background image

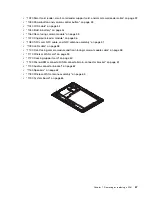
• Do not close the connector flips before inserting the NFC cable.

• When installing the cable and the antenna assembly, ensure that the connectors are attached firmly.

8

1090 LED cable

Before you start, do the following:

1. Follow the instructions in “Before servicing the tablet” on page 46.

2. For access, remove the back cover assembly. See “1010 Back cover assembly” on page 48.

3. Remove the connector of the built-in battery from the system board. See step 1 in “1050 Built-in

battery” on page 54.

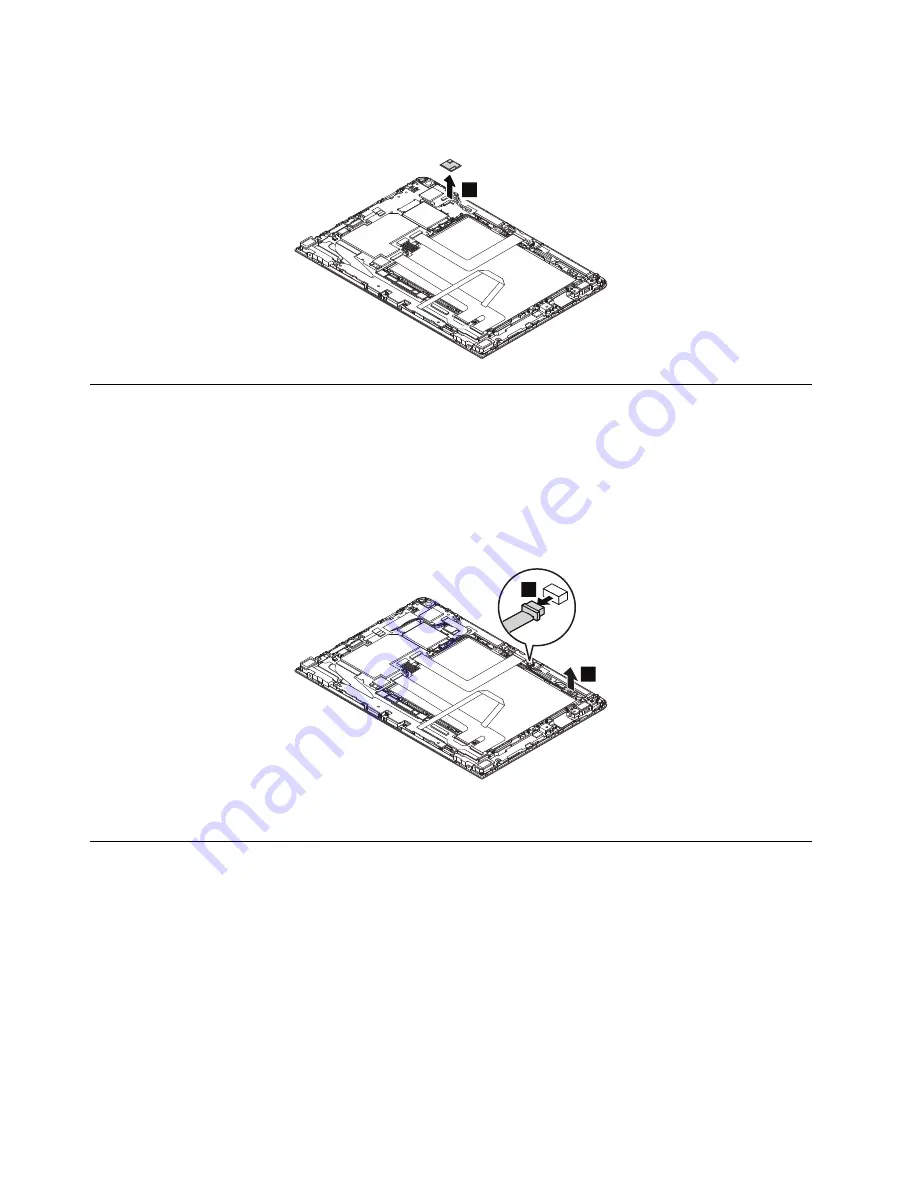
Removal steps of the LED cable

2

1

When installing

: Ensure that the connector is attached firmly.

1100 Front-facing camera module and front-facing-camera-module cable

Before you start, do the following:

1. Follow the instructions in “Before servicing the tablet” on page 46.

2. For access, remove the back cover assembly. See “1010 Back cover assembly” on page 48.

3. Remove the connector of the built-in battery from the system board. See step 1 in “1050 Built-in

battery” on page 54.

58

ThinkPad 10 Hardware Maintenance Manual

Summary of Contents for 20E3

Page 1: ...ThinkPad 10 Hardware Maintenance Manual Machine Types 20E3 and 20E4 ...

Page 2: ...g your computer 31 Using advanced startup options 32 Recovering your operating system if the Windows 10 operating system fails to start 32 Creating and using a recovery USB drive 32 Lenovo factory recovery USB key 33 Using passwords 33 Symptom to FRU index 34 Numeric error codes 35 Intermittent problems 35 Undetermined problems 35 Chapter 5 Locations 37 Locating tablet controls connectors and indi...

Page 3: ...Appendix A Notices 69 Electronic emission notices 70 Trademarks 70 Appendix B Abbreviation and acronym table 71 ii ThinkPad 10 Hardware Maintenance Manual ...

Page 4: ...ual is intended only for trained service technicians who are familiar with ThinkPad products Use this manual along with the advanced diagnostic tests to troubleshoot problems effectively Before servicing a ThinkPad product be sure to read all the information under Chapter 1 Safety information on page 1 and Chapter 2 Important service information on page 19 Copyright Lenovo iii ...

Page 5: ...s the equipment unsafe Before you start the machine make sure that other service technicians and the customer s personnel are not in a hazardous position Place removed covers and other parts in a safe place away from all personnel while you are servicing the machine Keep your toolcase away from walk areas so that other people will not trip over it Do not wear loose clothing that can be trapped in ...

Page 6: ...ly when there is a complete circuit By observing the above rule you may prevent a current from passing through your body When using testers set the controls correctly and use the approved probe leads and accessories for that tester Stand on suitable rubber mats obtained locally if necessary to insulate you from grounds such as metal floor strips and machine frames Observe the special safety precau...

Page 7: ...tablet on page 46 4 Disconnect the power cord 5 Check the power cord for the following a Make sure that a third wire ground connector is in good condition Use a meter to measure the third wire ground continuity and make sure that the continuity between the external ground pin and the frame ground is 0 1 ohm or less b The power cord is the type specified in the parts list c Insulation is not frayed...

Page 8: ...equirement Note The use of a grounding system to guard against ESD damage is desirable but not necessary Attach the ESD ground clip to any frame ground ground braid or green wire ground When working on a double insulated or battery operated system use an ESD common ground or reference point You can use coax or connector outside shells on these systems Use the round ground prong of the ac plug on a...

Page 9: ...DANGER DANGER DANGER DANGER DANGER Chapter 1 Safety information 5 ...

Page 10: ...DANGER 6 ThinkPad 10 Hardware Maintenance Manual ...

Page 11: ...does not correct the problem reinstall the original FRU before you continue Some tablets have both a processor board and a system board If you are instructed to replace either the processor board or the system board and replacing one of them does not correct the problem reinstall that board and then replace the other one If an adapter or a device consists of more than one FRU any of the FRUs may b...

Page 12: ...el is a unique configuration that has been negotiated between Lenovo and the customer A unique machine type and model MTM consists of a 4 character MT a 4 character model and a numeric 2 character country code is provided to the customer to place orders example 20AA000955 The country code assigned is numeric and does not designate a specific country or region The custom model factsheet for the MTM...

Page 13: ... list for a product do the following 1 Follow the instructions on the screen to select a product 2 Tap the Product Parts tab 3 Select System Service Parts to view a general FRU list Chapter 2 Important service information 21 ...

Page 14: ...t When you do return a FRU you must include the following information in the parts exchange form or parts return form that you attach to it 1 Name and phone number of service technician 2 Date of service 3 Date on which the machine failed 4 Date of purchase 5 Failing FRU name and part number 6 Machine type model number and serial number 7 Customer s name and address Note During the warranty period...

Page 15: ...bines diagnostic tests system information collection security status and support information along with hints and tips for maximum system performance To run the Lenovo Solution Center program do the following 1 Go to Control Panel 2 Tap System and Security Lenovo System Health and Diagnostics 3 Follow the instructions on the screen For more information about the Lenovo Solution Center program refe...

Page 16: ...on file Bootable diagnostic programs The bootable diagnostic programs enable you to test tablet memory and internal storage devices view system information and check and recover the internal storage devices To use the bootable diagnostic programs you can create a bootable diagnostic medium on a Universal Serial Bus USB device or CD To create a bootable diagnostic medium do the following 1 Tap Leno...

Page 17: ... notification area displays the percentage of the remaining battery power To check for detailed battery status information open the Lenovo Settings program and tap Power To check whether the battery charges properly during operation do the following 1 Ensure that the tablet failure is not caused by exhausted battery power 2 Reset the tablet by inserting a straightened paper clip into the emergency...

Page 18: ...Pin Voltage V dc 1 12 2 0 3 Ground 12V 1 3 2 3 If the voltage is not correct replace the ac power adapter 4 If the voltage is acceptable replace the system board Chapter 3 General checkout 27 ...

Page 19: ... refresh your tablet do the following 1 Swipe in from the right edge of the screen to display the charms 2 Tap Settings Change PC settings 3 In the navigation panel tap Update and recovery Recovery 4 In the Refresh your PC without affecting your files section tap Get started 5 Follow the instructions on the screen to refresh your tablet Resetting your tablet to the factory default settings If you ...

Page 20: ...overy environment starts automatically Then you can choose repair and recovery options by following the instructions on the screen Note Ensure that your tablet is connected to ac power during the recovery process Creating and using recovery media You can create a recovery USB drive as a backup for the Windows recovery programs With the recovery USB drive you can troubleshoot and fix the problems e...

Page 21: ...the recovery drive to the first place to select it as the boot device 4 Save configuration changes and restart the tablet 5 Follow the instructions on the screen to recover the tablet Windows recovery apps Windows 10 The Windows recovery apps enable you to reset your computer or use advanced startup options It is recommended that you create a recovery USB drive as early as possible Store the recov...

Page 22: ...owing the instructions on the screen Note Ensure that your tablet is connected to ac power during the recovery process Creating and using a recovery USB drive You can create a recovery USB drive as a backup for the Windows recovery apps With the recovery USB drive you can troubleshoot and fix the problems even if the preinstalled Windows recovery apps are damaged Creating a recovery USB drive The ...

Page 23: ...tartup On the Boot submenu drag USB CD DVD or USB HDD to the top to make it the first startup device 4 Tap Save and then tap Yes to save your configuration 5 Tap Restart and follow the on screen instructions to restart the tablet After the tablet restarts the recovery program runs automatically 6 Follow the on screen instructions to reset your tablet to the factory default settings Using passwords...

Page 24: ...must take your tablet to a Lenovo reseller or a Lenovo marketing representative to have the system board replaced Proof of purchase is required and a fee will be charged for parts and service 8 Tap OK to save the change The next time you open the ThinkPad Tablet Setup program you will be prompted to type your password to proceed Symptom to FRU index This section contains following information Nume...

Page 25: ... the tablet and charge the battery 2200 Machine Type and Serial Number are invalid Machine Type and Serial Number are invalid Have the tablet serviced 2201 Machine UUID is invalid Machine UUID is invalid Have the tablet serviced 2301 Built in Battery needs to recharge Recharge the built in battery Intermittent problems Intermittent system hang problems can be due to a variety of causes that have n...

Page 26: ...nd other external devices d Battery e External diskette drive or optical drive f PC cards 4 Turn on the computer 5 Determine whether the problem has been solved 6 If the problem does not recur reconnect the removed devices one at a time until you find the failing FRU 7 If the problem remains replace the following FRUs one at a time do not replace a non defective FRU a System board b LCD assembly 3...

Page 27: ...t view and side view 1 11 1 2 3 4 6 7 8 9 10 5 12 1 Microphones 2 Front camera 3 Camera status indicator 4 Audio connector 5 Volume control buttons 6 Micro SD card reader 7 Micro SIM card tray 8 Micro HDMI connector 9 USB 3 0 connector with cover 10 Power connector 11 Windows Start control 12 Security lock slot Available on some models Copyright Lenovo 37 ...

Page 28: ...is your responsibility For optional service CRUs you can either install the CRU yourself or you can request that a Service Provider install the CRU according to the warranty service for your prod uct If you intend on installing the CRU Lenovo will ship the CRU to you CRU information and replacement instructions are shipped with your product and are available from Lenovo at any time upon request Yo...

Page 29: ...lowing types of CRUs Self service CRUs Examples of these types of CRUs include the ac power adapter and power cord Major FRUs 1 2 7 6 4 5 9 10 11 12 15 1 2 3 4 8 9 10 14 20 25 24 25 25 16 17 15 18 19 21 23 22 13 Chapter 5 Locations 39 ...

Page 30: ...er assembly No No 17 LCD cable No No 18 Smart card reader cable No No 19 Smart card reader support card No No 20 Smart card reader No No 21 Docking support card No No 22 Built in battery No No 23 Front facing camera module cable No No 24 Micro HDMI connector USB connector dc in connector bracket No No 25 Wireless WAN antenna assembly No No Miscellaneous kits and other parts Table 3 Miscellaneous k...

Page 31: ...r parts continued Descriptions Self service CRU Optional service CRU ThinkPad 10 Gen 2 Ultrabook Keyboard Yes No ThinkPad 10 Quickshot Cover Yes No Pen holder Yes No Available on some models Chapter 5 Locations 41 ...

Page 32: ...ed to return the defective part that is replaced by the CRU When return is required 1 return instructions a prepaid shipping label and a container will be included with the replacement CRU and 2 you might be charged for the replacement CRU if Lenovo does not receive the defective CRU within thirty 30 days of your receipt of the replacement CRU See your Lenovo Limited Warranty documentation for ful...

Page 33: ...to use new screws for replacements If you have a torque screwdriver tighten all screws firmly to the torque specified in the screw information table for each step Ensure that torque screwdrivers are calibrated correctly following country specifications 44 ThinkPad 10 Hardware Maintenance Manual ...

Page 34: ...to service any tablet unless you have been trained and certified An untrained person runs the risk of damaging parts 2 Before replacing any FRU review Chapter 6 FRU replacement notices on page 43 3 Begin by removing any FRUs that have to be removed before replacing the failing FRU Any such FRUs are listed at the beginning of in each FRU replacement section Remove them in the order in which they ar...

Page 35: ...s 3 Tap Config Power to display the Power menu items 4 Tap Enter next to the Disable Built in Battery item 5 A confirmation message is displayed Tap Yes to disable the built in battery and to turn off the tablet Wait three to five minutes to let the tablet cool Removing the micro SIM card and the micro SIM card tray If the tablet you are servicing has a micro Subscriber Identity Module card micro ...

Page 36: ...1 2 Removing the micro SD card If the tablet you are servicing has a micro SD card installed remove the micro SD card before servicing 1 2 Chapter 7 Removing or replacing a FRU 47 ...

Page 37: ...u start follow the instructions in Before servicing the tablet on page 46 Note The tablet you are servicing might look slightly different from the following illustrations 1 1 Step Screw quantity Color Torque 1 M1 6 4 mm flat head nylon coated 2 Silver 0 098 Nm 1 00 kgf cm Attention Do not insert the hook releasing tool into the hook hole area of the USB door Otherwise the hook will be deformed 48 ...

Page 38: ...2 3 4 5 6 2 7 8 Chapter 7 Removing or replacing a FRU 49 ...

Page 39: ...ing does not have the smart card reader cable skip step 10 and step 11 Do not close the connector flip before inserting the cable When installing the cable ensure that the connector is attached firmly 50 ThinkPad 10 Hardware Maintenance Manual ...

Page 40: ...If the Federal Communications Commission FCC label is attached to a part that is replaced return the old part with the label attached to the customer or provide a letter to the customer stating what the label was originally on the tablet and what the label part number serial number and product key were For models with the smart card reader 2 3 4 5 6 7 8 9 1 10 11 14 12 13 For models without the sm...

Page 41: ...eader cable are only available on some models Before you start do the following 1 Follow the instructions in Before servicing the tablet on page 46 2 For access remove the back cover assembly See 1010 Back cover assembly on page 48 Removal steps of the smart card reader smart card reader support card and smart card reader cable 2 2 2 2 3 1 Step Screw quantity Color Torque 2 M1 6 2 0 mm flat head n...

Page 42: ...lat head nylon coated 1 Silver 0 098 Nm 1 00 kgf cm 1030 Power button and volume control button Before you start do the following 1 Follow the instructions in Before servicing the tablet on page 46 2 For access remove the back cover assembly See 1010 Back cover assembly on page 48 Removal step of the power button Removal step of the volume control button Chapter 7 Removing or replacing a FRU 53 ...

Page 43: ...step 1 in 1050 Built in battery on page 54 Removal steps of the LCD cable 1 1 1 2 4 3 Notes Do not close the connector flips before inserting the cable When installing the cable ensure that the connectors are attached firmly 1050 Built in battery Before you start do the following 1 Follow the instructions in Before servicing the tablet on page 46 2 For access remove the back cover assembly See 101...

Page 44: ...w quantity Color Torque 6 M1 6 2 0 mm flat head nylon coated 3 Black 0 098 Nm 1 00 kgf cm 1060 Rear facing camera module Before you start do the following 1 Follow the instructions in Before servicing the tablet on page 46 2 For access remove the back cover assembly See 1010 Back cover assembly on page 48 3 Remove the connector of the built in battery from the system board See step 1 in 1050 Built...

Page 45: ...s only available on some models Before you start do the following 1 Follow the instructions in Before servicing the tablet on page 46 2 For access remove the back cover assembly See 1010 Back cover assembly on page 48 3 Remove the connector of the built in battery from the system board See step 1 in 1050 Built in battery on page 54 56 ThinkPad 10 Hardware Maintenance Manual ...

Page 46: ... and NFC antenna assembly are only available on some models Before you start do the following 1 Follow the instructions in Before servicing the tablet on page 46 2 For access remove the back cover assembly See 1010 Back cover assembly on page 48 3 Remove the connector of the built in battery from the system board See step 1 in 1050 Built in battery on page 54 Removal steps of the NFC card NFC cabl...

Page 47: ... built in battery from the system board See step 1 in 1050 Built in battery on page 54 Removal steps of the LED cable 2 1 When installing Ensure that the connector is attached firmly 1100 Front facing camera module and front facing camera module cable Before you start do the following 1 Follow the instructions in Before servicing the tablet on page 46 2 For access remove the back cover assembly Se...

Page 48: ...ide area network WAN card is only available on some models Before you start do the following 1 Follow the instructions in Before servicing the tablet on page 46 2 For access remove the back cover assembly See 1010 Back cover assembly on page 48 3 Remove the connector of the built in battery from the system board See step 1 in 1050 Built in battery on page 54 Removal steps of the wireless WAN card ...

Page 49: ...at head nylon coated 1 Silver 0 098 Nm 1 00 kgf cm 3 1120 Docking support card Before you start do the following 1 Follow the instructions in Before servicing the tablet on page 46 2 For access remove the back cover assembly See 1010 Back cover assembly on page 48 3 Remove the connector of the built in battery from the system board See step 1 in 1050 Built in battery on page 54 60 ThinkPad 10 Hard...

Page 50: ...ector bracket Before you start do the following 1 Follow the instructions in Before servicing the tablet on page 46 2 For access remove the back cover assembly See 1010 Back cover assembly on page 48 3 Remove the connector of the built in battery from the system board See step 1 in 1050 Built in battery on page 54 Removal steps of the micro HDMI connector USB connector dc in connector bracket 1 1 ...

Page 51: ...e 46 2 For access remove the back cover assembly See 1010 Back cover assembly on page 48 Removal steps of the audio connector bracket 1 1 Step Screw quantity Color Torque 1 M1 6 3 5 mm flat head nylon coated 2 Black 0 098 Nm 1 00 kgf cm 2 1160 Speakers Before you start do the following 62 ThinkPad 10 Hardware Maintenance Manual ...

Page 52: ...ess WAN antenna assembly The wireless WAN antenna assembly is only available on some models Before you start do the following 1 Follow the instructions in Before servicing the tablet on page 46 2 For access remove the following FRUs 1010 Back cover assembly on page 48 1050 Built in battery on page 54 1080 NFC card NFC cable and NFC antenna assembly on page 57 Removal steps of the wireless WAN ante...

Page 53: ...are attached firmly Ensure that the cables are not twisted and not subject to any tension Tension could cause the cables to be damaged by the cable guides or a wire to be broken Ensure that the sponges do not tilt 64 ThinkPad 10 Hardware Maintenance Manual ...

Page 54: ...n page 54 1070 Fingerprint reader module on page 56 1110 Wireless WAN card on page 59 1080 NFC card NFC cable and NFC antenna assembly on page 57 1130 Micro HDMI connector USB connector dc in connector bracket on page 61 1150 Audio connector bracket on page 62 Removal steps of the system board 1 1 2 3 4 5 6 7 7 7 7 When installing Ensure that the connectors are attached firmly Chapter 7 Removing o...

Page 55: ...wnload the tool and the instruction do the following Note Service account and password are required for downloading the tool and the instruction 1 Locate the sensor calibration tool then you can download the tool or the instruction by selecting the corresponding file name Reset the NVRAM Non Volatile Random Access Memory To download the tool and the instruction do the following Note Service accoun...

Page 56: ... 1080 NFC card NFC cable and NFC antenna assembly on page 57 1090 LED cable on page 58 1100 Front facing camera module and front facing camera module cable on page 58 1110 Wireless WAN card on page 59 1120 Docking support card on page 60 1130 Micro HDMI connector USB connector dc in connector bracket on page 61 1150 Audio connector bracket on page 62 1160 Speakers on page 62 1180 Wireless WAN ante...

Page 57: ...f the publication Lenovo may make improvements and or changes in the products and or the programs described in this publication at any time without notice The products described in this document are not intended for use in implantation or other life support applications where malfunction may result in injury or death to persons The information contained in this document does not affect or change L...

Page 58: ...kPad logo ThinkPad Microsoft and Windows are trademarks of the Microsoft group of companies Ultrabook is a trademark of Intel Corporation in the U S and or other countries The terms HDMI and HDMI High Definition Multimedia Interface are trademarks or registered trademarks of HDMI Licensing LLC in the United States and other countries Other company product or service names may be trademarks or serv...

Page 59: ... Engineering Change Announcements EEPROM Electrically Erasable Programmable Read Only Memory EFI Extensible Firmware Interface EPO emergency power off ESD electrostatic discharge EU European Union FCC Federal Communications Commission FRU Field Replaceable Unit GAV General Announce Variant GPU graphics processing unit HDD hard disk drive HDMI high definition multimedia interface ICs integrated cir...

Page 60: ...anced Technology Attachment SIM subscriber identity module SVP supervisor password TFTs thin film transistors UEFI Unified Extensible Firmware Interface USB Universal Serial Bus UUID universally unique identifier VGA video graphics array VRAM video random access memory 72 ThinkPad 10 Hardware Maintenance Manual Check out the collection of computers hardware we offer ...

Reviews: