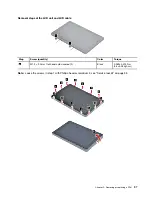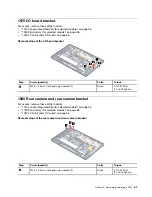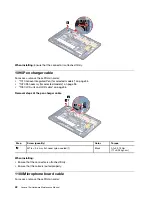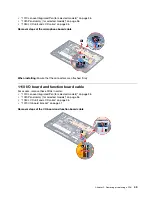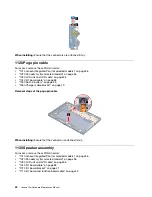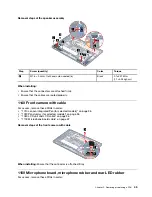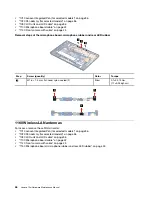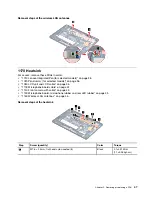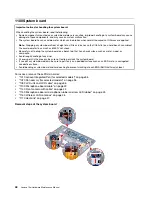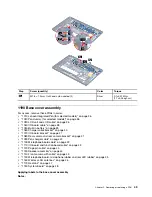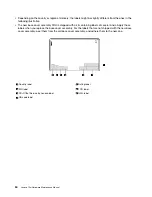
Removal steps of the LCD unit and LCD cable
Step
Screw (quantity)
Color
Torque
1
M1.2 × 2.0 mm, flat-head, nylon-coated (2)
Black
0.039±0.015 Nm
(0.4±0.05 kgf-cm)
Note:
Loose the screws in step 1 with Phillips-head screwdriver 2, see “Service tool kit” on page 33.
37
Summary of Contents for 10w
Page 1: ...Lenovo 10w Hardware Maintenance Manual ...
Page 4: ...ii Lenovo 10w Hardware Maintenance Manual ...
Page 6: ...iv Lenovo 10w Hardware Maintenance Manual ...
Page 11: ...DANGER DANGER DANGER DANGER DANGER DANGER Chapter 1 Safety information 5 ...
Page 12: ...DANGER 6 Lenovo 10w Hardware Maintenance Manual ...
Page 13: ...PERIGO Chapter 1 Safety information 7 ...
Page 14: ...PERIGO PERIGO PERIGO PERIGO 8 Lenovo 10w Hardware Maintenance Manual ...
Page 15: ...PERIGO PERIGO PERIGO DANGER DANGER Chapter 1 Safety information 9 ...
Page 16: ...DANGER DANGER DANGER DANGER DANGER 10 Lenovo 10w Hardware Maintenance Manual ...
Page 17: ...DANGER VORSICHT VORSICHT VORSICHT VORSICHT Chapter 1 Safety information 11 ...
Page 18: ...VORSICHT VORSICHT VORSICHT VORSICHT 12 Lenovo 10w Hardware Maintenance Manual ...
Page 19: ...Chapter 1 Safety information 13 ...
Page 20: ...14 Lenovo 10w Hardware Maintenance Manual ...
Page 21: ...Chapter 1 Safety information 15 ...
Page 22: ...16 Lenovo 10w Hardware Maintenance Manual ...
Page 23: ...Chapter 1 Safety information 17 ...
Page 24: ...18 Lenovo 10w Hardware Maintenance Manual ...
Page 25: ...Chapter 1 Safety information 19 ...
Page 26: ...20 Lenovo 10w Hardware Maintenance Manual ...
Page 30: ...24 Lenovo 10w Hardware Maintenance Manual ...
Page 35: ...Major FRUs and CRUs Chapter 3 Locations 29 ...
Page 38: ...32 Lenovo 10w Hardware Maintenance Manual ...
Page 60: ...54 Lenovo 10w Hardware Maintenance Manual ...
Page 61: ......
Page 62: ...Part Number XXXX Printed in China 1P P N XXXX 1PXXXX ...

