Chapter 3. Create and use a USB repair shim
This chapter contains the following topics:
“What is a USB repair shim?” on page 25
“Create a USB repair shim” on page 25
“Use the USB repair shim” on page 26
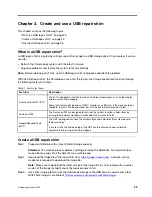
What is a USB repair shim?
A USB repair shim is created by writing a repair shim image to a USB storage drive. Once created, it can be
used to:
• Refresh the Chromebook system with the latest firmware.
• Diagnose problems and restore the system to factory settings.
Note:
Before replacing any FRUs, use the USB repair shim to diagnose and identify problems.
With the USB repair shim, the Chromebook can enter the factory-test-image environment and run through
the following factory test items.
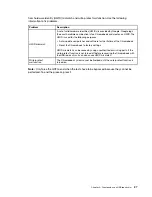
Table 1. Factory test items
Test item
Description
Final Functional Test (FFT)
The FFT is designed to test the function of individual component, such as the display,
audio, camera, and keyboard.
Some test items might require an HDMI
™
monitor or an SD card. If the devices are not
available, the tests can be bypassed, but with the overall test marked as failed.
RunIn and FAT
The RunIn and FAT are designed to test how the system functions under stress by
running the maximum workload. It takes about 10 minutes to finish.
Google Required Tests
(GRT)
The GRT is designed to check the system status and help reset the system back to
factory settings.
If any test fails, the finalized step of the GRT has to be forced to end in order to
complete the servicing of the Chromebook.
Create a USB repair shim
Step 1. Prepare a USB drive with at least 8 GB of storage capacity.
Attention:
The creation process deletes anything stored on the USB drive. To avoid data loss,
make a backup copy of all the data that you want to keep.
Step 2. Download the image file of the repair shim from
. A Lenovo service
credential is required to download the image file.
Note:
Make sure to download the latest version of the image file. A shim created with an earlier
version of the image file might cause the repair process to fail.
Step 3. Use a disk imaging tool to write the downloaded image to the USB drive. An open-source tool
Win32 Disk Imager is available at
http://sourceforge.net/projects/win32diskimager
.
© Copyright Lenovo 2020
25
Summary of Contents for 10e Chromebook
Page 1: ...Lenovo 10e Chromebook Tablet Hardware Maintenance Manual ...
Page 4: ...ii Lenovo 10e Chromebook Tablet Hardware Maintenance Manual ...
Page 6: ...iv Lenovo 10e Chromebook Tablet Hardware Maintenance Manual ...
Page 11: ...DANGER DANGER DANGER DANGER DANGER DANGER Chapter 1 Safety information 5 ...
Page 12: ...DANGER 6 Lenovo 10e Chromebook Tablet Hardware Maintenance Manual ...
Page 13: ...PERIGO Chapter 1 Safety information 7 ...
Page 14: ...PERIGO PERIGO PERIGO PERIGO 8 Lenovo 10e Chromebook Tablet Hardware Maintenance Manual ...
Page 15: ...PERIGO PERIGO PERIGO DANGER DANGER Chapter 1 Safety information 9 ...
Page 17: ...DANGER VORSICHT VORSICHT VORSICHT VORSICHT Chapter 1 Safety information 11 ...
Page 19: ...Chapter 1 Safety information 13 ...
Page 20: ...14 Lenovo 10e Chromebook Tablet Hardware Maintenance Manual ...
Page 21: ...Chapter 1 Safety information 15 ...
Page 22: ...16 Lenovo 10e Chromebook Tablet Hardware Maintenance Manual ...
Page 23: ...Chapter 1 Safety information 17 ...
Page 24: ...18 Lenovo 10e Chromebook Tablet Hardware Maintenance Manual ...
Page 25: ...Chapter 1 Safety information 19 ...
Page 26: ...20 Lenovo 10e Chromebook Tablet Hardware Maintenance Manual ...
Page 30: ...24 Lenovo 10e Chromebook Tablet Hardware Maintenance Manual ...
Page 34: ...28 Lenovo 10e Chromebook Tablet Hardware Maintenance Manual ...
Page 38: ...32 Lenovo 10e Chromebook Tablet Hardware Maintenance Manual ...
Page 41: ...Chapter 5 Removing or replacing a FRU 35 ...
Page 50: ...44 Lenovo 10e Chromebook Tablet Hardware Maintenance Manual ...
Page 56: ...50 Lenovo 10e Chromebook Tablet Hardware Maintenance Manual ...
Page 59: ......
Page 60: ...Part Number SP40G76889 Printed in China 1P P N SP40G76889 ...
Page 61: ... 1PSP40G76889 ...


