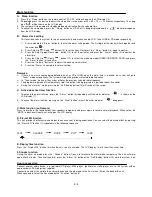
The clock setting mode will automatically quit if no button is being pressed in a period of about 5 seconds after
pressing the “ Mem/Clk-Adj ” button.
The preset time will be reset completely if the unit is being disconnected from the main power supply. You are
recommended to switch the system into standby mode for convenience usage.
Listening to the radio
Manual tuning
1. Switch on the unit by pressing the On/Standby button (10), then press the function button (5) to select “ Tuner ” mode.
2. Tune to the required station by pressing the Tuning Up or Down button (19).
3. Press the Volume knob (4) to the desired volume level.
Auto tuning
1. Press Function button (10) to select “ Tuner ” mode.
2. Press and hold the Tuning Up or Down button (19) for 1-2 seconds and then release.
3. The unit will start seeking automatically and stops when a radio station is found.
4. Repeat step 2 & 3 until the desired radio station is being reached.
5. Preset the Volume button (4) to the desired volume level.
Preset stations
You can store up to 20 radio stations in the memory
Swich to tuner mode.
1. Go to the desired radio station by “ Manual ” or “ Auto ” tuning.
2. Press and hold the Mem/Clk-Adj ” button (16) until the “ MEM ” indicator and preset station number are flashing on the LCD
display (3)
3. Press the “ Folder / Pre-up
“ button (21) to select the desired memory position to store this radio station.
4. Press “ Mem/Clk-Adj ” button (16) again to confirm the setting.
5. Repeat step 1 to 4 to store other radio stations.
6. Now you can select the presets stations by pressing the “ Folder/Pre–up
” button (21)
The preset station memories will be erased completely if the unit is being disconnected from the main power supply. You
are recommended to switch the system into standby mode for convenience usage.
When you don’t push a button within 5 seconds, the unit will resume to normal tuner mode automatically.
You can overwrite a present station by storing another frequency in its place.
FM-Stereo reception
Press the “ St/Mo ” button (17) to switch from Stereo to Mono. In particular when stereo signals are weak, it is preferable to
receive the program in mono for better quality.
If a stereo signal is being received, the stereo indicator “
” will appear on the LCD display (3).
Hints for best reception:
-
-
FM: the receiver has a build-in FM wire antenna (25) hanging at the rear cabinet. This wire should be totally unraveled and
extended for the best reception.
-
Playing Compact Disc
Getting started
1. Press Function button (5) to select “ CD ” mode.
2. Press CD Tray Open/Close button (20) to open the CD tray.
3. Place a CD with the printed side facing up inside the tray & then close the CD tray by press the CD Tray Open/Close
button(20) again.
4. The LCD display (3) will show the total number of tracks & total playing time. Then, the unit will start to play the CD
automatically.
5. Press the Volume knob (4) to the desired volume level.
Play / Pause mode
1. To pause playback, press the “ Play/Pause
” button (18) once. “PAUZE” will flash in the LCD display (3). Press again to
resume normal playback.
Stop mode
1. If the “ Stop
” button (17) is pressed during play or pause mode, the CD will stop playing.
Skip mode (skip up
/ skip down
)
1. If the “ skip up
” button (19) is pressed during the play or pause mode, the unit will skip to the next track and continue
to play this track. The pause mode will be reverted to play mode.
2. If the “ skip down
” button (19) is pressed during play or pause mode, the unit will skip to the previous track and
continue to play this track. The pause mode will be reverted to play mode.
E-2


