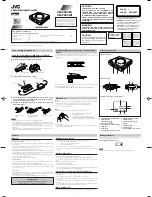
CVBS+S-Video
CVBS+YUV
CVBS+RGB
YUV P-SCAN
12
Advanced Features
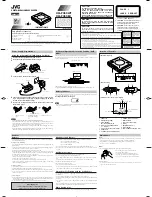
1. General Steps of the setup menu
A) Press the STOP button when playing a disc, then you press the setup button,
the main setup menu appears.
A) Press the STOP button when playing a disc, then you press the setup button,
the main setup menu appears.
B) Press the Down and Right arrow buttons to highlight the icon of the desired
page, then press the Down or Right arrow button to activate that page. For
example, if you want to setup the screen setup page, press the arrow button
Down to highlight the screen setup icon, the screen setup page will be
d isplayed o n t he s creen.
C) Press the Down arrow button to highlight the desired option. Press the Enter
button or press the Right arrow button to select. The sub-menu of that option
will appear on the right. For example, press the Down arrow button to highlight
the Video Output option, then press Enter to select, the brightness sub-menu
will appear on the right.
A)Press the Arrow buttons to highlight the Exit Setup option, then press
Enter or Setup again to exit Setup Menu
.
A)Press the Arrow buttons to highlight the Exit Setup option, then press
Enter or Setup again to exit Setup Menu
.
Note:
Make sure the player is in stop mode.
Note:
Make sure the player is in stop mode.
Summary of Contents for DVD-320
Page 1: ...DVD 320 ...
Page 3: ...2 AVIS RISQUE CHOC ELECTRIQUE NE PAS OUVRIR ...
Page 4: ...3 ...
Page 5: ...4 ...
Page 6: ...5 5 ...