background image

Exploring the device 

In the user manual, every feature or action always includes the number of the button 
or  part  that  is  used,  so  that  you  can  easily  recognize  the  buttons  or  parts  that  are 
needed. 

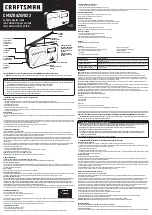
Top view 


1. 

Snooze

, Dimmer button, when the alarm sounds, press this button to snooze the 

alarm for 9 minutes. When listening to the radio or music, this button can be used 
to set the sleep timer. The device will automatically turn off when the set time has 
elapsed. If the device is turned off, press this button to set the display brightness. 

Front view 


2. 

FM LED

, when the radio is receiving an FM station, this LED will be lit. 

Summary of Contents for CR-3306 BT

Page 1: ...CR 3306 BT FM Radio with Bluetooth User manual www lenco com 20121112 v1 0 ...

Page 2: ...device 9 Adjust the speaker volume 9 Select the input source 9 Setting the alarm clock 9 Snooze interrupt the alarm 10 Disable the alarm for 24 hours 10 Disable the alarm 10 Radio mode 10 Turning the radio on 10 Finding a station frequency 10 Storing preset stations 11 Recalling a preset station 11 Playback from a Bluetooth device 11 Basic Operation during playback from a Bluetooth device 11 Other...

Page 3: ...built in USB charger 12 Maintenance of the device 13 Troubleshooting 13 Specification 13 Safety instructions 14 Declaration of Conformity 15 Do not distribute copyrighted material 16 Disclaimer 16 End of life 17 Service and support 18 ...

Page 4: ...is device Note This user manual was written during the development of the product based on the factory settings If the product would need improvement priority is given to the product and therefore in these cases the quick start guide user manual illustrations in the user manual and or packaging may differ from the actual product Lenco is not liable for any printing errors in this user manual What ...

Page 5: ... Snooze Dimmer button when the alarm sounds press this button to snooze the alarm for 9 minutes When listening to the radio or music this button can be used to set the sleep timer The device will automatically turn off when the set time has elapsed If the device is turned off press this button to set the display brightness Front view 2 FM LED when the radio is receiving an FM station this LED will...

Page 6: ...volume 9 Volume button press this button to decrease the volume 10 Next button press this button to skip to the next track 11 Play Pause Pair button press this button to start pause playback or to search for a Bluetooth device 12 Previous button press this button to skip to the previous track 13 Power Source button press this button to turn the device on off or to chance the input source Rear view...

Page 7: ...n top of it as pressure will damage or break the product Prevent insertion of objects into the ventilation slots or openings in the cabinet at all time Always read the safety instructions carefully before use Lenco is not responsible for damages and or consequential damage caused by improper use or malfunction of the device Lenco is not responsible for the loss of data during data transfer or or t...

Page 8: ... the screen for setting the minutes 5 Use the previous next buttons 10 12 to set the minutes Once the minutes are set confirm the setting by pressing the time set button 17 The device will now return to the Standby mode and the set time is shown on the display Pair Play connecting a Bluetooth device Pair Play allows you to connect a Bluetooth device with a simple press on the button and it allows ...

Page 9: ...ows Important note If both alarms are set within 60 minutes of each other the first alarm will automatically be disabled when the second alarm is scheduled to start The alarm that is disabled will sound again at the set time on the next day Note in the instructions below alarm 1 is set as an example Alarm 2 can be set by following the same procedure 1 Make sure the device is in standby mode 2 Pres...

Page 10: ...e has an FM radio with a wire antenna for receiving radio signals If you want to listen to the radio first fully extend the wire antenna If the signal is weak adjust the position of the antenna to find the best reception Contact your local service provider for a frequency list of the radio stations that can be received in your area Turning the radio on Press the Power button 13 to turn the device ...

Page 11: ...ice Depending on the external Bluetooth device the following functions might not work not work correctly or work differently than described Pause playback press the play pause button 11 during playback to pause playback Press the play pause button 11 again to resume playback Skip to next track press the next button 10 during playback to skip to the next track Skip to previous track press the previ...

Page 12: ...r from the power outlet for 5 minutes Connections Connecting a device through the AUX input Every device with an AUX output or headphones output can be connected to the AUX input When the external device is connected through the AUX input the volume can only be controlled through the radio Everything else can only be controlled on the external device To playback sound through the AUX input the rad...

Page 13: ... extend the wire antenna Move the wire antenna Bluetooth music stutters Place the Bluetooth device closer to the radio Specification Power Supply 1 5 m power adapter Input AC 100V 50 60Hz Output DC 5V 1500 mA Power Consumption Standby 0 7W Operation 5W Operating Temperature 10 35ºC Humidity 5 90 Output Output speakers max 4W RMS Frequency response 1 5dB 20Hz 20kHz THD noise 60dB 1kHz Tuner FM Band...

Page 14: ...ension cables are not over overloaded Overloading can cause short circuits or fire Always pull the plug when removing it from the power outlet Do not pull the power cord This may cause a short circuit If you notice smoke an excessive build up of heat or any other unexpected phenomena you should disconnect the plug from the power outlet immediately Disconnect the plug from the power outlet during l...

Page 15: ...he device or the supplied accessories in your ears mouth or other body orifices This device and or accessories contain small parts that may lead to a choking hazard Therefore keep it away from children When connecting the device if a connector does not seem to fit do not force it Be careful when using this device when participating in traffic the sound might distract your attention Lenco recommend...

Page 16: ... BUT NOT LIMITED TO WARRANTIES OF MERCHANTABILITY OR FITNESS FOR A PARTICULAR PURPOSE LENCO DOES NOT GUARANTEE THE ACCURACY VALIDITY TIMELINESS LEGALITY OR COMPLETENESS OF ANY CONTENT OR SERVICE MADE AVAILABLE THROUGH THIS DEVICE UNDER NO CIRCUMSTANCES INCLUDING NEGLIGENCE SHALL LENCO BE LIABLE NEITHER IN CONTRACT NOR TORT FOR ANY DIRECT INDIRECT INCIDENTAL SPECIAL OR CONSEQUENTIAL DAMAGES ATTORNE...

Page 17: ...ccordance to any applicable local laws of requirement for disposal of electrical equipment or batteries In so doing you will help to conserve natural resources and improve standards of environmental protection in treatment and disposal of electrical waste Waste Electrical and Electronic Equipment Directive When you see a crossed out wheeled waste container on the product It means that the product ...

Page 18: ... Friday from 9 AM till 6 PM Lenco offers service and warranty in accordance to European law which means that in case of repair both during and after the warranty period you should contact your local dealer Please note It is not possible to send repairs to Lenco directly Important note If the unit is opened by a non official service center the warranty expires This device is not suitable for profes...

Page 19: ... B V is not responsible for any printing errors in this manual Products of other manufacturers are only mentioned for information This does not mean that these products are recommended by STL Group B V STL Group B V accepts no liability for the reliability or compatibility of these products ...

Reviews: