background image

 
3.


Started and setup   

MSY2 is easy to use by the below 3 steps: 
a.


Place the MSY2 on a suitable shelf or table; 

b.


Extend the telescopic antenna; 

c.


Connect the power adapter between MSY2 and the mains supply and press the 
Power/Volume dial to turn the device on. 

 
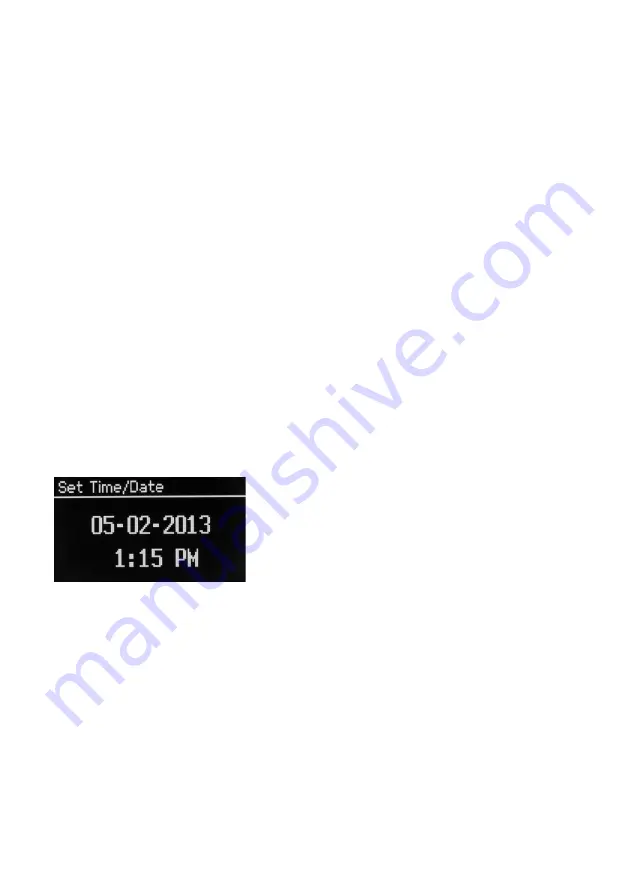
Set Time/Date (wizard) 
The time and date can be updated manually or automatically. With auto-update, the 
time and date are automatically synchronised with national time signals broadcast over 
DAB and FM (when available). 
The time menu contains the following options: 
- Set Time/Date 
- Auto update 
- Set 12/24 hour 
- Set date format 
- Clock style 


Auto-update   
Auto-update works with data sent over DAB, FM. The clock is   
only updated when in a corresponding mode, so it is best to select a mode you 
use regularly.     
 
DAB and FM use time signals broadcast with radio transmissions.   
Select Update from DAB, Update from FM, Update or No update. 
Note that if you are updating the time from DAB or FM, the Daylight savings option has 
no effect on the clock’s time.     
MSY2 will auto-update from the selected source when time information is available.   

Summary of Contents for MSY2

Page 1: ...MSY2 ALL IN ONE MUSIC SYSTEM ...

Page 2: ...1 Selecting stations 11 4 2 Now playing information 11 4 3 Settings 11 5 FM radio mode Optional 12 5 1 Selecting stations 12 5 2 Now playing information 12 6 Aux in mode 13 7 Bluetooth mode 13 8 My Music with USB playback 13 9 CD playback 14 10 Alarms and sleep 15 10 1 Alarms 15 10 2 Sleep 15 11 Factory reset 16 12 Troubleshooting and error messages 16 12 1 Error messages 16 12 2 Troubleshooting 1...

Page 3: ...lectric shock do not remove cover or back as there are no user serviceable parts inside Refer servicing to qualified personnel The exclamation point within an equilateral triangle is intended to alert the user to the presence of important operating and maintenance instructions in the literature accompanying the appliance Correct Disposal of this product This marking indicates that this product sho...

Page 4: ...tegral convenience receptacles Do not let objects or liquids enter the product Use proper power sources Plug the product into a proper power source as described in the operating instructions or as marked on the product Changing sources while a CD is playing causes the CD to stop playback Playback will resume when the source is set to CD again The sound quality of MP3 CD R CD RW and even commercial...

Page 5: ...th streaming music and control from Smart device USB port to play the MP3 music from USB stick storage device USB 5V 1A port for mobile charging Aux in for external MP3 music sources from iPod iPad or other MP3 players CD playback playback formats audio CD MP3 CD WMA CD CD R and CD RW MSY2 also provides the following features Infrared remote control Clock with auto update capability and dual indep...

Page 6: ... MENU press the MENU to show the MENU for the current mode Press again to show now playing screen 5 INFO Info button 6 Presets button 7 Multi function navigation dial Select Volume control Mute Snooze Power button 8 CD Bluetooth skip previous Tune button 9 Bluetooth mode is Bluetooth pairing CD mode is repeat 10 Press to select Play Pause under BT mode In FM mode press to do auto scans the station...

Page 7: ...ject button 15 CD slot 16 TFT color Display 2 2 Connectors As shown below has connectors from left to right for the following 2 3 Remote control In additional to duplicating most of buttons on top of the unit the remote control adds the following functions ...

Page 8: ...en Press up or down to select menu for settings 5 Press right or left to select mode In playing screen press right or left to select FM DAB or CD tracks 6 OK MUTE Long press the button to switch DAB normal playing screen image to full screen slide show image 7 SRC Source button 8 EQ Adjust the EQ setting 9 Repeat Shuffle play it is Repeat in CD USB playback it is Shuffle play in CD mode 10 Dim Adj...

Page 9: ...oadcast over DAB and FM when available The time menu contains the following options Set Time Date Auto update Set 12 24 hour Set date format Clock style Auto update Auto update works with data sent over DAB FM The clock is only updated when in a corresponding mode so it is best to select a mode you use regularly DAB and FM use time signals broadcast with radio transmissions Select Update from DAB ...

Page 10: ...the radio it will automatically start scanning This may take a few minutes previously selected station or fist station on the station list will automatically play 3 To change station press Tune button and use Navigation dial to choose a radio station press dial to select 4 Adjust volume using Power Volume dial turn anticlockwise to decrease and clockwise to increase volume If reception was not goo...

Page 11: ...on broadcast by the station giving real time information such as programme name track title and contact details Stereo broadcasts are indicated with an icon at the top of the screen To view further information press Info Each time you press Info another set of information is displayed cycling through DLS text programme type ensemble name frequency signal strength error rate bit rate codec channels...

Page 12: ...s You can scan up or down by pressing and holding the Tune buttons or tune manually with quick presses Presets to store an FM preset press and hold button Presets until the display shows the Save preset screen Select one of the 20 presets to save the currently playing station To select a preset press Presets briefly then select one of the listed Preset stations 5 2 Now playing information While an...

Page 13: ...Source and select Bluetooth mode This will power on the Bluetooth Turn the volume up about to start Also turn up the volume on the source device the device you are streaming from 2 Turn on the Bluetooth on your enabled device 3 Select Bluetooth device name LEMEGA MSY2 when it appears on your device s screen to initiate searching 4 You can start to play your music files wirelessly Adjust the volume...

Page 14: ...tically load the CD and start playback The display will say Loading Disc functions will not work while the disc is loading Playback will begin automatically once the table of contents is read The display will show No Disc when the unit is set to CD mode and there is no CD inside Insert the CD into the CD slot with the label side up The display shows the following information in CD mode CD mode Tim...

Page 15: ...ll down and select Save The screen shows active alarms with an icon at the bottom left At the set time the alarm will sound To temporarily silence it press Snooze You can change the snooze period with the Select control if you like The radio returns to standby for the set period with the silenced alarm icon flashing 10 2 Sleep To set the sleep timer select Sleep button then choose from Sleep OFF 1...

Page 16: ... Troubleshooting and error messages 12 1 Error messages Message Description Example Service not available DAB No DAB reception No USB device found Trying to access USB menu but no USB plugged in USB device unsupported Unsupported USB device plugged in USB error General USB problems USB read error Unable to read particular data from memory Bad memory sector found on USB device USB underpowered Powe...

Page 17: ...n local high strength stations only For DAB check local coverage at www ukdigitalradio com coverage DAB No stations available message Low signal strength As above then rescan stations CD playback does not start CD format is not compatible CD format is not compatible CD is damaged Insert a different CD into the CD slot CD is dirty Clean the CD ...

Page 18: ...ts are designed to provide reasonable protection against harmful interference in a residential installation This equipment generates uses and can radiate radio frequency energy and if not installed and used in accordance with the instructions may cause harmful interference to radio communications However there is no guarantee that interference will not occur in a particular installation If this eq...

Page 19: ...tions not expressly approved by the party responsible for compliance could void the user s authority to operate the equipment This device complies with Part 15 of the FCC Rules Operation is subject to the following two conditions 1 this device may not cause harmful interference and 2 this device must accept any interference received including interference that may cause undesired operation ...

Page 20: ......

Reviews: