


Tools need:
This machine is shipped complete in one carton.
Separate all parts from packing materials and check each
item with illustration and “bag of loosen parts”.
Note:
Make certain all items are accounted for, before discarding
any packing material.
Warning!
To avoid injury, if any parts are missing, do not attempt to
assemble the Belt and Disc sander, unplug in the power
cord, or turn the switch on until the missing parts are
obtained and installed correctly.
Warning!
For your own safety, never connect plug to power source
outlet, or switch on until all assembly steps are complete
and until you have read and understood the entire Owner’s
Manual.
ITEM
DESCRIPTION
QTY
A
B
C
D
E
F
G
H
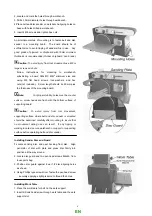
Belt & Disc Sander Assembly
Owner’s Manual
Table
Sanding Disc
Mount, Support Table
Table Support W/Scale
Work Table for Belt
Bag of Loosen Parts
Contain:
Hex ”L” Wrench 3mm
Hex ”L” Wrench 6mm
Sunk head screw M6x16
Pan head screw M6x16
Hex nut M6
External lock washer 6mm
Wing nut 6 mm
Flat washer 6 mm
1
1
1
1
2
2
1
1
1
1
2
4
4
8
2
2
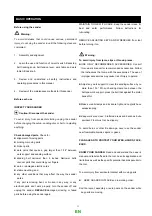
Mounting Belt and Disc Sander to Workbench
If belt and disc sander is to be used in a permanent location,
it should be fastened securely to a firm supporting surface
such as workbench.
If mounting to a workbench, holes should be drilled through
supporting surface of the workbench using dimensions
illustrated.
1.The unit should be bolted securely using M8 screws and
hex nuts (not included). Screw length should be 50mm
plus the thickness of bench top.
UNPACKING AND CHECK CONTENTS
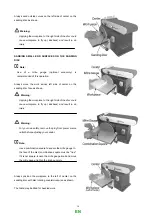
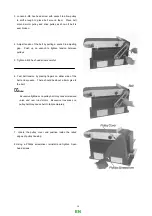
ASSEMBLY
5
EN
Summary of Contents for BDS610
Page 2: ......
Page 3: ...Manuel d utilisation MODELE PON250 FR...
Page 19: ...17 13 2 Vue clat e de la machine FR...
Page 22: ...Manual de instrucciones MODELO PON250 ES...
Page 41: ...20 14 DESPIECE ES...
Page 42: ...21 ES...
Page 67: ...Diagram 21 EN...
Page 68: ...Notes...
Page 69: ......