EN
Selection of parking position
! DANGER
The machine must be unplugged from the power socket (mains
powered model).
! WARNING
Before placing the machine in the parking position, empty the
detergent tank and the dirty water tank, referring to the relative
sections “Emptying the water/detergent tank” and “Emptying the
dirty water tank”.
! WARNING
The machine must always be parked standing on end (vertical);
if left in the normal operating position (horizontal), the weight of
the machine can cause the bristles of the brush, and the squeegee
blades, to bend out of shape.
•
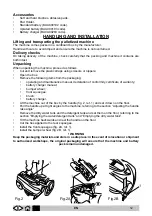
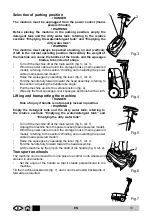
Turn off the machine off at the main switch (fig. 3, ref. 1).
•
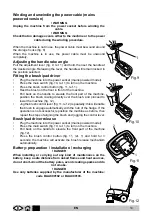
Wind the power cable around the storage hooks (mains powered
model), referring to the section “Winding and unwinding the power
cable (mains powered model)”.
•
Raise the squeegee by operating the lever (fig. 3, ref. 2).
•
Fold the handle fully forward toward the head assembly, referring to
the section “Adjusting the handle rake angle”
•
Pull the machine up into the vertical position (fig. 4).
•
Wipe dry the front squeegee, rear squeegee and brush with a cloth.
Lifting and transporting the machine
! DANGER
Risk of injury if handle is not properly locked in position.
! WARNING
Empty the detergent tank and the dirty water tank, referring to
the relative sections “Emptying the water/detergent tank” and
“Emptying the dirty water tank”.
•
Turn off the machine off at the main switch (fig. 6, ref. 1).
•
Unplug the machine from the power socket (mains powered model).
•
Wind the power cable around the storage hooks (mains powered
model), referring to the section “Winding and unwinding the power
cable (mains powered model)”.
•
Raise the squeegee by operating the lever (fig. 5, ref. 1).
•
Fold the handle fully forward toward the head assembly.
•
Lift the machine by the grip on the shaft of the handle (fig. 6, ref. 2).
Transport on wheels
The machine can be moved from one place to another on its wheels and
steered in all directions:
•
Set the angle of the handle so that it stands perpendicular to the
machine.
Tilt the machine backwards (fig. 7), and it can be wheeled backwards or
forwards as required.
Fig.3
Fig.4
2
1
1
Fig.5
Fig.6
2
1
Fig.7
13


