Product Elements
1. Main Tent Flysheet (outer tent)
2. Inner Tent (badroom compartment
3. Tent peg bag (includes pegs)
4. Fiberglass Pole
5. Air Pump
6. Tent Carry Bag
Intention For Use
Thank you for purchasing your Olympus 4
Man Air Tent.
Before inflating and using this air tent,
we strongly advise that you read all the
information and guidelines in this document.
General Guidelines
This air tent has been specially designed for quick assembly and set up. The air tents come with
specially made inflatable tubes that are already attached and when inflated, hold and support the tent
in place. Please follow the assembly instructions opposite to maintain its performance.
• When air tubes are inflated, do not attempt to open any of the zips. This can lead to damage to both
the air tube and the air tent.
• Do NOT use this during during adverse weather conditions such as snow.
• The valve on the tubes can loosen over time with use, it is advised to ensure these are tight at all times.
Inflatable Pole Leakage
Should you experience any leakage from the inflatable poles, these can be easily replaced.
Contact your supplier for a replacement.
Inflating/Deflating Poles
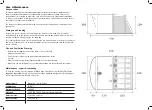
This air tent comes supplied with a manual hand pump (Fig 1).
Assembly Instructions
1. Ensure the ground is free of stones and other sharp objects. Unpack and familiarise
yourself laying the outer tent on the ground.
2. Inflate the main hoops until rigid ensuring the valves are screwed in tightly.
3. Using the guy ropes erect the tent to form its rough shape.
4. Ensure all the doors are closed.
5. Now peg out each of the four corners to form a rigid shape and readjust the guys as
necessary, finally completing the additional pegging points.
6. Once you are happy with the overall shape, take the inner tent and attach to the outer
using the toggles and hoops working from the rear forward, in addition attaching the ground
sheet to the outer tent via the sewn in hooks as you work your way forward (Fig 5).
7. Make sure the groundsheet is flat and crease free as you go.
8. Once you are happy procced to peg any remaining guy lines.
9. Finally slide the small fiberglass pole through the sleeve to form the peak over the main
Dismantling Procedure
To dismantle the air tent, simply reverse the assembly procedure. Ensure you follow the
deflation guidelines under the Inflatable poles section. As for the tent itself, ensure this is
fully dried before carefully placing it back into the air tent carry bag.
Note On First Use
With new tents in particular, you may experience slight leakage from the channel beading
and the stitching on its first use, once this has happened the stitching will tighten and
prevent this from happening in the future, this is known as weathering in.
General Recommendations & Usage
• We advise that you fully familiarise with the air tent before you go on your first trip and
further recommend doing a test set-up beforehand.
• Set-up our tent on a clean and even surface. Remove any stones, branches or any other objects
that could damage your air tent. Also, take note of the direction and strength of the wind.
• Always try to set-up your air tent in a wind-protected area.
• Avoid setting up your air tent under any trees. This is because debris and sap from trees
can leave a mark/stain that is difficult to clean off.
• This tent is not designed for permanent pitching.
• This tent is designed for private and personal use only.
Before First Use
When you first receive your air tent
check the following is included to
avoid inconvenience at a later stage.
INFLATING
Open up the valve of the inflatable pole,
insert the air hose into the valve and
commence inflating (Fig 2).
Keep pumping until the pole feels rigid.
Under extreme heat, do not exceed the
maximum air pressure of 7psi as this will
cause damage to the air tubes due to the
air expanding inside the tubes. Once you
have finished inflating, remove the air hose
and replace the outer securing cap.
NEVER USE ELECTRIC AIR COMPRESSORS AS THESE
TEND TO HAVE HIGHER OPERATING PRESSURE AND
CAN PERMANENTLY DAMAGE THE AIR TUBES.
DEFLATING
To deflate the inflatable poles, carefully
open the whole valve, not just the outer
cap. Carefully press the beam to release
the air. Never force the air out of the beam,
as you might risk damaging the beam/pole.
When packing the tent away, the valves
should be left open to allow any trapped air
to escape.


