


Call 888.852.2778 for Technical Support
INTRODUCTION
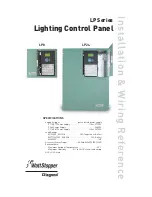
Welcome to the LP Series Lighting Control Panels
The LP panels contain up to 8 relays controlling lighting through automatic scenarios, time schedules,
photocells and occupant controlled switches. Scheduling capability is included through a built-in clock with a
keypad and display window on the interior. The interior provides isolation between the line- and low-voltage
sections of the panel, as well as the mounting frame for relays, the power supply and the circuit board
assemblies.
LP panels are shipped with all their components installed in a locking enclosure. The
LP8
’s enclosure is
compact, measuring only 16.5” x 15.1”. The
LP24
’s enclosure is equipped with din rails to accomodate up
to 12 contactors. A secure outer cover protects the user from the high voltage area. A separate interior
enclosure protects the low voltage wiring and components while allowing easy user access to the time clock
scheduling controls.
Most functions are the same for the LP24 as for the LP8. References to LP8 features, functions,
programming and wiring also apply to the LP24, unless specifi ed otherwise. If you have any questions, call
technical support at: 888.852.2778.
Use the plastic sleeve affi xed inside the enclosure cover door to keep these instructions
and the completed system documentation forms for future reference.
Figure 1: LP8 components (enclosure cover removed and interior keypad and display door open)
EM-24A2 Photocell Connections
Relay Control
Push-buttons
Accessory Power Connections
Power Supply Connections
Relay Switch and Pilot Connections
Relay Line and
Load Connections
Keypad and Display Door (open)
Optional Group Switching
(GS) Card
Page 3


