LEGRAND WattStopper LP Series Installation Reference Download Page 1

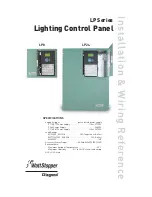
LP Series

Lighting Control Panel

LP8

LP24 

SPECIFICATIONS

Supply Voltages. . . . . . . . . . . . . . . . .  per selected power supply
 

P115/277 Power Supply  . . . . . . . . . . . . . . . . . .115 or 277VAC


P240 Power Supply . . . . . . . . . . . . . . . . . . . . . . . . . . . .240VAC


P115/347 Power Supply  . . . . . . . . . . . . . . . . . .115 or 347VAC

Load Ratings
 

@120VAC, 50/60Hz  . . . . . . . . . . . . .  20A Tungsten or Ballast


@277/347VAC, 50/60Hz. . . . . . . . . . . . . . . . . . . . .  20A Ballast


@250VAC. . . . . . . . . . . . . . . . . . . . . . . . . . . . . . . . . . . . . . . .1HP

Accessory Power Ouput . . . . . . . . . . . 800mA @24VDC/VAC/ACR
Environmental
 

Maximum Ambient Temperature  . . . . . . . . . . . . . . . . . . 60°C


Maximum Humidity   . . . . . . 5% to 90% RH, non-condensing

UL & cUL Listed

Installation & Wiring Reference

Summary of Contents for WattStopper LP Series

Page 1: ...AC P240 Power Supply 240VAC P115 347 Power Supply 115 or 347VAC Load Ratings 120VAC 50 60Hz 20A Tungsten or Ballast 277 347VAC 50 60Hz 20A Ballast 250VAC 1HP Accessory Power Ouput 800mA 24VDC VAC ACR Environmental Maximum Ambient Temperature 60 C Maximum Humidity 5 to 90 RH non condensing UL cUL Listed Installation Wiring Reference ...

Page 2: ...IONS 1 INTRODUCTION 3 Welcome to the LP Series Lighting Control Panels 3 INSTALLATION 5 Mount the Enclosure 5 Install Interior 6 CONNECT THE LP8 POWER SUPPLY 7 CONNECT LINE VOLTAGE 7 Power Up and Test Relays 7 Confirm Nominal Operation 7 LOW VOLTAGE WIRING 8 Hardwire Low Voltage Switches Optional 8 Install and Wire Exterior Photocell Optional 9 Using Low Voltage Sensors with LP Panels 9 Group Switc...

Page 3: ...contactors A secure outer cover protects the user from the high voltage area A separate interior enclosure protects the low voltage wiring and components while allowing easy user access to the time clock scheduling controls Most functions are the same for the LP24 as for the LP8 References to LP8 features functions programming and wiring also apply to the LP24 unless specified otherwise If you have...

Page 4: ...WHITE RELAY PILOT Manual override switch for relays Factory installed jumper provides 24V rectified power to pilot contacts A different voltage 5 24V can be connected to the YELCOM terminal from other equipment looking to monitor relay state pilot contacts For standard use 3 18 Line Neutral To relay as rquired For standard use 2 18 For pilot use 3 18 Light fixture Light fixture Light fixture Notes...

Page 5: ...nt the Enclosure 1 Place the LP on a sturdy flat horizontal surface 2 Remove the outer cover by removing the cover screws Set it aside 3 Open the interior door containing the clock keypad and display window by pulling up the two black plastic self retained pop fasteners on the left side 4 Remove the panel interior assembly a Remove the washer and nut that attaches the transformer mounting assembly ...

Page 6: ...ne and low voltage wiring compartments Install Interior Do not reinstall the interior until after the exterior enclosure has been securely mounted to the wall and the conduit wiring holes have been drilled or knocked out 1 Place the interior in the enclosure 2 Align the interior with the studs provided in the enclosure 3 Hold the interior in place while you pull up on the black self retaining pop ...

Page 7: ... relay 4 Apply power to the relays 5 Being careful not to touch any line voltage wiring toggle each relay on off again and confirm that each relay controls the appropriate load Confirm Nominal Operation With power applied to the LP8 panel there should be two 2 green LED indicators glowing on the power supply card in the lower left corner of the panel And there should be six 6 green LED indicators gl...

Page 8: ...rd See page 9 Figure 3 Low voltage switch and sensor wiring R B Y W 2 WIRE MAINTAINED CONTACT R to B JUMPER B to W JUMPER 2 WIRE MOMENTARY PUSH BUTTON STANDARD 3 WIRE MOMENTARY STANDARD 3 WIRE MAINTAINED R B Y W RED WHITE RED WHITE BLACK WHITE RED BLACK WHITE RED R B Y W R B Y W R B Y W OCCUPANCY SENSOR or INDOOR PHOTOCELL BLACK BLUE RED Blue Black Red White 24VDC 24VR 24VAC COMMON CONTROL 24VDC R...

Page 9: ...oup Switching card press and hold the Group push button for several seconds The red group LED and the LEDs for relays currently controlled by that input will begin to flash 2 On each Relay Driver card select the relays to be controlled If a relay was previously Smartwired to the group input selected the LED flashes otherwise the LED is off Press the associated Relay Control Button to add delete that...

Page 10: ...rted and that the switch is operating correctly Move LV relay connection to a different point on the RD board and attempt to override the relay on No change in status relay needs to be replaced call tech support Relay functions properly circuit board needs to be replaced call tech support 3 When I try to turn the relay on it comes on for a second then comes back off Remove any LV switching that is...

Page 11: ...you entering ON OFF times using the 24 hour format No Using the 24 hour format make the necessary scheduling corrections Yes Refer to the Spanning Midnight With A Schedule section of the User s Guide and make the necessary scheduling corrections 7 I need to remove a sensor from the system Once a sensor has been connected to a relay driver or group switch card low voltage input the input will remai...

Page 12: ...A2 Low voltage exterior photocell AS 100 Automatic control switch 120 277VAC 50 60Hz LVS 1 Standard momentary toggle switch RS2 3x Two button low voltage momentary switch L1S Single button low voltage architectural design toggle switch LxS Multi button low voltage architectural design toggle switch DCC2 Low voltage momentary switch Miro Decorator style with LED Multiple options available such as c...

Reviews: