Raritan PXE Quick Setup Guide
2
QSG-PXE-1A-v3.3.10-E
255-80-0007-00 RoHS
If a rack is subject to shock in environments such as boats
or airplanes, the PDU CANNOT be mounted upside down.
If installed upside down, shock stress reduces the trip
point by 10%.
Note: If normally the line cord is down, upside down
means the line cord is up.
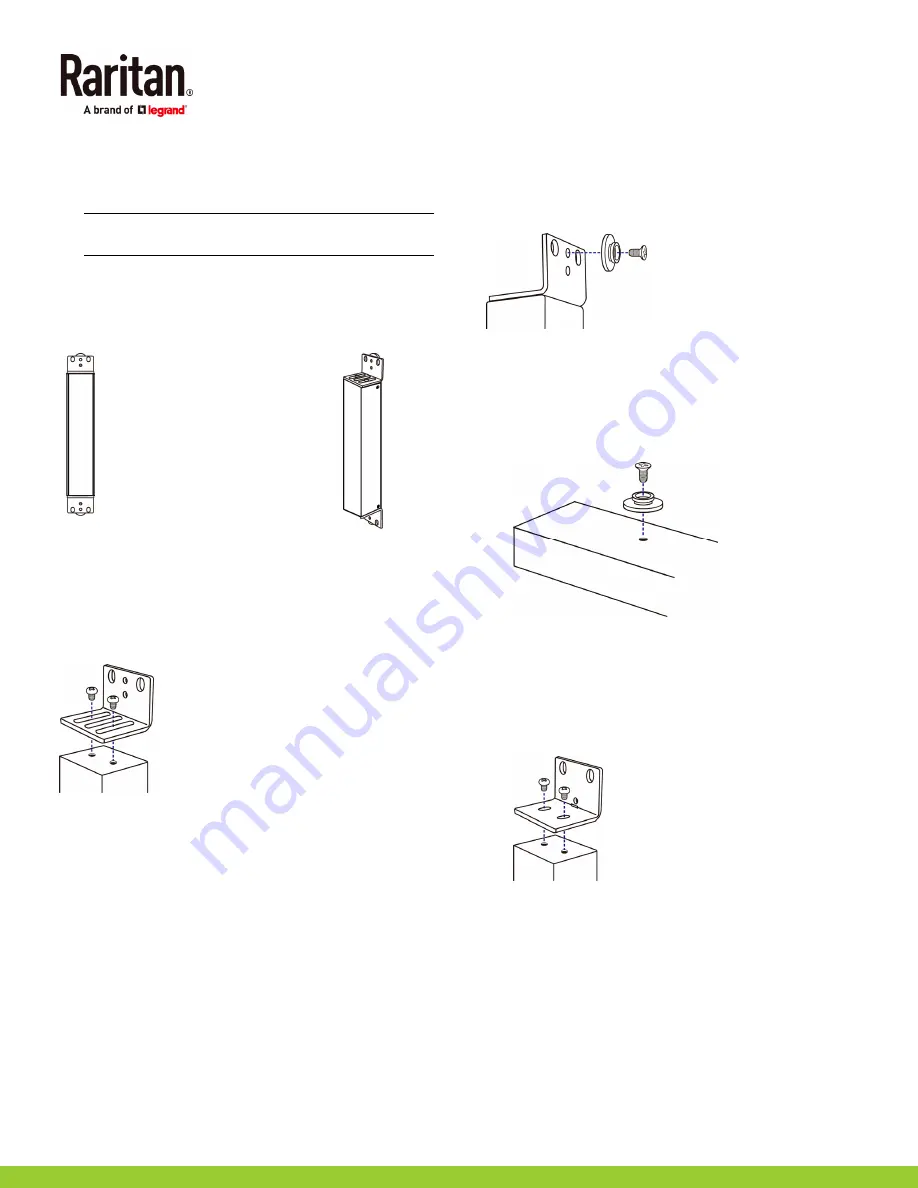
Mounting 1U Models Using L-Brackets and Buttons
This section describes how to mount a 1U PXE device using
L-brackets and two buttons.
To mount 1U models using L-brackets and two
buttons:
1.
Align the two edge slots of the L-bracket with the two
screw holes on the top of the PXE device.
2.
Screw the L-bracket to the device and ensure the bracket
is fastened securely.
3.
Repeat Steps 1 to 2 to screw another L-bracket to the
bottom of the device.
4.
After both L-brackets are installed, you can choose either
of the following ways to mount the device in the rack.
Using rack screws, fasten the device to the rack
through two identical holes near the edge of each
L-bracket.
Mount the device by screwing a mounting button in the
back center of each L-bracket and then having both
buttons engage the mounting holes in the rack. The
recommended torque for the button is 1.96 N·m (20
kgf·cm).
Mounting Zero U Models Using Buttons
1.
Turn to the rear of the PDU.
2.
Locate the two screw holes on the rear panel.
3.
Screw a button in each screw hole. The recommended
torque for the button is 1.96 N·m (20 kgf·cm).
4.
Press the PDU forward, pushing the mounting buttons
through the mounting holes, then letting the PDU drop
slightly.
Mounting Zero U Models Using L-Brackets and
Buttons
1.
Fasten the L-bracket to each end of the PDU.
2.
Choose either of the following ways to fasten the PDU to
the rack.
Attach the rack screws to the two rackmount holes of
each L-bracket.
Screw a mounting button in the back center of each
L-bracket and then have both buttons engage the
mounting holes in the rack. The recommended torque
for the button is 1.96 N·m (20 kgf·cm).


