background image

12

cl eaning


an d


steri lizing


instructions


for


yo ur


fluid fit

®

®


ki t

?

Before first use

• 

Disassemble all parts.

• 

Wash in warm soapy water (except for tubing).

• 

Rinse well with clean water.

• 

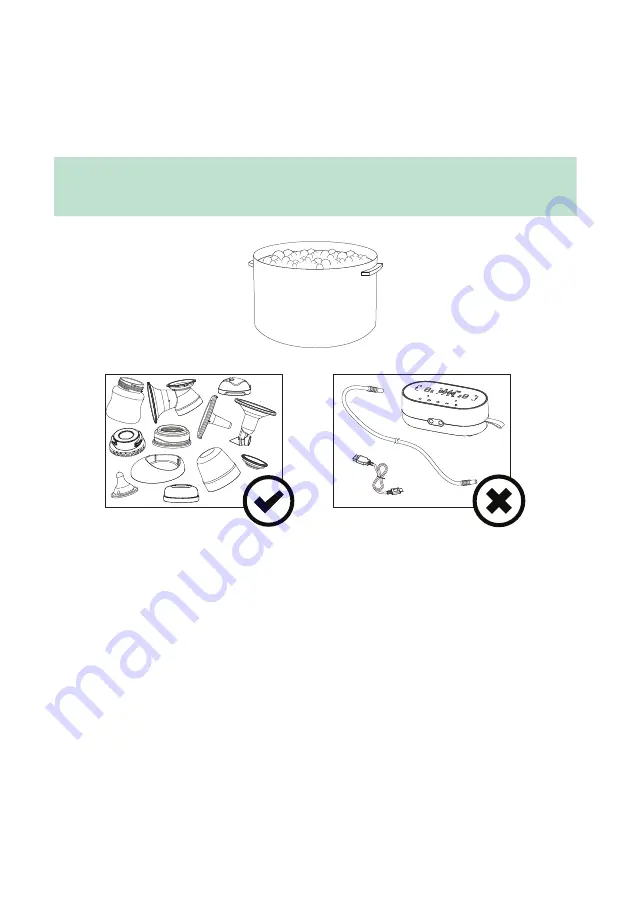
Submerge parts in pot of water (except for tubing) and boil for 3-5 minutes. 
Use large pot to prevent parts from touching sides or bottom of pot. 

• 

Shake off excess water and air-dry on a dedicated rack or clean cloth.

Summary of Contents for DUETTE

Page 1: ...DUAL ELECTRIC BREAST PUMP Manufactured for Legendairy Milk LLC www legendairymilk com ...

Page 2: ......

Page 3: ...rding Your FluidFit Collection Kit 6 How to Assemble the FluidFit Collection Kit 7 Connecting FluidFit Collection Kit and Pump Kit 8 Pumping Instructions 8 Getting Started 10 Using Customizable Pumping Styles 10 Cleaning and Sterilizing Instructions for Your FluidFit Kit 12 Troubleshooting 14 Technical Data 16 Warranty 16 ...

Page 4: ...ttings for the left and right breast This provides a customized and individualized pumping experience for maximum comfort and breastmilk output With the Duette your pumping possibilities are now endless indications for use The Duette Dual Powered Electric Breast Pump is an electrically powered suction device intended to express and collect milk from a lactating person s breasts This pump is intend...

Page 5: ...e sleeping or when drowsy Do not drop or insert any object into any opening of the pump unit Do not use this product if it is broken or any parts are missing Close supervision is necessary when this product is used near children Never operate this product if it has a damaged cord or plug if it is not working properly if it has been dropped or damaged dropped into water or if any parts are broken o...

Page 6: ...comfortable or causing pain turn the unit off break the seal between the breast and breast shield with your finger and remove the breast shield from your breast If irritation or discomfort occurs discontinue use and consult your lactation consultant SAVE THIS INSTRUCTION MANUAL Continued from page 3 ...

Page 7: ... Nipple Collar 2 14 Bottle Cap Cover 2 15 Silicone Lid 2 16 Bottle Adapter Wide Neck to Narrow Neck 2 01 Shield Cap 2 02 Liquid Silicone Cushion with Integrated Duckbill Valve 2 03 Breast Shield 2 04 Silicone Diaphragm 2 05 Cap 2 06 Tubing Connector 4 07 Power Adapter 08 Tubing 2 No parts of this device were made with BPA ...

Page 8: ... signs of wear or damage Replace the silicone cushion every 1 2 months or more often depending on frequency of use Please do not use a cleaning brush inside the valve of the silicone cushion as this may damage the valve or shorten its lifespan This product is a personal care item and use should not be shared between mothers This product is only intended for use with compatible pumps If you are exp...

Page 9: ... shield 2 Assembling the diaphragm Press the silicone diaphragm down with your fingers so it s flush with the top of the breast shield Place the white cap on with the hole for the tubing insert posi tioned slightly to the right Twist the cap to the left until it s tightly in place 3 Assembling the bottle and base Twist the bottle on and insert the tubing into the white cap ...

Page 10: ... discomfort tubing connectors pump instructions Control Panel Speed Level Suction Level Memory Function Speed Mute Button Press and at the same time to activate mute button function Press again to deactivate Child Lock Button Press and at the same time to activate child lock function Press again to deactivate Speed Side Selection Left Right Duette ON OFF Pause Resume Phase Stimulation Expression R...

Page 11: ...ng To access the recording short press the Memory Funtion button Press it again to exit the recording Child Lock To activate the child lock function press the and at the same time The lock icon will display on the screen Press again to deactivate Mute Button This function activates when you press the and at the same time The mute icon will display on the screen Press again to deactivate ...

Page 12: ... 1 5 Press Side Selection button to select the pump to operate on the Left Right or Duette Mode Suction and Speed settings can be adjusted sepa rately for the left or right side 6 Press Phase button to toggle between the four unique pumping styles using customizable pumping styles The Duette Dual Electric Breast Pump offers 4 unique pumping styles so you can find the settings that are most comfort...

Page 13: ...be set independently Your pump s vacuum suction strength has 9 levels in both stimulation and expression phases and are independently adjustable on each side To adjust the suction level press the buttons Speed Settings Stimulation Phase Vacuum Strength 1 9 Cycle Speed 80 100 cycles min Expression Phase Vacuum Strength 1 9 Cycle Speed 20 60 cycles min Press the pause resume button to pause pumping ...

Page 14: ... all parts Wash in warm soapy water except for tubing Rinse well with clean water Submerge parts in pot of water except for tubing and boil for 3 5 minutes Use large pot to prevent parts from touching sides or bottom of pot Shake off excess water and air dry on a dedicated rack or clean cloth ...

Page 15: ...ake off excess water and air dry on a dedicated rack or clean cloth How to sanitize Follow cleaning instructions from the above section Submerge parts in pot of water and boil for 3 5 minutes Use large pot to prevent parts from touching sides or bottom of pot Shake off excess water and air dry on a dedicated rack or clean cloth After first sanitizing all parts except tubing please do not boil sili...

Page 16: ...te cap are firmly attached to the top of the breast shield Place the white cap on with the hold for the tubing insert positioned slightly to the right Twist the cap to the left until it s tightly in place Ensure that the tubing silicone diaphragm and white cap are dry before use If condensation occurs ensure tubing is dry before next use To do this disconnect tubing from breast shields and turn th...

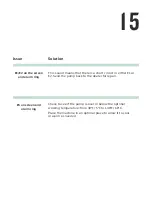
Page 17: ...is sound means that there is a short circuit in either E1 or E2 Send the pump back to the dealer for repair Check to see if the pump is over or below the optimal working temperature from 40 F 5 C to 140 F 60 C Place the machine in an optimal place to allow it to cool or warm as needed ...

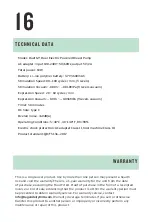
Page 18: ...adapter Class II host machine Class III Product standard QB T5136 2017 warranty This is a single user product Use by more than one person may present a health risk and void the warranty There is a 1 year warranty for the unit from the date of purchase excluding the FluidFit kit Proof of purchase in the form of a receipted invoice or bill of sale evidencing that the product is within the warranty p...

Reviews: