background image

2.

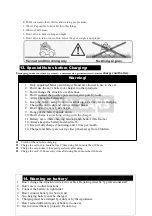
Public road and other vehicles and walking people areas;

3. Where it’s possible to hit or hit the other things;
4. Other not safe areas.
5. Don’t drive in dark evening and night.
6. Don’t drive in rain or snow. Don’t drive if age or weight is not proper.

15. Special WARNING for battery:

14. Warning on battery

1. Don’t change the structure and electric cables. Repairing must be by professional staff.
2. Don’t use it in other functions.
3. Connect the battery in right order.
4. Don’t connect battery in short circuit.
5. No charging battery cant be charged.
6. Charging must be arranged by Adult, or by their guidance.
7. Don’t mixed different types of battery in one car.
8. Get rid of used battery properly. Its not a toy.

Charging must be done by adult. Children are prohibited to touch charger and battery. 

Warning!

1. Only appointed battery and charger brand are allowed to use to the car.
2. Don’t use the car’s battery or charger to other products.
3. Don’t change the structure or cable lines.
4. Don’t connect the positive pole and negative pole by tools.
5. Always keep the battery dry.
6. Keep the battery away from fire or smoking, especially while charging.
7. Charge the car in dry and well-ventilated places.
8. Don’t open the battery & charger.
9. Dong put the battery upside down.
10. Don’t charge if something wrong with the charger.
11. Battery heats while charging but stop and check it if its too hot.
12. Always keep the battery fastened well.
13. Keep it fully charge if not using, and 1 time per month.
14. Charger and battery are not toys.Keep them away from Children.

Switch of the car while charging.

Charge the car for 4-6 hours before 1

st

 time using but no more than 10 hours

Charge the car on time if the speed gets lower after using.

Charge the car 8-12 hours every time after using but no more than 20 hours.

13. Special Notes before Charging:

Summary of Contents for A026

Page 1: ...ully before assembling Preserve the manual properly for future reference The manual is for assembling and using reference only Details will be possibly improved and changed including structure appearance packing functions and etc Please take the actual product as standard if something different from the manual ...

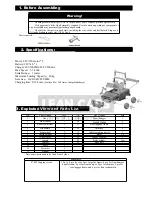
Page 2: ...60 kg Item size 1600 940 858 MM Charging time 8 12 hours Battery life 300 times charge discharge 3 Exploded View and Parts List No Parts Name Qty No Part Name Qty 1 Body 1 13 Front bumper 1 2 Steer Wheel 1 14 Guide frame 1 3 Rear view mirror 2 15 Rear luggage frame 1 4 windshield 1 16 Chimney 2 5 Front wheel 2 17 Vehicle wading device 1 6 Driving wheel 2 18 motor 2 4 7 Wheel cover 4 19 Wheel eyebr...

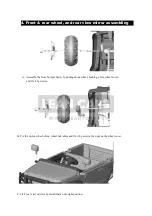
Page 3: ...A Assemble the front bumper firstly by putting shim wheel bushing shim wheel cover and fix it by screws B Fix the motor wheel shim wheel hub shim and fix it by screws then put on the wheel cover C Fix 2 rear view mirrors by install them onto right position ...

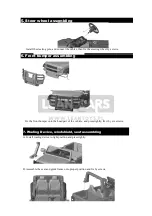
Page 4: ...Assemble the seat and guide frame onto proper position and fix by screws 5 Steer wheel assembling 前知 Install the steering pole and connect the cables then fix the steering wheel by screws 6 Front bumper assembling Fix the front bumper onto the head part of the vehicle and press tightly fix it by six screws ...

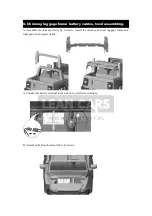
Page 5: ...sembling A Assemble the chimney firstly by 2 screws install the chimney and rear luggage frame onto right position and press tightly A Connect the battery terminal to the ride on by red red accordingly B Assemble the front hood and fix it by screws ...

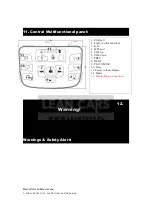
Page 6: ...e point 11 2 Power Switch Switch On off the ride on 3 Horn and music button 4 Drive reverse switch switch to drive neutral reverse 5 Speed switch 6 Pedal switch pedal the switch to move release to stop gradually 7 Door switch Switch to lock open the door ...

Page 7: ... If the light still flickers take out the battery and restart it again as above steps 2 Braking Button press the braking button the car stops Press it again braking function is relieved 3 Speed button Press S button to change speed Press 1 time means speed changing 1 time 3 lights on the remote means 3 speeds upper light means high speed middle light means middle and the down button is for low spe...

Page 8: ...rous to kids Adult assembly required Use care when unpacking as components t o be assembled may pose small parts sharp edge hazard Check if the charger is in good state including the wire socket and all details Stop use it if it looks broken in some way till it s fixed 1 USB port 2 Light no this function 3 horn 4 MP3 port 5 VOL up 6 VOL down 7 PREV 8 NEXT 9 PLAY PAUSE 10 Story 11 Power volume disp...

Page 9: ...ted battery and charger brand are allowed to use to the car 2 Don t use the car s battery or charger to other products 3 Don t change the structure or cable lines 4 Don t connect the positive pole and negative pole by tools 5 Always keep the battery dry 6 Keep the battery away from fire or smoking especially while charging 7 Charge the car in dry and well ventilated places 8 Don t open the battery...

Page 10: ...mewhere with any problem stop using is till repaired Lubricate related metal parts by some lubricating oil after period using to avid abrasion and rust The car should be placed away from fire and avoid long time strong sunshine Don t turn upside and down and tilt Place it indoor in wet weather or cover it with tarp The car should be kept away from hot objects such as oven or heater and etc to avoi...

Page 11: ...ller No feedback from car to remote 1 Check if braking works 2 Check if remote with battery 3 Check if receiving cables well connected Yes press braking to relief brake No normal Yes connect it No install battery Yes connect all cables again No Normal Ineffective charging 1 Check if battery cable connected 2 Check if charger get heated while charging Yes connect them No get to the next No broken c...

Page 12: ...be worn Never use in roadways near motor vehicles on or near steep inclines or steps swimmin g pools or other bodies of water Direct adult supervision is required Always keep child in vision when child in vehicles Execution Standard EN71 1 EN71 1 2014 A1 2018 for mechanical and physical properties EN71 2 2011 A1 2014 flammability test EN71 3 2019 on migration of certain elements EN62115 2005 A12 2...

Reviews: