


Front view
Side view
A
C
B
3
Installation
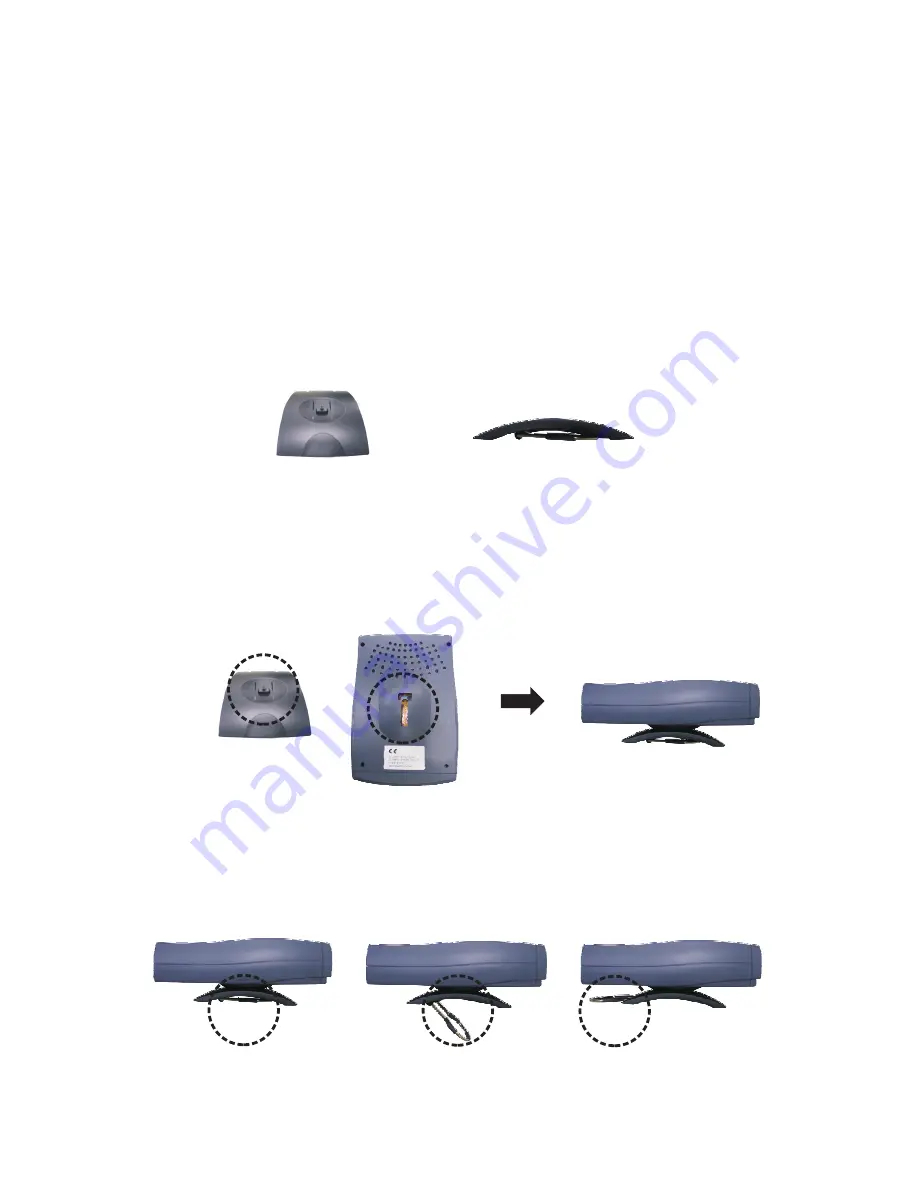
Installing the unit
Step 1 Installing the skid-proof base
The enclosed skid-proof base keeps the unit securely positioned
anywhere on the flat surfaces.
1. Attach the base to the unit by sliding the security latch of the
base into the corresponding area on the bottom of the unit.
2. Move the weight stabilizer from position A to position C to
provide extra weight support and balance.
IP Videophone STB User's Manual
8


