20
4
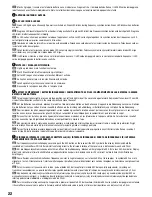
GAIN CONTROL / GAIN-REGLER / POTENTIOMÈTRE GAIN / CONTROL DE GANANCIA / STEROWANIE WZMOCNIENIEM / CONTROLLO DEL
GUADAGNO
EN
Handle carefully! Use only suitable screwdriver! Turn left to decrease gain, turn right to increase gain.
DE
Bitte sehr vorsichtig bedienen! Verwenden Sie nur einen passenden Schraubendreher! Drehen Sie den Regler nach links, um den Pegel zu
reduzieren, und nach rechts, um den Pegel anzuheben.
FR
Réglez ce potentiomètre avec soin ! Utilisez uniquement un tournevis compatible! Tournez le potentiomètre vers la gauche pour diminuer le
gain, vers la droite pour l’augmenter.
ES
¡Ajustar con cuidado! ¡Emplee sólo un destornillador apropiado! Gire a la izquierda para disminuir la ganancia, o a la derecha para aumentarla.
PL
Obsługiwać ostrożnie! Używać wyłącznie odpowiedniego śrubokrętu! Obrócić w lewo, aby zmniejszyć wzmocnienie, lub w prawo, aby je
zwiększyć.
IT
Manipolare con cura! Utilizzare solo un cacciavite adeguato! Girare a sinistra per diminuire il guadagno, a destra per aumentarlo.
5
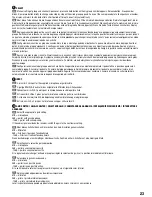
BATTERY COMPARTMENT / BATTERIEEINSCHUBFACH / COMPARTIMENT DES PILES / COMPARTIMENTO DE LAS BATERÍAS / GNIAZDO
BATERII / VANO BATTERIE
EN
To replace batteries, unscrew cover counterclockwise, remove batteries, insert 2 new AA size batterries (direction as shown in the compartment) and
screw the cover onto the handheld microphone clockwise.
DE
Um die Batterien zu wechseln, schrauben Sie die Abdeckung gegen den Uhrzeigersinn auf, setzen Sie zwei neue AA-Batterien (Ausrichtung
siehe Abbildung im Batteriefach) ein und schrauben Sie die Abdeckung wieder im Uhrzeigersinn auf das Handmikrofon.
FR
Pour remplacer les piles, dévissez le couvercle (sens inverse des aiguilles d’une montre), enlevez les anciennes piles et mettez en place deux
nouvelles piles (format AA, LR06) – le sens d’introduction est gravé dans le compartiment. Revissez ensuite le couvercle sur le corps du microphone
(sens des aiguilles d’une montre).
ES
Para sustituir las baterías, desenrosque la tapa en sentido antihorario, quite las baterías, inserte 2 baterías nuevas de tipo AA (polaridad
indicada en el compartimento) y vuelva a enroscar la tapa en sentido horario en el micrófono de mano.
PL
Aby wymienić baterie, należy odkręcić pokrywę w kierunku przeciwnym do kierunku wskazówek zegara, wyjąć baterie, włożyć 2 nowe baterie
AA (w kierunku wskazanym wewnątrz gniazda) i przykręcić pokrywę mikrofonu ręcznego w kierunku zgodnym z kierunkiem wskazówek zegara.
IT
Per sostituire le batterie, svitare il coperchio in senso antiorario, estrarre le batterie, inserire 2 batterie nuove di tipo AA (nella direzione indicata
sul vano) e riavvitare il coperchio sul microfono gelato in senso orario.
6
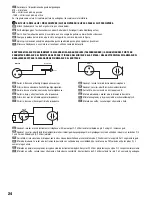
IR INFRARED INTERFACE / INFRAROT-SCHNITTSTELLE (IR) / INTERFACE INFRAROUGE (IR) / PUERTO DE INFRARROJOS IR / INTERFEJS
PODCZERWIENI IR / PORTA A INFRAROSSI
EN
Located on the bottom side of the handheld microphone.
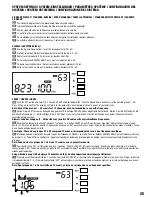
For frequency synchronisation push the ASC button on the receiver (the ASC symbol in the display blinks), switch on the transmitter and hold it with
its infrared interface facing direct to the infrared interface of the receiver in a distance between 5 and 20 cm (within 10 seconds after switching the
transmitter on).
DE
Die Infrarot-Schnittstelle befindet sich an der Unterseite des Handmikrofons.
Um die Frequenz zu synchronisieren, drücken Sie die ASC-Taste des Empfängers (das ASC-Symbol im Display blinkt), schalten Sie den Sender ein
und richten Sie die Infrarot-Schnittstelle (innerhalb von 10 Sekunden nach dem Einschalten des Senders) im Abstand von 5 bis 20 cm direkt auf die
Infrarot-Schnittstelle des Empfängers.
FR
Elle se trouve sur le fond de l’émetteur à main.
Pour effectuer une synchronisation des fréquences, appuyez sur la touche ASC du récepteur (le symbole ASC se met alors à clignoter à l’écran).
Orientez ensuite l’interface infrarouge de l’émetteur (allumé) directement vers celle du récepteur, à une distance comprise entre 5 et 20 cm.
ES
Ubicado en la parte inferior del micrófono de mano.
Para sincronizar la frecuencia, pulse el botón ASC del receptor (el símbolo ASC de la pantalla parpadeará), encienda el transmisor y, antes de que
transcurran 10 segundos, mantenga su puerto de infrarrojos apuntando directamente al puerto de infrarrojos del receptor a una distancia entre 5 y
20 cm.
PL
Znajduje się na spodzie mikrofonu ręcznego.
Aby dokonać synchronizacji częstotliwości, należy nacisnąć przycisk ASC znajdujący się na odbiorniku (symbol ASC na wyświetlaczu zacznie migać),
włączyć nadajnik i ustawić go w takiej pozycji, aby interfejs podczerwieni skierowany był bezpośrednio na interfejs podczerwieni odbiornika, w
odległości od 5 do 20 cm (czynność tę należy wykonać w ciągu pierwszych 10 sekund po włączeniu nadajnika).
IT
Situata sulla parte inferiore del microfono gelato.
Per sincronizzare la frequenza premere il pulsante ASC del ricevitore (il simbolo ASC sullo schermo lampeggia), accendere il trasmettitore e mante-
nerlo acceso con la porta a infrarossi puntata direttamente verso la porta a infrarossi del ricevitore a una distanza tra 5 e 20 cm (entro 10 secondi
dall’accensione del trasmettitore).

