


POWER CORE User Manual
Version: V6.0.0/5
24/459
5. Installation
5.5
Setting the IP Address
By default, POWER CORE ships with the following IP settings for the
·
IP Address
= 192.168.101.240
·
Subnet Mask
= 255.255.255.0
·
Gateway
= 0.0.0.0
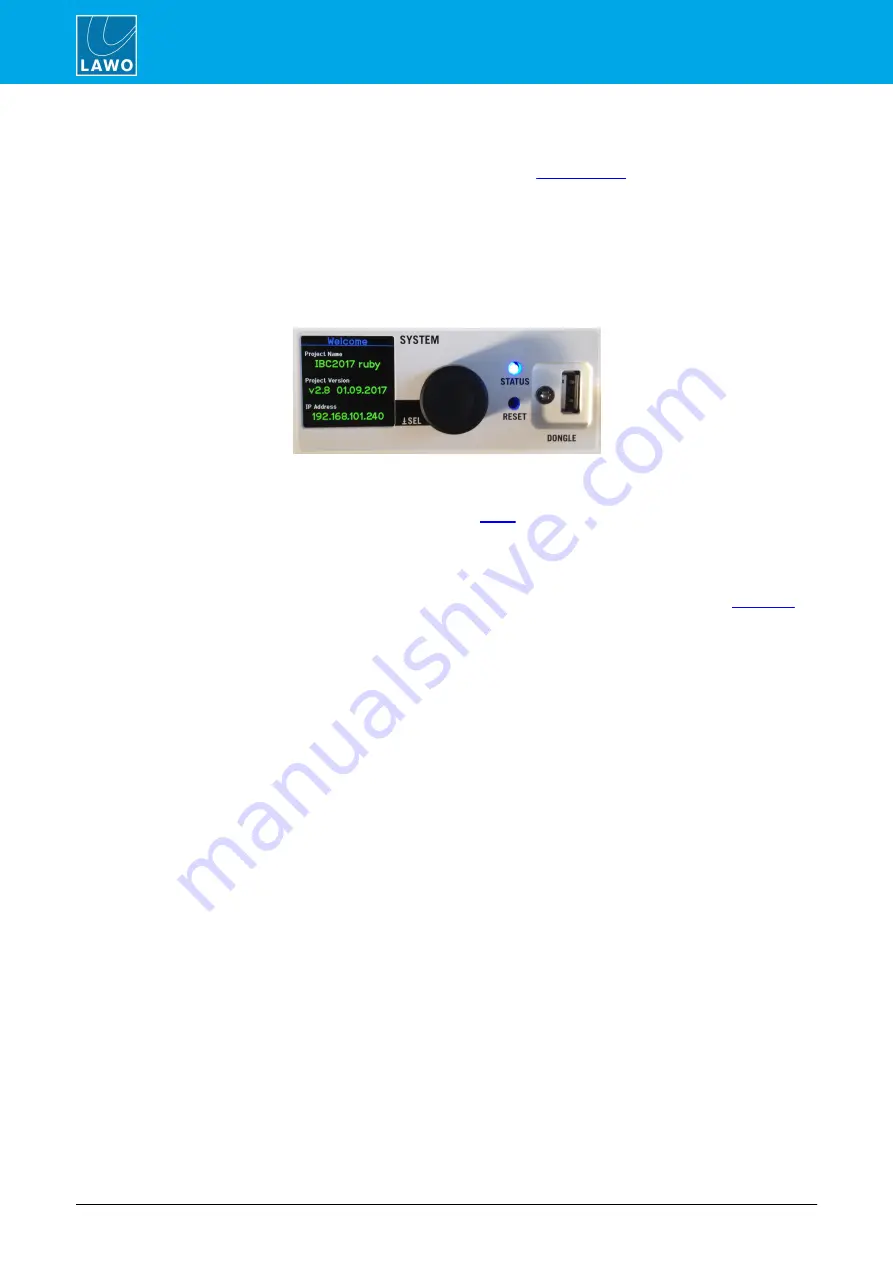
You can also check the current IP Address from the front panel display by turning the rotary control until you
see the
Welcome
page:
Front Panel: Welcome Page
If you are installing POWER CORE within a network of devices, then you may need to change its IP Address,
Subnet Mask and Gateway. This can be performed using the Web UI as follows.
1
.
Open a Web UI connection to POWER CORE in the
2
.
Select
System
->
Network Devices
- you will see the current IP settings assigned to the three
Ethernet ports. The top entry (
dwc0
) corresponds to front-panel port
1
and is used for system administration
and control.
Any of the fields marked with an asterisk (*) can be edited. You will need to enter the Administrator
order to modify the parameters.
3
.
To change the IP Address, click in the
IP Address
field and type in the new IP.
4
.
Then click on
Apply
- the new setting will be applied and so you will loose your browser connection.
5
.
To check that the new IP has been taken, re-open the Web UI connection (by typing the new IP address
into the URL field), or refreshing the front panel display.
The subnet mask (
Network Mask
) and
Gateway
can be edited in a similar manner. Note that if you edit these
settings, then you may need to also edit the IP settings of your service computer's Network Interface Card in
order to re-establish the Web UI connection.


