background image

30

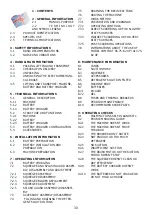
1 - CONTENTS

2 - GENERAL INFORMATION

2.1

MANUAL PURPOSE

2.2

T E R M I N O L O G Y

AND SYMBOL LEGEND

2.3

PRODUCT IDENTIFICATION

2.4

SPECIFIC USE

2.5

TECHNICAL MODIFICATIONS

3 - SAFETY INFORMATIONS

3.1

BASIC RECOMMENDATIONS

3.2

NOISE AND VIBRATIONS

4 - HANDLING INFORMATION

4.1

PACKING LIFTING AND TRANSPORT

4.2

CHECKS UPON DELIVERY

4.3

UNPACKING

4.4

UNBLOCKING THE ELECTROMECHANI-
CAL BRAKE

4.5

LIFTING AND TRANSPORT: MACHINE, 
BATTERY AND BATTERY CHARGER

5 - TECHNICAL INFORMATIONS

5.1

GENERAL  DESCRIPTION

5.1.1

MACHINE

5.1.2

BATTERY

5.1.3

BATTERY CHARGER

5.2

STRUCTURE AND FUNCTIONS

5.2.1

MACHINE

5.2.2

BATTERY

5.2.3

BATTERY CHARGER

5.3

BATTERY CHARGER CONFIGURATION

5.4

ACCESSORIES

6 - INSTALLATION INFORMATION

6.1

BATTERY PREPARATION

6.2

BATTERY INSTALLATION AND 
PREPARATION

6.3

MACHINE PREPARATION

7 - OPERATING INFORMATION

7.1

BATTERY CHARGING

7.2

SQUEEGEE AND SPLASH GUARD ASSEM-
BLY, DISASSEMBLY AND ADJUSTMENT

7.2.1

SQUEEGEE ASSEMBLY

7.2.2

SQUEEGEE DISASSEMBLY

7.2.3

SQUEEGEE BLADES REPLACEMENT 

7.2.4

SQUEEGEE ADJUSTMENT

7.2.5

SPLASH GUARD ASSEMBLY/DISASSEM-
BLY 

7.3

ACCESSORY ASSEMBLY/DISASSEMBLY 

7.4

FILLING AND DRAINING THE DETER-

GENT SOLUTION TANK

7.5

DRAINING THE RECOVERY TANK

7.6

DRIVING THE MACHINE

7.7

WORK METHOD

7.7.1

PREPARATION AND WARNINGS

7.7.2

OPERATING CONTROLS

7.7.3

DIRECT SCRUBBING OR FOR SLIGHTLY
DIRTY SURFACES

7.7.4

INDIRECT SCRUBBING OR FOR VERY 
DIRTY SURFACES

7.7.5

POST-SCRUBBING OPERATIONS

7.8

INFORMATIONS ABOUT THE USE OF 
MODEL COMFORT XS 75-82 UP /A13 75-
82 UP

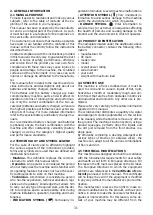
8 - MAINTENANCE INFORMATION

8.1

TANKS

8.2

SUCTION HOSE

8.3

SQUEEGEE  

8.4

ACCESSORIES

8.5

DETERGENT SOLUTION FILTER

8.6

MACHINE BODY

8.7

BATTERIES

8.7.1

PB-ACID

8.7.2

GEL

8.8

FUSES AND THERMAL BREAKERS

8.9

PERIODIC MAINTENANCE

8.10

RECOMMENDED SPARE PARTS

9 - OPERATING CHECKS

9.1

MALFUNCTIONS SELF-DIAGNOSTIC 

9.2

PROBLEM SOLVING GUIDE 

9.2.1

THE MACHINE DOESN’T WORK

9.2.2

THE MACHINE DOESN’T MOVE 
FORWARD

9.2.3

THE BRUSHES DON’T ROTATE

9.2.4

NOT ENOUGH OR TOO MUCH 
DETERGENT

9.2.5

NO SUCTION

9.2.6

INSUFFICIENT SUCTION

9.2.7

THE BRUSH MOTOR OR THE SUCTION 
MOTOR DOESN’T STOP

9.2.8

THE SQUEEGEE DOESN’T CLEAN OR 
DRY EFFICIENTLY

9.2.9

THE BATTERY CHARGER DOESN’T 
WORK

9.2.10

THE BATTERIES DO NOT CHARGE OR 
DO NOT HOLD A CHARGE

Summary of Contents for A13 75 ESSENTIAL

Page 1: ...T XS 75 ESSENTIAL XS 75 ESSENTIAL XS 75 UP XS 75 UP XS 82 UP XS 82 UP L A L A V V A S C I U G A A S C I U G A P P A A V I M E N T I V I M E N T I F L O O R S C R U B B E R S F L O O R S C R U B B E R...

Page 2: ...2 ITALIANO PAG 13 ENGLISH PAG 30 FRAN AIS PAG 46 DEUTSCH PAG 63 ESPA OL PAG 81 FOTOGRAFIE PHOTOGRAPHS PHOTOS FOTOGRAFIEN FOTOGRAFIAS PAG 3 E D F GB I...

Page 3: ...3 1 2 A B 2 6 4 1 3 3 7 4 5 6 9 5 8...

Page 4: ...4 C 2 1 3 5 4 1 D...

Page 5: ...5 3 3 2 1 4 6 7 6 7 1 2 5 E F 1...

Page 6: ...6 H 2 G 1 3 3 2 4 5 8 6 7 9 1 4...

Page 7: ...tch 1 Dip Switch 2 Dip Switch 1 Dip Switch 2 Pb Acid 4 x 6V 240Ah C5 code 0 107 0034 ON OFF OFF OFF Gel Exide Sonnenschein Haze OFF OFF OFF OFF Gel AGM OFF ON OFF OFF Pb Acid 4 x 6V 180Ah C5 code 0 10...

Page 8: ...8 1 1 2 L 1 L 2 L 3 2...

Page 9: ...9 L 4 L 5...

Page 10: ...10 M 1 2 3 1 6 2 5 N Comfort XS 75 Essential A13 75 Essential 3 4 4 7 9 8 10...

Page 11: ...11 O 1 Comfort XS 75 Essential A13 75 Essential...

Page 12: ...12 P 1 2 3 1 2 8 3 4 9 7 Q Comfort XS 75 82 UP A13 75 82 UP 5 6 11 10 12 13 14 15 16...

Page 13: ...E TERGIPAVIMENTO 7 2 5 MONTAGGIO E SMONTAGGIO DEL PARASPRUZZI 7 3 MONTAGGIO SMONTAGGIO E REGOLAZIONE DEGLI ACCESSORI 7 4 RIEMPIMENTO E SCARICO DEL SERBATOIO SOLUZIONE 7 5 SCARICO DEL SERBATOIO DI RECU...

Page 14: ...r poter eseguire interventi che la richiedano Tecnico Lo sono le persone che possiedono quell esperienza preparazione tecnica conoscenza legislativa e normativa che permettono di eseguire ogni tipo di...

Page 15: ...ri secche acidi e solventi es diluenti per vernici acetone ecc anche se diluiti in fiammabili o esplosivi es benzina olio com bustibile ecc non aspirare mai oggetti in fiamme od incandescenti Non impi...

Page 16: ...o dal simbolo di riciclabilit metalli gomma imballi In caso di componenti contenenti materiali diversi rivolgersi a enti competenti ciascun gruppo omogeneo va smaltito in accordo alla legge in ma teri...

Page 17: ...ccorre ripe tere l operazione al contrario e riportare la forcella nella posizione di funzionamento Foto L1 1 Togliere il perno e la leva ATTENZIONE prima di utilizzare la mac china assicurarsi che la...

Page 18: ...ruppi di batterie a cassone Que sta configurazione del gruppo di alimentazione oltre che robusta necessaria per poter offrire pre stazioni capacit in Ah di rilievo Indipendentemente dalla tipologia di...

Page 19: ...egolazione dell inclinazione del tergipavimento 5 Tubo di aspirazione 6 Pomelli per lo smontaggio delle lame del tergipavimento 7 Ruota del tergipavimento FOTO F 1 Filtro soluzione detergente FOTO G 1...

Page 20: ...TTERIA Le impostazioni di carica del caricabatteria sono in dicate dal lampeggio dei LED luminosi all accen sione del carica batteria stesso LED luminoso ROSSO Foto I 2 lampeg gia 2 volte caricabatter...

Page 21: ...rificare che il serbatoio di recupero sia vuoto se cos non fosse svuotarlo completamente Controllare e chiudere completamente il comando di rilascio della soluzione detergente Riempire il serbatoio so...

Page 22: ...E 6 partendo da un estremit fino ad arrivare al l opposta E normale che per centrare le viti di fissaggio si debba estendere la bandella posteriore questo con lo scopo di portarla alla corretta tensi...

Page 23: ...custodita la gomma dell acqua per il riempimento ed inserirla completamente nel ser batoio potrebbe spostarsi e bagnare parti delicate della macchina Chiudere il coperchio del serbatoio Per lo scarico...

Page 24: ...ogressivamente fino all esaurimento della carica della batteria Quando si accende la luce rossa spegnere il motore spazzole chiudere l erogazione soluzione terminare eventualmente di asciugare il picc...

Page 25: ...mpletamente la superficie da eventuali leggere tracce di acqua attendere qualche secondo poi sollevare il tergi pavimento e spegnere il motore d aspirazione Dirigersi verso un punto adatto di scarico...

Page 26: ...riore ed inferiore della macchina Lavare con acqua corrente se necessario e verifi care l effettiva uscita di soluzione sulle spazzole Serrare bene il filtro per evitare perdite durante il funzionamen...

Page 27: ...Smontaggio delle spazzole e controllo dello stato di usura Verificare che non ci siano ele menti estranei che impediscono il movimento o l efficacia degli organi di pulizia X Controllo visivo dello st...

Page 28: ...caldata Verificare le situazioni di utilizzo che possono avere causato il guasto pendenza elevata ecc attendere 30 min e provare ad evitare gli stessi utilizzi non cor retti Se il problema persiste ri...

Page 29: ...n si risolve il problema contattare il servizio tecnico autorizzato Il costruttore NON potr essere d aiuto a pro blemi causati dall utilizzo di batterie e carica batterie non forniti direttamente spaz...

Page 30: ...ADJUSTMENT 7 2 5 SPLASH GUARD ASSEMBLY DISASSEM BLY 7 3 ACCESSORY ASSEMBLY DISASSEMBLY 7 4 FILLING AND DRAINING THE DETER GENT SOLUTION TANK 7 5 DRAINING THE RECOVERY TANK 7 6 DRIVING THE MACHINE 7 7...

Page 31: ...experience technical education legi slative and regulatory knowledge that allows him to carry out any type of required work and the abi lity to recognise and to avoid possible risks during machine in...

Page 32: ...nd or uncontrolled accelera tions Use only the lowest speed The machine can be handled on ramps and or steps only with the brush head and squeegee lifted off the ground Never park the machine on a slo...

Page 33: ...r liquid is noted immediately turn off the suction motor Do not use the machine on textile flooring such as rugs carpeting etc Wax foaming detergents or dispersions along the hoses may cause serious p...

Page 34: ...verall dimensions using an inclined surface Solidly anchor the machine and the squeegee to the pallet using metallic brackets or other elements that can bear the weight of the parts Lift the pallet wi...

Page 35: ...ures Therefore the capacity of a battery varies depen ding on how fast it uses energy current That s why there s such a variation in the capacity values expressed as C5 or C20 These factors must be ta...

Page 36: ...witch settings for PB Acid GEL charging curve Photo L1 1 Electromechanical brake fork lever Photo L2 1 Unblocking lever 2 Pin Photo L3 L4 L5 Electromechanical brake unblocking procedure Photo M XS 75...

Page 37: ...Using different batteries may cause se rious damage to the machine or may require them to be charged more frequently During installation or when performing any type of battery maintenance the operator...

Page 38: ...eries connected to the battery charger when the machine is not being used If the machine is not used for extended time pe riods Charge the battery during the night after the last work period then disc...

Page 39: ...e rows of brushes to become lower than 1 cm Do not allow the thickness of the abrasive disks to become less than 1 cm Working with excessively worn brushes or excessi vely thin abrasive disks may dama...

Page 40: ...sing the for ward reverse lever even while pressing on the ac celerator pedal 7 7 WORK METHOD 7 7 1 PREPARATION AND WARNINGS Remove any loose solid residue from the surface to be treated using suitabl...

Page 41: ...s against walls or other objects Allow the detergent solution to work on the dirt ac cording to what is indicated in the information re lative to the detergent used Second set of operations Follow the...

Page 42: ...rs or to install new ones 8 4 ACCESSORIES Remove and clean the brushes or the scraper disks To avoid damaging the floor and the machine carefully check if foreign matter such as metallic parts screws...

Page 43: ...vel in the battery cells if batteries are not maintenance free X Remove brushes and check for brush wear foreign bodies and wrapped belts X Verify the machine general conditions X Verify that suction...

Page 44: ...ts contact the authorised ser vice centre 9 2 2 THE MACHINE DOESN T MOVE FOR WARD The direction selection lever is in the neutral po sition Select a running direction The advancement pedal is not pres...

Page 45: ...anual If this does not solve the problem contact the authorised technical service centre The manufacturer CANNOT solve problems caused by using batteries and battery char gers that were not directly s...

Page 46: ...LA BAVETTE ANTI ECLABOUSSURES 7 3 MONTAGE ET DEMONTAGE DE LES BROSSES 7 4 REMPLISSAGE ET VIDANGE DU RESERVOIR DE LA SOLUTION DETERGENTE 7 5 VIDANGE DU RESERVOIR DE L EAU SALE 7 6 CONDUITE DE LA MACHIN...

Page 47: ...ci des sous Machine Cette d finition remplace la d signa tion commerciale laquelle se r f re ce manuel Op rateur Ce sont les personnes qui condui sent la machine et qui sont instruites sur son fon cti...

Page 48: ...a let nuisible la sant poussi res nocives gaz etc sur des routes ou des passages publics ni l ext rieur en g n ral La plage de temp rature d exercice pr vue est comprise entre 4 C et 35 C La machine d...

Page 49: ...r elles offrent la cer titude que l appareil puisse fonctionner en toute s curit et sans inconv nient N utilisez jamais de pi ces r cup r es sur d autres machines A la fin de la vie de la machine il e...

Page 50: ...e Visser le pivot Photo L2 2 et le levier de d blocage Photo L2 1 dans la fourche de d blo cage du frein lectrom canique Photo L1 1 Tirer le pivot vers l ext rieur Photo L3 Tourner le levier de d bloc...

Page 51: ...ie des r servoirs est en poly thyl ne antichocs de 7 8 mm d paisseur Tout est simple et tr s solide sans complications inutiles Le logement des batteries peut accueillir des bat teries de grande capac...

Page 52: ...re chocs 6 Bavette anti claboussures 7 Roue motoris avant 8 Tableau logement composants lectriques 9 Volant PHOTO B 1 Gyrophare 2 Tuyau de vidange du r servoir eau sale 3 Bouchon tuyau de vidange du r...

Page 53: ...ente du plateau brosses 14 S lecteur lev e descente du suceur 15 Interrupteur du moteur d aspiration 16 Potentiom tre du r glage de la vitesse d avancement 5 2 2 BATTERIES Si elles sont fournies les b...

Page 54: ...commande sont sur 0 ou au repos branchez le connecteur des batteries celui de la machine Fermez le logement batteries en abaissant le r servoir de l eau r siduelle en veillant n craser aucun fil 6 3 P...

Page 55: ...Baisser le syst me de soul vement pour viter de devoir tenir soulev le corps pendant les phases de liaison Enlever le tuyau d aspiration du corps du suceur Photo E 5 D visser les pommeaux de fixation...

Page 56: ...llage du produit Utilisez exclusivement des produits adapt s la surface et la salet liminer La machine a t con ue pour tre utili s e avec des d tergents non moussants et biod gradables adapt s aux aut...

Page 57: ...eur de rota tion des brosses Interrupteur position brosses pour abaisser en posi tion de travail ou soulever en position de repos d pla cement le groupe de brosses sur le du sol Interrupteur aspiratio...

Page 58: ...e un mur ou autre Laissez agir quelque temps la solution d tergente en suivant les indications report es sur le mode d emploi du produit Deuxi me op ration Proc dez comme indiqu dans le paragraphe pr...

Page 59: ...rs Contr lez soigneusement si des corps trangers ne se sont pas encastr s pi ces m talliques vis co peaux ou cordes et autres ce qui endommagerait le sol et la machine V rifiez le niveau des soies des...

Page 60: ...vement ou l efficacit des organes X Contr le visuel de l tat g n ral de la machine X V rifier que les tuyaux et les conduits d aspiration ne soient pas bouch s ou obstru s X Contr le de l usure des b...

Page 61: ...a panne d clivit trop lev e etc attendez 30 minutes et vitez les m mes conditions d exercice Si le probl me persiste adressez vous un centre de service apr s vente agr 9 2 2 LA MACHINE N AVANCE PAS Le...

Page 62: ...aucune aide en cas deprobl mesdus desbatterieset unchargeur de batteries qu il n a pas fourni en raison d une surchauffe V rifiez et liminez la raison ayant provoqu la surchauffe pr sence de bouts de...

Page 63: ...SQUEEGEES 7 2 5 EINSETZEN UND ABNAHME DES SPRITZSCHUTZES 7 3 EINBAU UND AUSBAU DER B RSTE 7 4 BEF LLEN UND ENTLEEREN DES L SUNGSBEH LTERS 7 5 ENTLEEREN DES SAMMELTANKS 7 6 FAHREN DER MASCHINE 7 7 ARBE...

Page 64: ...verwendet die nachstehend definiert und abgebildet werden Maschine Dieser Begriff ersetzt die Handelsbe zeichnung auf die sich dieses Handbuch bezieht Bediener Person oder Personen die die Ma schine n...

Page 65: ...chine ist der je weilige Geb udetyp zu ber cksichtigen und es sind die dort geltenden Sicherheitsbedingungen strikt zu beachten Die Maschine nicht an schlecht beleuchteten Orten in explosionsgef hrdet...

Page 66: ...ie Maschine durch Trennen des Batterieverbinders von der Stromver sorgung getrennt wird Alle Eingriffe an der elektrischen Anlage sowie alle Wartungs und Reparatureingriffe insbeson dere die nicht aus...

Page 67: ...r Maschine entfernen Die Metallb gel und Kunststoffumreifungen en tfernen die die Maschine an der Palette befestigen Die B rsten und Squeegees aus der Verpackung nehmen Die Maschine nach hinten von de...

Page 68: ...isten das perfekte Trocknen auch auf gefliesten B den Die beson dere ausgeglichene Form des Maschinenrahmens und der Squeegee Halterung tragen dazu bei dass in den Kurven auch bei einem Squeegee mit r...

Page 69: ...assige Leistungen lange Lebensdauer Sicherheit und Wirtschaftli chkeit 5 1 3 BATTERIELADEGER T Dieses Hochfrequenz Batterieladeger t gew hrlei stet ein optimales Laden der Batterie und verl n gert der...

Page 70: ...3 Schl sselschalter 4 Elektromechanischen Bremse 5 Vorw rts R ckw rtsgangschalter 6 Thermischer Sicherungsautomat B rstenmotor 7 Thermischer Sicherungsautomat Saugmotor 8 Geschwindigkeitsanpassung pot...

Page 71: ...se mit S ure be f llt geliefert Pb S ure Batterien und sind ein satzbereit Es sind jedoch auf jeden Fall die in dem der Batterie beigestellten Handbuch enthaltenen Anweisungen und Vorschriften bez gli...

Page 72: ...eladen werden Nach dem Laden das Batterieladeger t ausschalten und den Verbinder von den Batterien trennen Wenn die Maschine mit Pb S ure Batterien ausge stattet ist ist die Dichte der die Elemente be...

Page 73: ...er Schleif scheiben arbeiten Einbau Sicherstellen dass die B rstenplatte hochgefahren ist andernfalls ist die Platte unter Beachtung der An leitungen im spezifischen Abschnitt hochzufahren Sicherstell...

Page 74: ...gen Anwendungsland der Ma schine geltenden Gesetze zur Entsorgung von Ab wasser zu befolgen Die Maschine ausschalten und den Z ndschl ssel ziehen Den Ablassschlauch aus seiner Halterung nehmen den Sch...

Page 75: ...keit Das Fahrpedal sanft treten und dabei berpr fen dass alle Systeme funktionieren Das Gaspedal bis zum Anschlag treten um die Ar beitsgeschwindigkeit zu erh hen Die h chste Fahrgeschwindigkeit und d...

Page 76: ...tcentern oder durch auf kompetentes Fachpersonal durchf hren lassen das mit den an wendbaren Sicherheitsvorschriften vertraut ist Die regelm ige Wartung der Maschine unter Bea chtung der Anleitungen d...

Page 77: ...sind die Anweisungen des Herstellers und alle im Han dbuch enthaltenen Anweisungen zu befolgen Wenn die Batterieelemente nicht mit der S urel sung bedeckt sind kommt es zu einer Oxydation was die Fun...

Page 78: ...Reinigung des Filters der Reinigungsl sung X Allgemeine Reinigung der B rstenplatte der Halterung und des Squeegees X Die Hebe und Senkbewegung der B r stenplatte kontrollieren X Die Hebe und Senkbew...

Page 79: ...mst nden forschen die zur St rung gef hrt haben k nnen zu gro e Steigung usw 30 Minuten warten und die Maschine wieder einschalten wobei die falschen Einsatzbedingungen zu vermeiden sind Wenn das Prob...

Page 80: ...icht gel st werden kann ist ein autori sierter technischer Kundendienst zu kontaktieren Der Hersteller kann NICHT bei der L sung von Problemen behilflich sein die auf nicht direkt gelieferte Batterien...

Page 81: ...E LA BOQUILLA DE SECADO 7 2 4 REGULACI N DE LA BOQUILLA DE SECADO 7 2 5 MONTAJE Y DESMONTAJE DEL PROTECTOR CONTRA SALPICADURAS 7 3 MONTAJE DESMONTAJE Y REGULAC I N DE LOS ACCESORIOS 7 4 LLENADO Y DESC...

Page 82: ...n la m quina y que conocen su funcionamiento pero que no tienen conocimien tos t cnicos espec ficos para poder realizar las inter venciones que pudieran ser necesarias T cnico Por t cnico se entienden...

Page 83: ...de suciedad nociva para la salud polvos gases etc en calles o pasajes p blicos y en ambientes exteriores en general El campo de temperatura previsto para el uso de la m quina es de 4 C a 35 C coloque...

Page 84: ...ermite usar s lo accesorios y recambios originales proporcionados exclusivamente por el fabricante puesto que s lo estos recambios garan tizan que la m quina funcione de modo seguro y sin inconvenient...

Page 85: ...mbalaje el mismo deber eliminarse seg n lo establecido en las leyes vigen tes en materia 4 4 DESBLOQUEO DEL FRENO ELECTROME C NICO Cuando la m quina est sin bater a o si es apa gada resulta ser frenad...

Page 86: ...hapa y la pintura durante miles de horas en ne blina salina Los tornillos son 100 de acero inoxi dable los dep sitos carrocer a son de polietileno antigolpes de 7 8 mm de espesor Todo es simple y suma...

Page 87: ...DESTELLANTE 3 TUBO DE VACIADO DEL DEP SITO DE RECUPERACI N 2 TAP N DEL TUBO DE VACIADO DEL DEP SITO DE RECUPERACI N 4 TAP N DE LLENADO DEL DEP SITO DE LA SOLUCI N DETERGENTE 6 TUBO DE ASPIRACI N 7 TAP...

Page 88: ...LLAVE 6 FRENO ELECTROMEC NICO 7 SELECTOR DE MARCHA ADELANTE ATR S 8 DISYUNTOR T RMICO DEL MOTOR CEPILLOS 9 DISYUNTOR T RMICO DEL ACTUADOR DEL GRUPO CEPILLOS 10 DISYUNTOR T RMICO DEL ACTUADOR DE LA BO...

Page 89: ...co nectores no tire nunca de los cables Fije el cableado bater a a la bater a co nectando los bornes exactamente y s lo en los polos marcados con el mismo s mbolo cableado rojo cableado negro Un event...

Page 90: ...ras de la boquilla de secado en el estribo sobre el soporte Atornillar los dos p mulos Foto E 3 para fijar la boquilla de secado Insertar el tubo de aspiraci n de la m quina Foto E 5 en el cuerpo de l...

Page 91: ...erior a 50 C Antes de llenar el dep sito de la soluci n lim piadora hay que vaciar por completo del dep sito de recuperaci n Para el llenado Quite el tap n situado en la parte anterior de la m quina D...

Page 92: ...lante o atr s Regulador de velocidad para seleccionar la velo cidad de adelanto a pedal completamente compri mido Interruptor de los cepillos para poner en marcha el motor de rotaci n de los cepillos...

Page 93: ...fecto sobre la sociedad seg n lo indicado en las informaciones relativas al detergente utilizado Segunda operaci n Proceda como se explica en el p rrafo precedente Lavado Directo 7 7 3 Para evitar da...

Page 94: ...in strucciones del correspondiente p rrafo gire los la bios para desgastar los otros cantos vivos o monte otras nuevas 8 4 ACCESORIOS Desmontar y limpiar los cepillos o los platos de ar rastre Comprue...

Page 95: ...ROGRAMADO Para todas las operaciones descritas en este p r rafo rem tase a las instrucciones y a las adverten cias detalladas en los correspondientes p rrafos A la necesidad Despu s de cada empleo Sem...

Page 96: ...placa de control se ha sobrecalentado Averiguar las situaciones de empleo que pudie ran haber causado la aver a inclinaci n elevada etc tera esperar 30 min y probar a evitar los mi smos empleos no cor...

Page 97: ...lame al ser vicio t cnico autorizado El fabricante NO podr ayudarle a solucionar los problemas causados por usar bater as y cargadores de bater as no suministrados di rectamente Presionar el pedal de...

Page 98: ...004 108 CE e alla Diret tiva Bassa Tensione 2006 95 CE e alle seguenti norme armonizzate EN 60335 1 EN 60335 2 72 EN 62233 2008 EN 55014 1 2006 EN 55014 2 1997 A1 2001 EN 61000 3 2 2006 EN 61000 3 3 1...

Page 99: ...2004 108 and Low vol tage Directive EEC 2006 95 and to the following standards EN 60335 1 EN 60335 2 72 EN 62233 2008 EN 55014 1 2006 EN 55014 2 1997 A1 2001 EN 61000 3 2 2006 EN 61000 3 3 1995 A1 20...

Page 100: ...004 108 et Di rective Basse Tension CEE 2006 95 ainsi qu aux normes EN 60335 1 EN 60335 2 72 EN 62233 2008 EN 55014 1 2006 EN 55014 2 1997 A1 2001 EN 61000 3 2 2006 EN 61000 3 3 1995 A1 2001 A2 2005 L...

Page 101: ...magnetische Vertr glichkeit 2004 108 EWG und Niederspan nung 2006 95 EWG bereinstimmt und die Normen EN 60335 1 EN 60335 2 72 EN 62233 2008 EN 55014 1 2006 EN 55014 2 1997 A1 2001 EN 61000 3 2 2006 EN...

Page 102: ...romagn tica CEE 2004 108 y Directiva BajaTensi n CEE 2006 95 y a las normas EN 60335 1 EN 60335 2 72 EN 62233 2008 EN 55014 1 2006 EN 55014 2 1997 A1 2001 EN 61000 3 2 2006 EN 61000 3 3 1995 A1 2001 A...

Page 103: ...3 A B SWIFT 43E...

Page 104: ...facturing defects shall be examined by one of our Technical Service Centres or at our factory and charged in accordance with the outcome The following are anyhow not covered by the warranty accidental...

Page 105: ...n Die Reparatur erfolgt in einem unserer autorisierten Technischen Kundendienstcenter oder in unserem Firmensitz die Transportkosten hat der Kunde zu tragen der auch die Haftung f r den Transport bern...

Page 106: ...3 A B SWIFT 43E...

Page 107: ...3 A B SWIFT 43E...

Page 108: ...cod 7 504 0096 03 2011 Via J F Kennedy 12 46020 PEGOGNAGA MN ITALY...

Reviews: