LAVA Computer MFG STS Product Family User Manual – A01
2 Vulcan St. Toronto, ON Tel: +1 416 674-5942 www.lavalink.com
7 of 20
Canada, M9W 1L2 Fax: +1 416 674-8262 Toll Free (US & Canada): 800 241-5282
Hardware Setup - STS-3U
The STS-3U is a USB HUB, which has no required setup in the tablet. The tablet battery indicator icon can
be useful to have enabled, but is optional. The charging status of the tablet can always be checked in the
tablet battery menu.
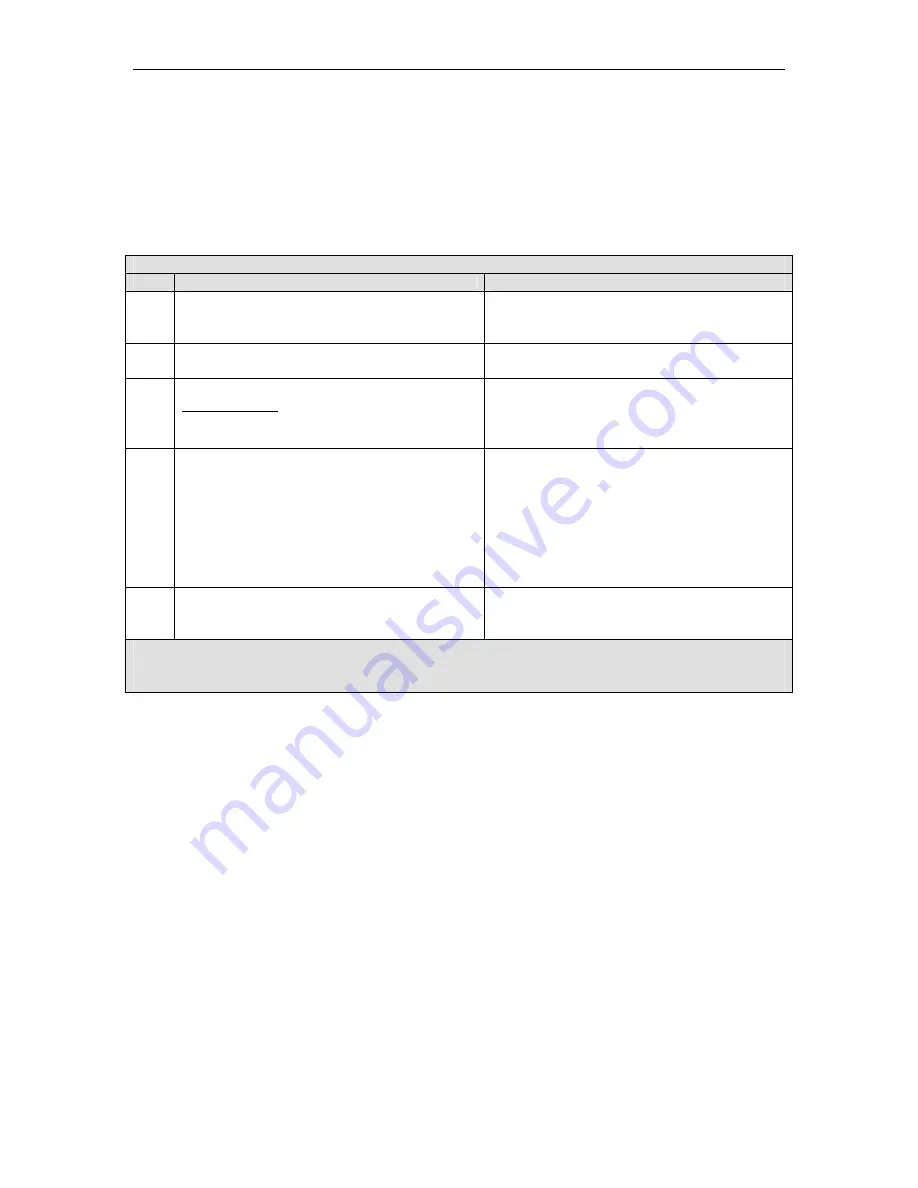
Hardware Setup – for the STS-3U
Step
Procedure
Observations
1
Turn on the tablet.
The standard startup banner(s) and music are
reported. A new tablet requires the standard first
time setup required by manufacturer.
2
Plug the USB Power Supply into a wall outlet.
If using a battery pack, turn the battery pack on.
3
Connect a USB Power Supply to the
5V Power Input of the STS-3U.
The Charge-Only light (green) will flash on and
off for 2 seconds, after which the SimulCharge
light (yellow) is on and the Charge-Only light
(green) is off.
4
Connect the STS-3U to the tablet with the
custom Micro USB to Micro USB cable
provided.
Always verify the connector orientation before
attempting to insert it to a device. Either end of
the cable can be plugged into to tablet.
A tablet status message briefly appears to report
“USB connector connected” and issues a beep.
The tablet battery icon will now show a
lightning bolt to indicate it is being charged.
5
Optionally plug in a USB accessory to one of
the STS-3U USB-A receptacles.
The tablet reports a connection message such as
“USB mass storage connected” for a flash
memory stick.
The tablet is now operating as a USB Host and is being charged by the USB Power Supply.


