


Rear Ceiling:
The projector mounted upside-down from the ceiling behind the screen.
NOTE:
A projector mount is required to install the projector (not included).
A special rear projection screen is required (not included).
To Reduce Image Distortion, it is recommended to move the projector as close to centre of screen.
Distance Between Projector and Screen
Measure the distance between the projector and the position of the screen. This is the projection
distance.
Screen
Projector
Remote Control
POWER Press to power unit ON / OFF.
Mute Mutes all audio from the projector.
RANDOM Press to random playing for the loaded disc.
OSD Press to display information of the current video/ audio.
Angle On supported DVDs, press and hold to view alternate angles.
Subtitle Press to change subtitle mode.
Repeat Press to cycle through repeat options for the loaded disc.
PBC Press to activate Play Back Control function for a supported disc. Press it again
to be off.
Title Press to view the title menu on a loaded DVD.
DVD Menu Press to view the main menu on a loaded DVD.
A-B Press to create a repeating loop on a loaded DVD.
PROG Program a loaded disc to play chapters and titles or tracks in a specified
order.
SLOW During playback, enables slow-motion playback for disc. Press OK button to
resume.
SETUP Press to access the setup menu for DVD.
Previous/Next Press to skip between chapters or tracks.
Rewind/ Fwd Press to search through an individual chapter or track.
Arrows (UP/DOWN/LEFT/RIGHT)/ OK Press to navigate and confirm selections in settings and other
menus.
SOURCE Press to select media source (AV/HDMI 1/ HDMI 2/VGA/ DVD/MEDIA PLAYER).
DVD Press to enter the DVD player mode when in another source.
MENU Press to access projector settings menu.
EXIT Press to exit the projector menu or the audio/movie playback.
Play/Pause Press here to play or pause the audio / movie playback.
STOP Stop the audio/video /photo playback.
FLIP Press to rotate/ mirror projector screen.
Audio Press here to switch the available audio channels provided by the disc.
VOL + Adjust volume up.
VOL- Adjust volume down.
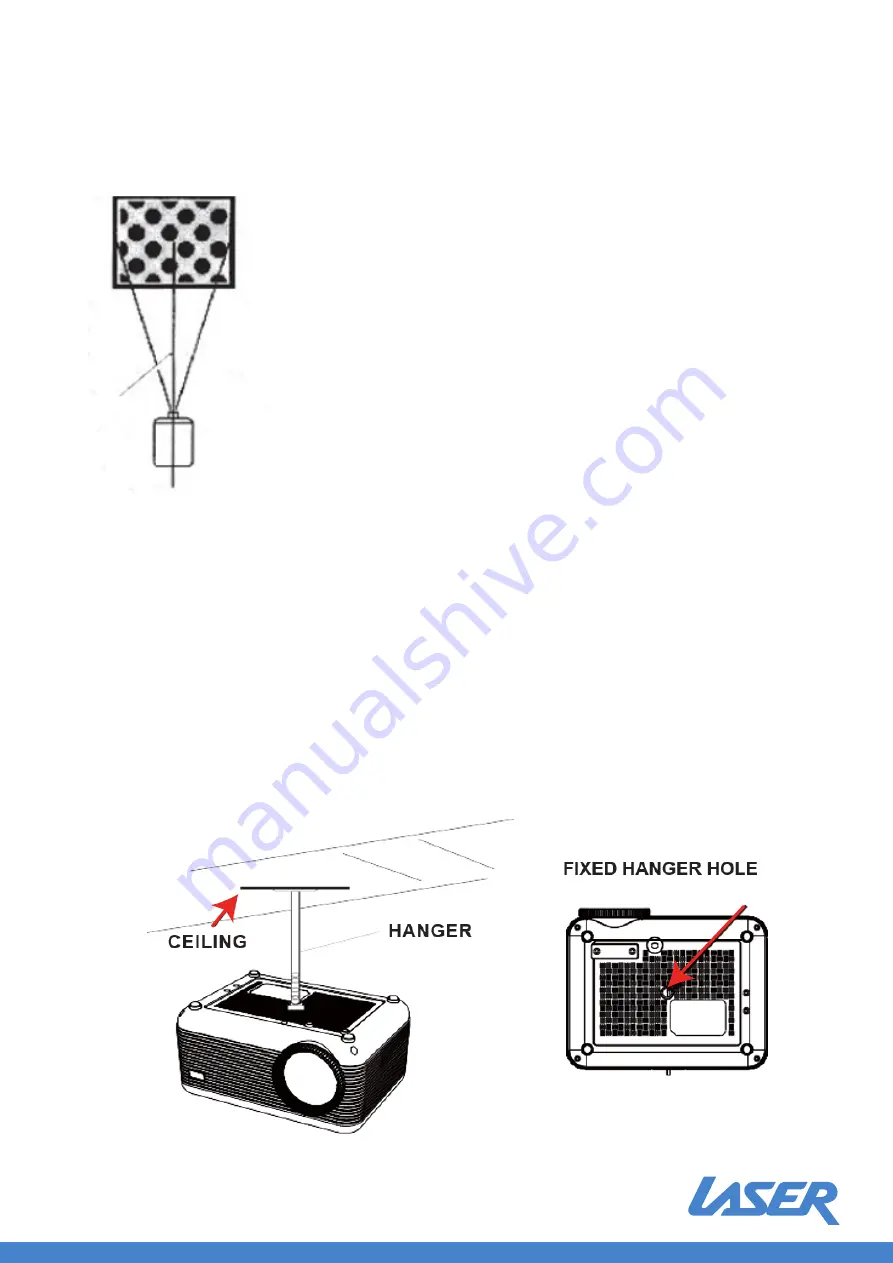
Mounting your Projector to the Ceiling
When mounting the projector to the ceiling, please purchase a projector mount recommended by an
installation professional and follow the instructions of the mount.
Before mounting the projector to the ceiling, please check to ensure the ceiling structure can
support the weight of the projector and the mount. If in doubt, please ask the advice from an
installation professional.
NOTE: Projector mount and screw(s) are not included.
Instruction Manual
PJT-DVDHD-906


