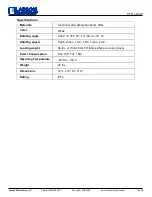
PTB-1-WHT
Larson Electronics, LLC
Phone: (800) 369-6671
Fax: (903) 498-3364
www.larsonelectronics.com
2
of
8
Warning:
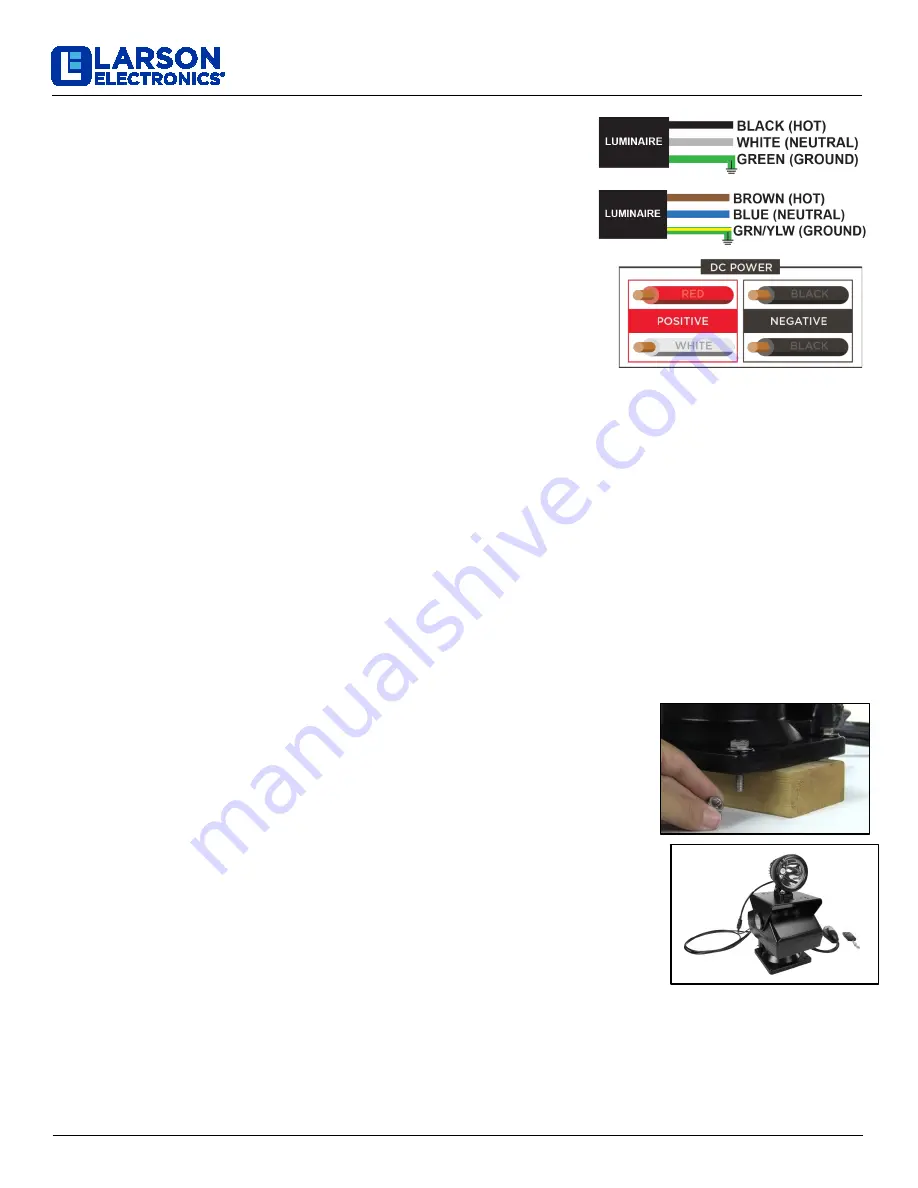
Check product label for correct input voltage!
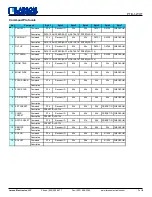
Attach supply line wires to the appropriate light fixture wires as shown
in the diagram
Secure each pair of wires according to the diagram. Utilize a junction box or
similar device and take precautionary steps for weatherproofing all
connections if installed in a location where water may come in contact with the
unit. Ensure the unit is properly grounded and that wiring is done according to
all local and national electrical/building codes.
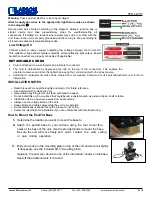
Low Voltage DC
Connect power to power supply outputting low voltage between 9-42 Volts DC.
This variable voltage allows greater versatility without affecting light output. Ensure
deutsch connectors are properly connected (If applicable)
DETACHABLE CORDS
•
Cord is attached via a weatherproof 2-pin Deutsch connector.
•
The cord is detachable by depressing the tab on the top of the connectors. This enables the
operator to remove and store the light while leaving the cord connected to the power source.
•
Additional or replacement cords can be ordered from our website. Contact us or visit LarsonElectronics.com for more
information.
INSTALLATION NOTES
•
Read this user’s manual thoroughly and retain it for future reference.
•
Use a damp cloth to clean the unit.
•
Never attach anything to this unit that could lead to danger.
•
Do not install this unit to a surface that could become unstable such as a stand, tripod, shelf or table.
•
Install the unit in an open area away from heat sources.
•
Always use the voltage listed on the unit.
•
Keep objects and cables away while the unit is in operation.
•
Do not electrically overload this unit to prevent a risk of fire.
•
Contact an electrician for installation if you are not familiar with electrical wiring.
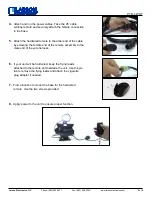
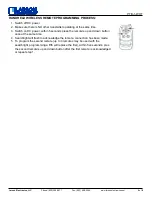
How to Mount the Pan/Tilt Base
1.
Determine the location you want to mount the base to.
2.
Attach the pan/tilt base to your surface using the four
corner thru-
holes at the base of the unit. Use the provided
bolts to mount the base.
Be sure the unit will move freely
and won’t contact the wall, ceiling
or pole during
operation.
3.
Bolt your device to the mounting plate on top of the unit
and secure it tightly.
If necessary, use the included 8x10”
mounting plate.
Optional:
Connect your device to one of the indi/-leads on the base.
Seal off the additional wire if not used.