EPL-BS-150HPS
Larson Electronics, LLC
Phone: (800) 369-6671
Fax: (903) 498-3364
www.larsonelectronics.com
2
of
2
2.
Protection Association Bulletin NFPA No. 70B: Recommended Practice For Electrical Equipment Maintenance
(
3.
The lens should be cleaned periodically to ensure continued lighting performance. To clean, wipe the lens with a
clean, damp cloth. If this is not sufficient, use a mild soap or a liquid cleaner such as Collinite NCF or Duco #7. Do
not use an abrasive, strong alkaline, or acid cleaner. Damage may result.
4.
Visually check for undue heating evidenced by discoloration of wires or other components, damaged parts, or
leakage evidenced by water or corrosion in the interior. Replace all worn, damaged, or malfunctioning
components, and clean gasket seals before putting the luminaire back into service.
5.
Electrically check to make sure that all connections are clean and tight.
6.
Mechanically check that all parts are properly assembled.
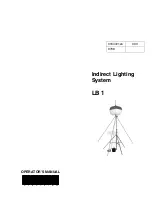
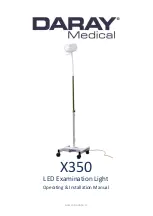
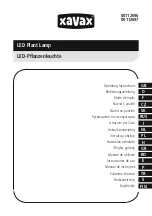
REMOVAL AND REPLACEMENT OF COVER
In most cases, a rectangular steel bar about can be placed between the lugs
provided on the face of the cover and rotated counterclockwise to accomplish
the removal. See figure below. Excessive force must not be used as bar may
slip and cause injury.
Before replacing the cover, thoroughly clean the threads in both the cover and
shell, then lubricate threads with thin film of a
non-drying grease or petrolatum. This will enable the cover to be turned more
easily and will facilitate its removal later.
Thread the cover onto the shell by hand until the cover contacts the shell o-ring. Use the rectangular steel bar
to rotate the cover another 1/12 to 1/10 of a turn or between 2.50 inches (64 mm) and 3.00 inches (76 mm)
measured on the outside diameter.
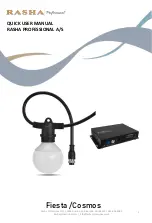
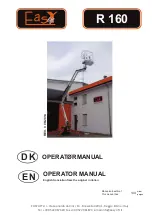
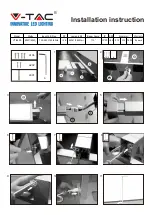
COVER GLASS REPLACEMENT
To replace the cover glass, first loosen the retaining ring by
turning it counterclockwise with a hammer and drift punch
applied to the lugs on the ring. Once loose, it may be rotated
out by hand. Remove the cover glass and cover o-ring which
should also be replaced.
Threads in the cover, the retaining ring and the shell should
be thoroughly cleaned and then lubricated liberally with a
non-drying grease or petrolatum to facilitate assembly and
disassembly and to inhibit corrosion. After replacement of the
cover, o-ring and the cover glass, the retaining ring must be tightened against the glass with the hammer and
the drift punch until the clearance between the cover glass and the cover is such that a 0.0015 inch (0.04 mm)
feeler will not enter the joint more than 1/8 inch (3 mm) at any point.
TROUBLESHOOTING
Refer to the guide below or contact the manufacturer if the fixture does not function properly.
Is the correct line voltage being supplied to the fixture?
Is the fixture properly grounded?
Make sure installed power switch is functioning properly (if applicable).
THESE INSTRUCTIONS MAY NOT COVER ALL DETAILS OR VARIATIONS OF THIS PRODUCT FOR YOUR EQUIPMENT OR INSTALLATION REQUIREMENTS.
SHOULD FURTHER INFORMATION NOT COVERED BY THESE INSTRUCTIONS BE REQUIRED, PLEASE CONTACT LARSON ELECTRONICS BY EMAIL AT
OR BY PHONE AT 1-800-369-6671 FOR FURTHER ASSISTANCE.
PLEASE VISIT LARSONELECTRONICS.COM FOR
WARRANTY
AND
RETURN
INFORMATION.