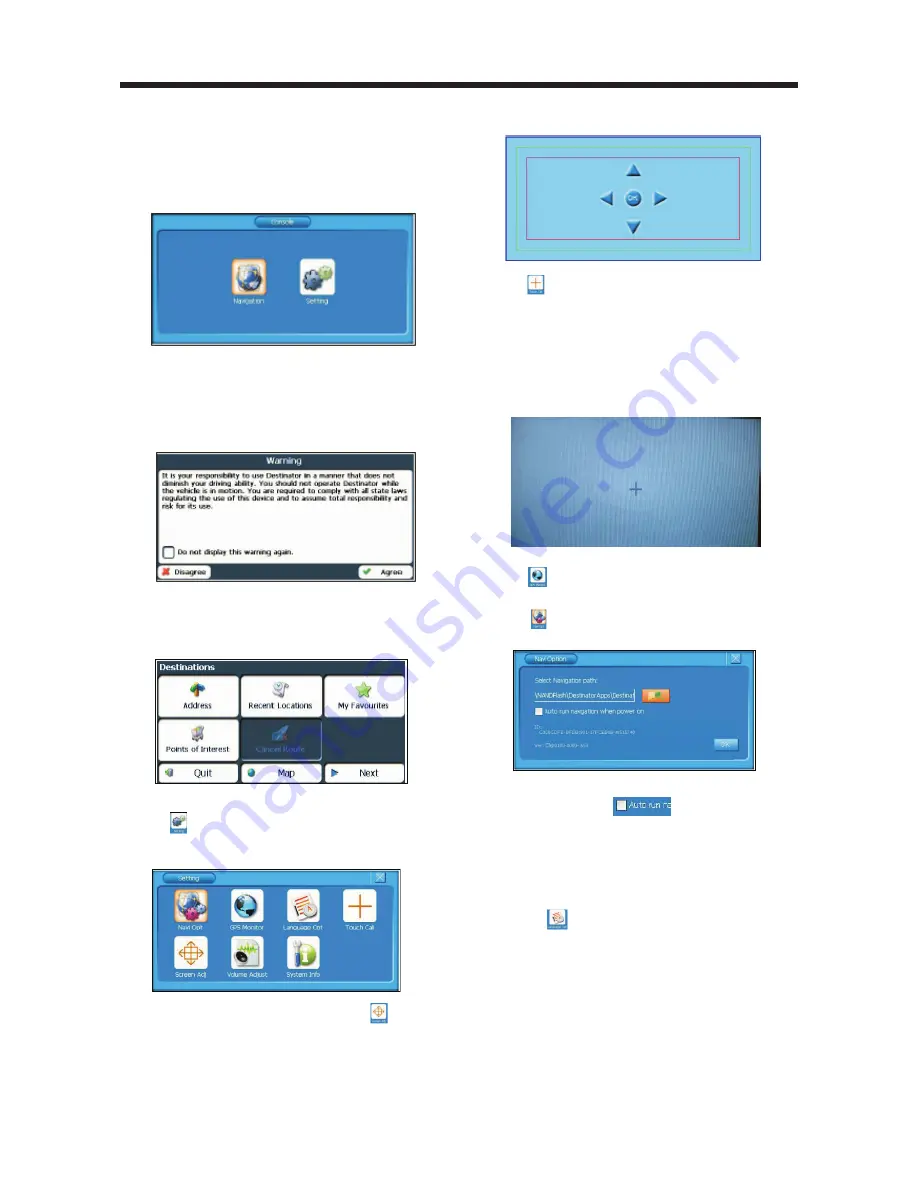
• Console
When all the connections is finished,
turn the unit on, switch the mode to
navigation mode, the unit will enter the
following interface automatically.
Note: If you have set “Auto navigation
when power on”, when you turn on the
unit, it will skip Console interface and
enter navigation interface automatically.
Tap Agree, the following interface will
appear, tap Quit will return to Console
interface.
• Setting
Tap
icon on Console interface to
enter Setting interface like followed:
1) Use remote control to select
icon
and enter screen adjust mode, you can
see the following interface displayed
on screen. Use remote control to move
the screen up/down, left/ right. Then
press OK button on remote control to
confirm the screen adjustment.
2) Tap
to enter screen calibration mode,
and you can see a plus displayed on
screen. Tap the plus firmly, the plus will
continue to move until the screen is
aligned. And “OK” will appear on
screen, tap OK will exit screen
calibration mode.
3) Tap
to enter GPS Monitor interface,
it is for factory testing.
4) Tap
to enter Navi Option interface.
Tap check box
to enable “Auto
run navigation when power on”. When
you select “Auto run navigation when
power on”, every time when you turn
the unit on, it will enter navigation mode
automatically.
5) Tap
to enter Language Option
menu. You can select system language
in this menu.
9
OPERATION


