background image

• ADDING SAND TO THE BOTTOM OF
  FIREBOWL HELPS PROTECT AGAINST 
  THE CORROSIVE NATURE OF THE ASHES
  AND WILL EXTEND THE LIFE OF
  THE FIREBOWL.
• IF YOU ARE NOT GOING TO USE THE
  BALL 'O FIRE FOR A LONG PERIOD 
  OF TIME, STORE AWAY OUT OF THE
  WEATHER OR USE THE COVER TO KEEP
  DRY.
• DO NOT LET FIREBOWL FILL WITH
  WATER.
• DO NOT DUMP ASHES WHERE THEY
  COULD START A FIRE.
• DISPOSE OF ASHES IN PROPER
  RECEPTACLE ONLY AFTER ASHES HAVE 
  COOLED.

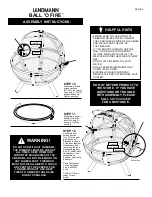
HELPFUL HINTS

STEP 10

Assemble the fixed
screen sections 
[E,F,G] to the center 
ring using (2) 13MM 
bolts and hexnuts.  
Tighten securely.

BALL 'O FIRE

ASSEMBLY INSTRUCTIONS:

STEP 12

Assemble door 
screen section 
[H,J,K] to the pivot 
pins as shown.  
Squeeze the ends 
of the door together 
if necessary and 
insert into the pins.  
Assemble the door 
with (2) 40MM bolts, 
flat washers, lock 
washers and 
hexnuts.  Assemble 
as shown.

Place the firebowl 
on the inside and 
onto the 25MM 
bolts.  

The Ball 'O Fire is 
ready for use.  
Enjoy!  

STEP 11

Assemble the bowl 
handles [N] to the 
bowl [O] using (4) 
hexnuts.  Tighten 
securely.

PAGE 4

DO NOT RETURN PRODUCT TO

THE STORE.  IF YOU HAVE

QUESTIONS OR TROUBLE

WITH ASSEMBLY, PLEASE

CALL 1-877-347-4557

FOR ASSISTANCE.

WARNING!

!

DO NOT USE WITHOUT FIREBOWL,
THE FIREBOWL MUST BE USED AT

ALL TIMES.  KEEP FIREWOOD

WITHIN THE BOUNDARIES OF THE

FIREBOWL.  DO NOT PILE WOOD ON

ANY SCREEN PART.  FIREWOOD

MUST NOT BE ALLOWED TO TOUCH

ANY PART OF THE SCREEN.  FOR

LONGER PRODUCT LIFE, KEEP

FIRES TO A RESPECTABLE SIZE,

DO NOT OVERLOAD.

Hexnut

13MM bolt

40MM bolt

Lock washer

Hexnut

Flat washer

Summary of Contents for 28925

Page 1: ...HIN THE BOUNDARIES OF THE FIREBOWL FIREWOOD MUST NOT BE ALLOWED TO TOUCH ANY PART OF THE SCREEN FOR LONGER LIFE KEEP FIRES TO A RESPECTABLE SIZE DO NOT OVERLOAD DO NOT BURN LEAVES OR GARBAGE IN THE BALL O FIRE KEEP THE BALL O FIRE AWAY FROM BUILDINGS FLAMMABLE ITEMS AND VEHICLES THE BALL O FIRE IS FOR ADULT USE ONLY DO NOT LEAVE UNATTENDED AT ANY TIME WHILE IN USE KEEP SPARK GUARD DOOR CLOSED WHIL...

Page 2: ...XED TOP SECTION 1 CENTER FIXED TOP SECTION 1 RIGHT FIXED TOP SECTION H J K 1 LEFT DOOR SECTION 1 CENTER DOOR SECTION 1 RIGHT DOOR SECTION L M N 1 CONNECTING RING 1 CONNECTING RING W HANDLE 2 BOWL HANDLES Q O 1 BOWL U T S 6 10MM BOLTS 6 20MM BOLTS R 6 25MM BOLTS X 6 CAP NUTS V 2 40MM BOLTS Y 2 LOCK WASHERS W 52 HEXNUTS PAGE 2 BALL O FIRE IF YOU HAVE MISSING OR DEFECTIVE PARTS PLEASE CALL CUSTOMER S...

Page 3: ...t hexnut on the inside 25MM bolt hexnut here 13MM bolt hexnut on the inside STEP 5 Find the center ring C and remove the pre assembled 20MM bolts and hexnuts Carefully place the center ring on the screen sections aligning the holes with the center ring Assemble with the 6 20MM bolts and hexnuts Securely tighten the bolts STEP 6 Assemble screen sections E F G together with 6 10MM bolts and 6 cap nu...

Page 4: ... as shown Squeeze the ends of the door together if necessary and insert into the pins Assemble the door with 2 40MM bolts flat washers lock washers and hexnuts Assemble as shown Place the firebowl on the inside and onto the 25MM bolts The Ball O Fire is ready for use Enjoy STEP 11 Assemble the bowl handles N to the bowl O using 4 hexnuts Tighten securely PAGE 4 DO NOT RETURN PRODUCT TO THE STORE I...

Reviews: