

3
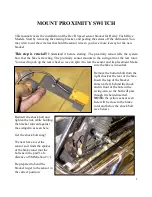
When you think you
have it, turn the ignition
to Accessory position,
and roll the wheel to
make the spokes of the
rotor pass by the sensor.
Each time one passes
the sensor, the LED on
the sensor should go
bright then off.
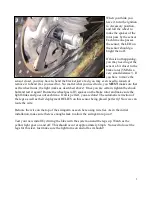
If this is not happening,
you may need to get the
sensor a bit closer to the
brake rotor (5MM is a
very small distance!). If
you have to move the
sensor closer, you may have to bend the bracket just a tad (you may even need to loosen or
remove it to bend it as you need to). No matter what you need to do, you MUST make sure that
as the wheel turns, the light works as described above! Once you are certain, tighten the shock
bolt and test it again! Rotate the wheel past all 5 spokes on the brake rotor and make sure the
light blinks and goes out each time. If all is perfect, you are done! The automatic retraction of
the legs as well as their deployment RELIES on this sensor being placed perfectly! Now we can
route the wire.
Reroute the wire on the top of the swingarm as seen here using wire ties. As in the initial
installation, make sure there is enough slack to allow the swingarm to pivot!
Test your new install by driving the bike with the system on and the legs up. Watch as the
yellow light goes on and off. This should occur at approximately 6mph. No need to lower the
legs for this test. Just make sure the light turns on and off as it should!