


17
Portion Control & Lighting Features
1.
From the Service Menu, press the Portions button.
2.
Adjust the initial pour amount, wait time, and top-off pour
amount for any of the four drink sizes by entering the
amount on the keypad.
A. Drink Sizes C. Wait Time (sec)
B. Pour Amount (ml) D. Top-Off Amount (ml)
A
B
C
D
3. Any size can be disabled by selecting the size, then
pressing the Disable button next to the keypad. To enable,
select the size again.
4.
Press Menu to return to the Service menu. In order to
enable the Portion Control feature on the Home “Pour”
Screen, enter the Configuration menu.
5. At the bottom of the screen, enable the Portion Control
feature by pressing Enable from the “Portions” heading.
6. Press Menu to return to the Service menu.
7. From the Service menu, press the Lighting button.
8.
Adjust the brightness of the screen as well as the brightness
of the nozzle lights when the dispenser is idle or
dispensing.
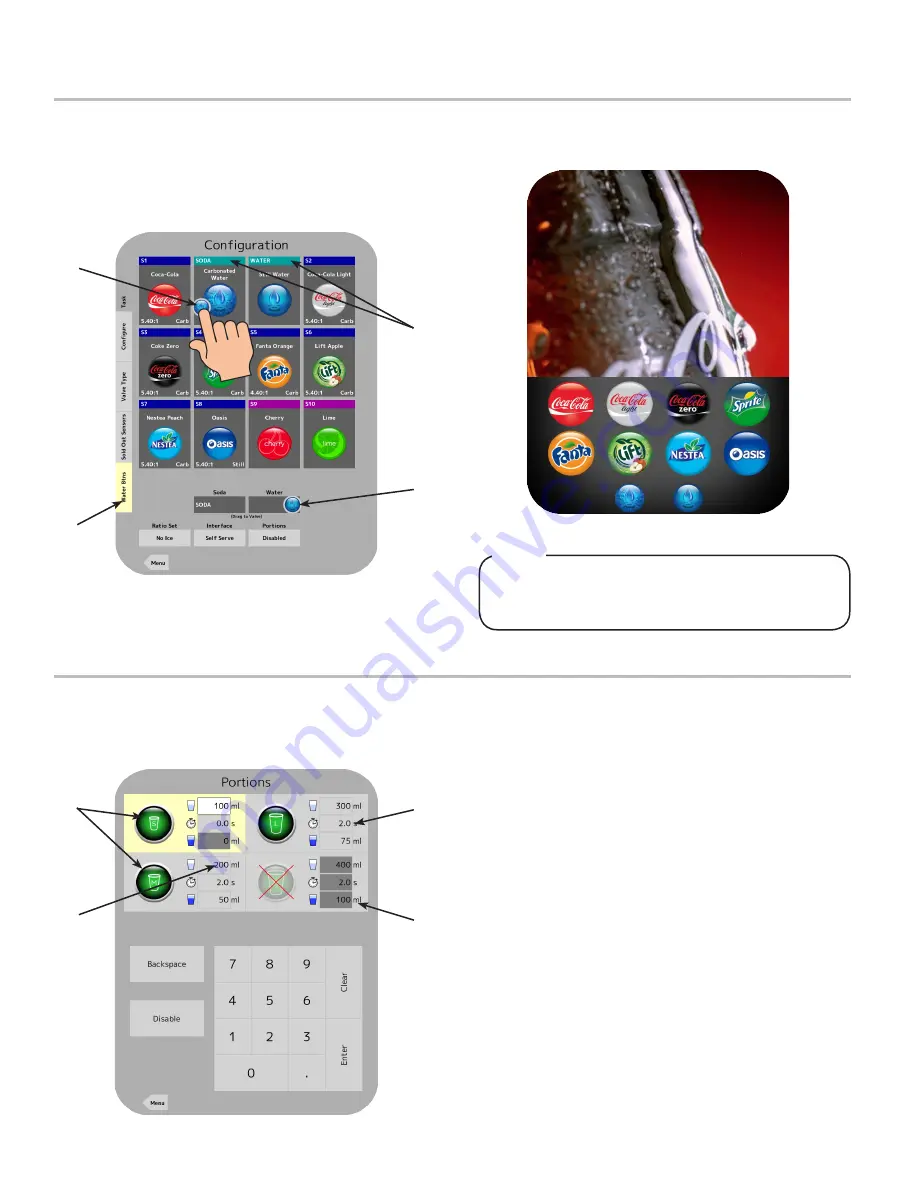
The water buttons on the Main Menu give the
consumer/customer the ability to pour plain or
carbonated water without any syrup.
NOTE
Water Buttons
A. Water Buttons Tab
B. Plain/Carb Water Button
C. Plain/Carb Water Module
- Plain/Carb Water Buttons
on Main Menu
A
B
B
C
1. In order to access the plain and/or carbonated water
modules from the Main Menu, press the Configuration
button from the Service Menu.
2. Press the “Water Btns” tab on the far left side of the screen.
3. From here, the water buttons (carbonated and plain) can be
dragged and placed onto their designated water modules.
4. Once a water button has been dragged and placed over its’
designated water module, a button will appear on the Main
Menu.
Summary of Contents for bridge tower
Page 30: ...30 Unit Wiring Diagram ...


