6
Quick Operation Guide – continued
To Do a Loop Play
define the loop by entering an inpoint and an outpoint. The
minimum duration is 1:15 [one and one-half seconds]. The loop play may be initiated
by either Pbus trigger 5, or by pressing <FCN> the <PLAY> on the front panel. You
may simulate the Pbus trigger by pressing <FCN>, then <5> on the keypad. The
loop will run until either a STOP, RECUE or RECALL command is received. If you
turn on LOOP PRESERVE in the menu, only a STOP command will halt the loop.
You can recall another register without disturbing the loop playback.
To Do a Multi-point Loop Play
set the initial start point in the inpoint of a register
number between 000 and 099 (first 100 registers). You may also set an outpoint if
desired, although it isn’t required. The ‘inner loop’ points should be entered in a
register 100 higher. For example, if your ‘outside points’ are in register 25, your
‘inside points’ should be in register 125. Minimum duration for the inside loop is one
and one-half seconds. The multi-point loop play may be initiated by Pbus trigger 8,
or from the front panel by pressing <FCN>, then <8>. The ddr will start at the initial
start point, then loop between the ‘inner loop’ points. If you send a Pbus trigger 9
[<FCN> <9> from the keypad], the controller will stop looping at the first opportunity,
and play to the ‘outside’ outpoint [register 25 outpoint in the above example].
To Do an Automatic Transfer (Dub)
from a vtr: Set inpoints for both the vtr
(playback) and the ddr (record) channels. Press and hold the device button for the
ddr, then press the vtr’s device button. Both should be lit, with the ddr’s button
flashing. This is the recorder. Press <FCN>, then <REC>. The vtr will cue back 3
seconds from the inpoint and roll. The ddr will go into record at the proper time.
To Add an Offset to All Registers
first select the register number where you’d like
to start [usually 000], and select the channels you want to modify [A, B, C, D] by
lighting up the device buttons. Press <FCN>, then <TM>. The controller will prompt
you to ‘Enter Offset Time’. Enter the time using the keypad. If you want to offset by
a negative number, enter a minus sign first. Press <SET>, then <TM>. The TDC will
start modifying both the inpoints and outpoints of all selected channels. You can
stop the process by pressing STOP.
To Display Pbus Data
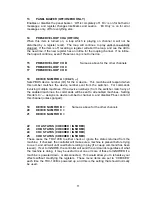
for diagnostic purposes, turn on Item 30 in the menu, PBUS
DATA DISPLAY. This will cause the ASCII Pbus data to be displayed on line two
of the panel. If the Pbus data is incorrectly formatted (invalid command) a ‘Pbus
Format Error’ message will be displayed. Note that this menu item is turned off each
time the TDC-100B is powered up.
To Use USB Port for Cue/Menu Offline Storage
see the USB section on page 21
of this manual.
Summary of Contents for TDC-100B
Page 28: ...28 Notes...


