Qu
i
ck Installation Guide
Broadband routers
PL
| EN
E-mail: [email protected]
www.lanberg.eu
Lanberg © 2015-2018
21
|
32
3.2)
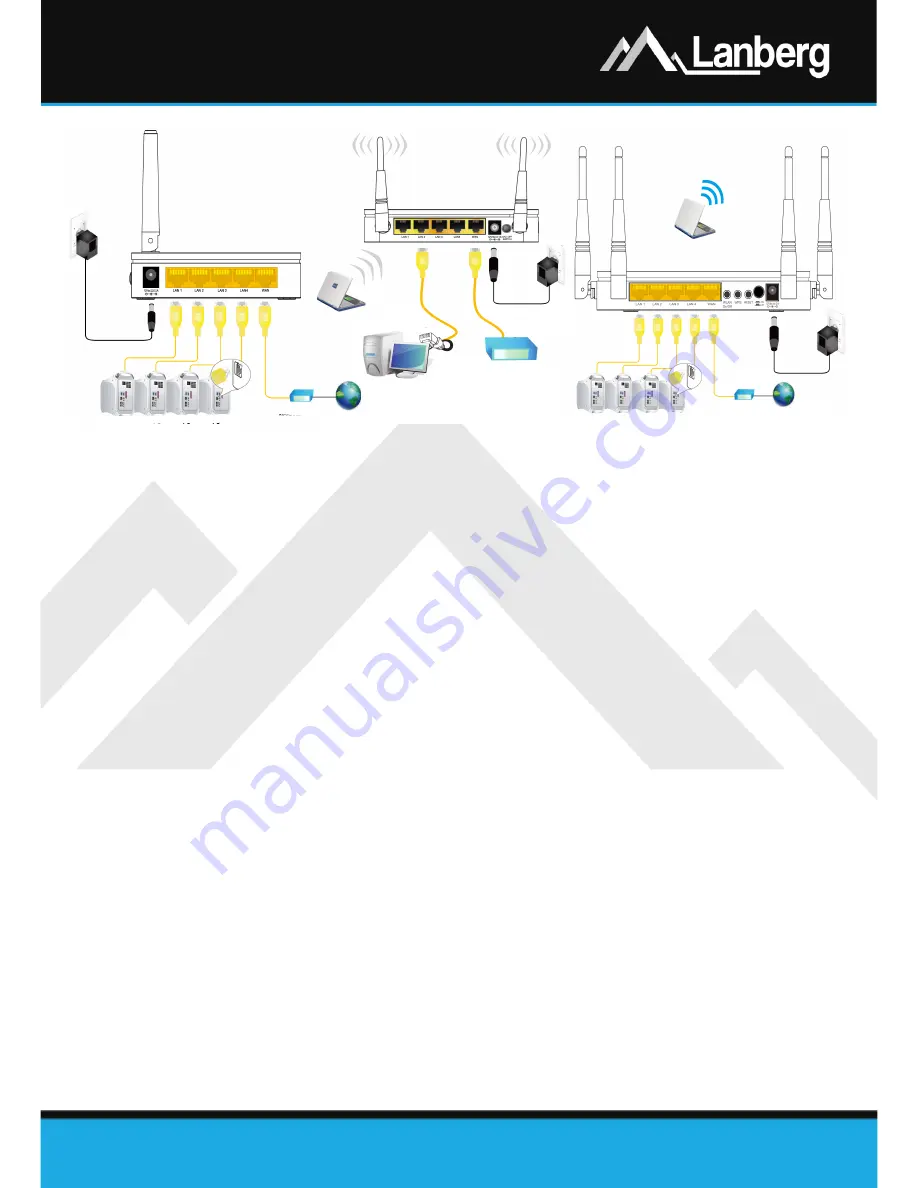
Connecting and turning Lanberg’s broadband router on
Step 1)
Connect one end of RJ
-
45 crossover (Ethernet) cable to the WAN port located on the router, and
its other end to the cable modem / xDSL / user’s internet provider (ISP) device,
Step 2)
Connect one end of RJ
-
45 crossover (Ethernet) cable to one of the LAN ports located on the router
and its other end to the user’s end device (e.g. PC, laptop etc.),
Step 3)
Connect the power by inserting the end of the router's power adapter plug into its power outlet
(labeled Vdc and A respectively) located at the back of router. To turn the device on, change the
position of the power switch button to ON (button pressed)
–
RO
-
120GE and RO
-
175GE models.
3.3)
Initial configuration of network settings of the user’s end device
Before proceeding to the first basic configuration of the Lanberg’s broadband router, first you must
configure the end device (such as PC or laptop), so that it will obtain an automatic IP address and DNS
server from the router's DHCP server.
NOTE:
If there is no connection with the router or in further stages of device’s operation modes
configuration, there may be a situation in which the DHCP server service, responsible for assigning IP
addresses to customer’s end devices connected to the local network, will be turned off (depending on the
current router's operation mode). In that case it is necessary to set the static IP address of the end device
(on PC / laptop
etc.). Then select the flags "Use the following IP address:" by entering unused IP address
from the local network and the subnet mask (usually „255.255.255.0”) and select option „Use the following
DNS server addresses:” by entering the IP address of your Internet service provider (ISP) or a known DNS
solution provider (e.g. „8.8.8.8”).


