CL4790 User Guide
Version 2.0
Americas: +1-800-492-2320 Option 2
Europe: +44-1628-858-940
Hong Kong: +852-2923-0610
www.lairdtech.com/ramp
14
CONN-GUIDE_CL4790
A
PPENDIX
I:
T
ROUBLESHOOTING
Problem
Solution
Read Radio displays error
message: “Radio not
responding.”
Make sure the PC Settings are right.
Make sure the CL4790 unit uses the right serial cable. Refer to
Error!
Reference source not found.
.
If any other program using the same COM port as CL4790 is open, close that
program and try to read the radio again.
Reset the radio by cycling power after each unsuccessful read.
Write Radio displays error:
“Radio not responding.”
Cycle power to the radio. Read the radio, make changes and click Write
Radio.
Garbled Data received.
Check Data Encryption Standard settings.
Client’s Link LED does not
come on.
Make sure the unit is connected to power. Cycle power to the radio.
Link LED is on, but data
does not get transmitted
or received.
Make sure the CL4790 unit or units connect to the correct COM port.
Check the COM port settings for correct baud rate, parity, and either
Hardware or No Flow Control. May be caused by Flow Control set to
Xon/Xoff.
Try increasing the Maximum Transmit Attempts (clients) and/or Broadcast
Attempts (servers) in small increments until communication is established.
Connect a Null Modem adapter between the client and its host device.
Check the Destination Address setting.
If these tips do not resolve the problem, please call our toll free number at (800) 492-2320, option 2 for
technical support. Hours are Monday through Friday, 8:00 am to 5:00 pm Central Standard Time.
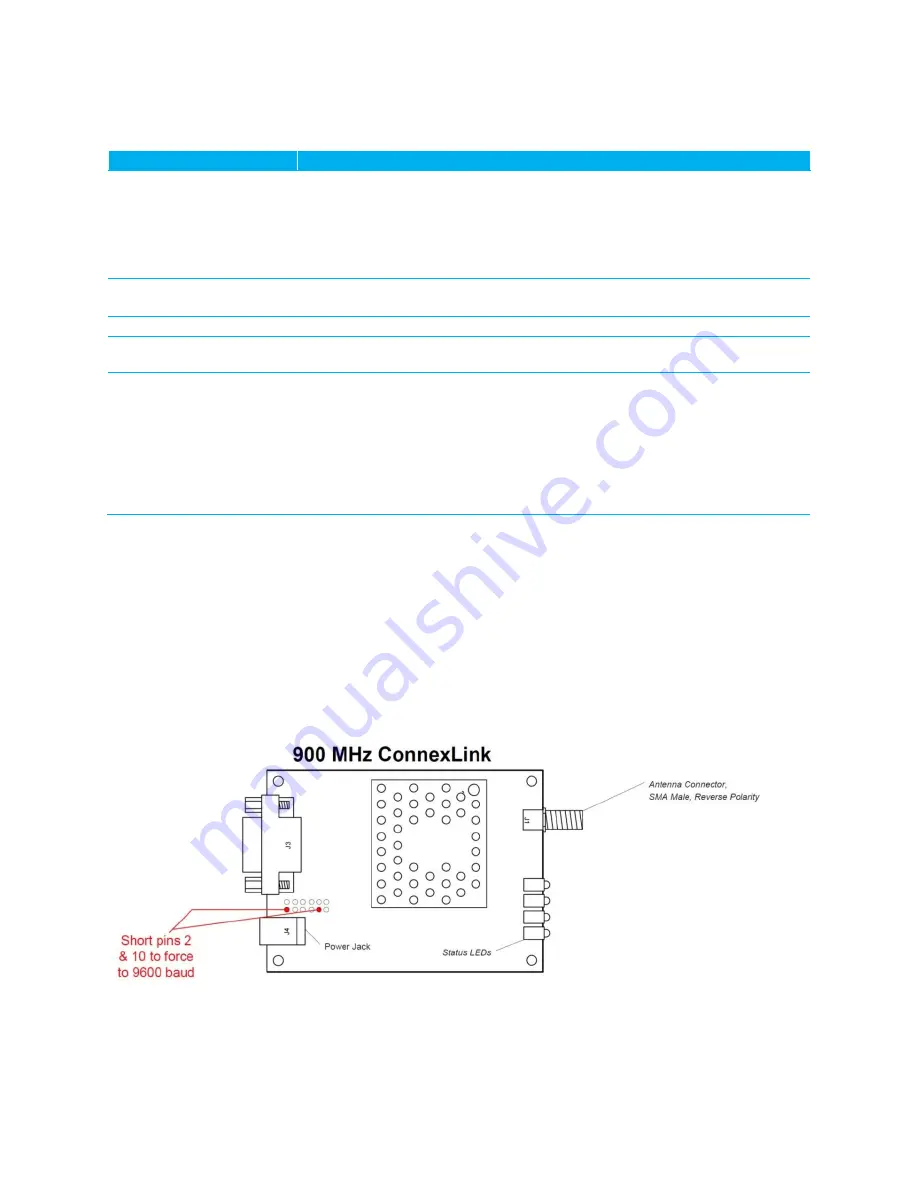
Force 9600 Baud Recovery
To force the serial interface to a known value, perform the following steps (this also sets the RF Packet Size
and Interface Timeout to default values):
1.
Remove power from the radio.
2.
Remove the screws on the case and slide the radio out.
3.
Set a jumper (a wire or even a pair of tweezers work because it is a low voltage line) between the pins
indicated in
Figure 3: CL4790 with jumper pins highlighted
4.
Connect the radio to the PC via a straight through cable.
5.
Power on the radio.
6.
On the PC Settings tab, click Find Ports.


