Classic Collection Installation Instructions 8
BACK
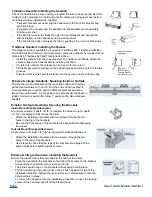
Optional Hold-Down Brackets
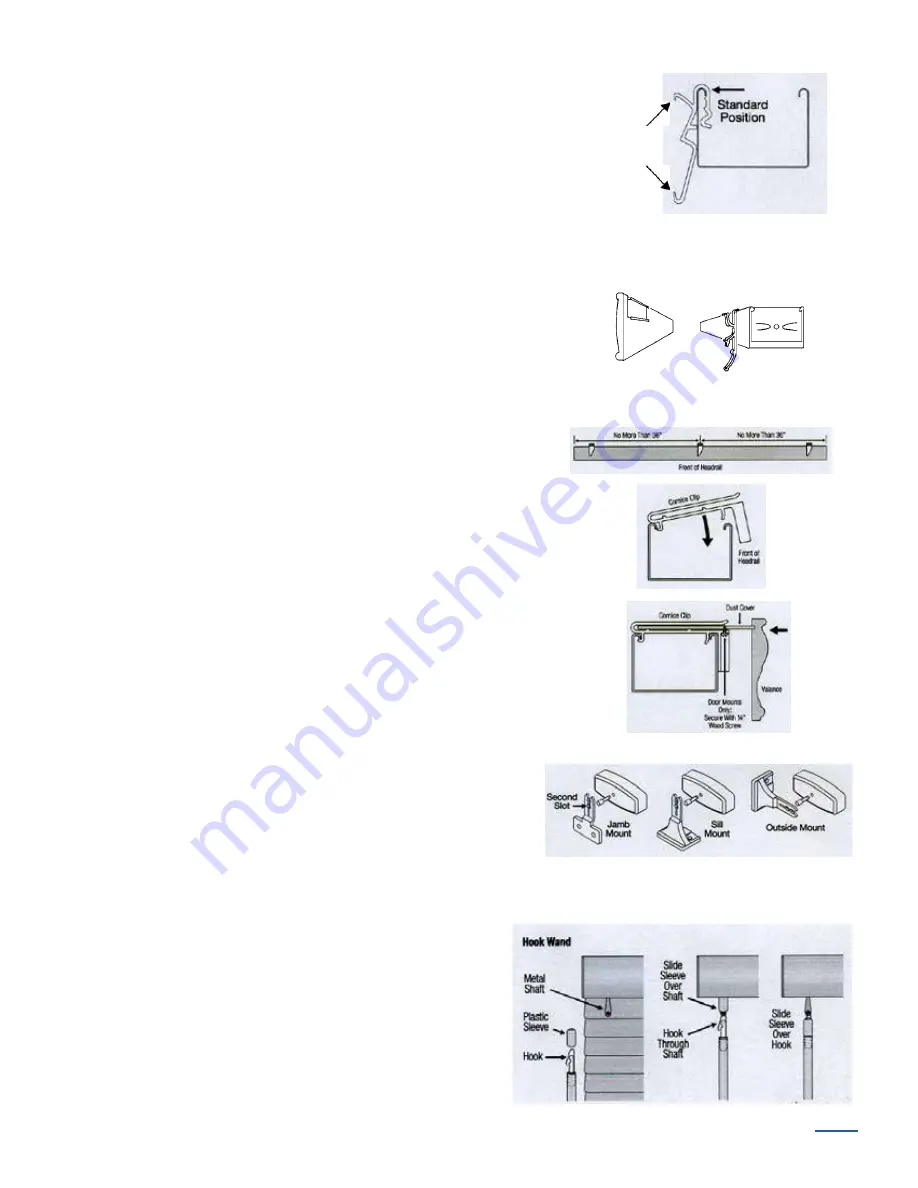
Plastic Hold-Down Brackets
• Attach the hold-down brackets to the jamb, sill or outside mounting
surface. When the blind is fully lowered, the pin on the hold-down
must align with the center of the bottom rail end caps.
• Insert the pin on the hold-down brackets into the end caps to se-
cure the bottom rail. A hole may need to be punched in the end cap
to accept the pin in the hold-down.
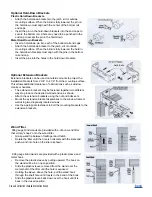
Wand TIlter
• Remove the plastic sleeve by pulling upward. The hook on
the wand will be in an open position.
• Slide the plastic sleeve removed from the wand over the
metal shaft of the tilter until the hole is exposed.
• Holding the sleeve above the hole, pull the wand hook
through the shaft hole until it rests in the bend of the hook.
• Slide the plastic sleeve back down over the hook until it is
back in the closed position.
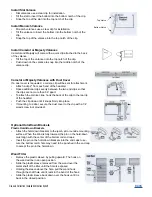
Install Slat Valance
• Slat valances use a clear clip for installation.
• Tilt the slat to insert the bottom into the bottom notch of the clip.
• Snap the top of the slat into the top notch of the clip.
Install Monarch Valance
• Monarch valances use a clear clip for installation.
• Tilt the valance to insert the bottom into the bottom notch of the
clip.
• Snap the top of the valance into the top notch of the clip.
Install Camelot or Majesty Valances
Camelot and Majesty will come with a quick clip attached to the back
of the valance.
• Tilt the top of the valance onto the top notch of the clip.
• Push down on the valance to snap into the middle notch of the
valance clip.
Camelot or Majesty Valances with Dust Cover
If a dust cover is requested, a cornice clip will be sent for attachment.
• Attach a clip 2” from each end of the headrail.
• Space additional clips evenly between the two end clips so that
the clips are no more than 36” apart.
• To attach the cornice clips, hook the back of the clip to the rear lip
of the headrail.
•
Push the clip down until it snaps firmly into place.
• If mounting to a door, secure the dust cover to the clip with a 1/4”
wood screw (not provided).
Top Notch
Bottom Notch


