background image

2

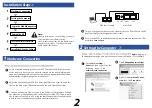
Installation Steps   

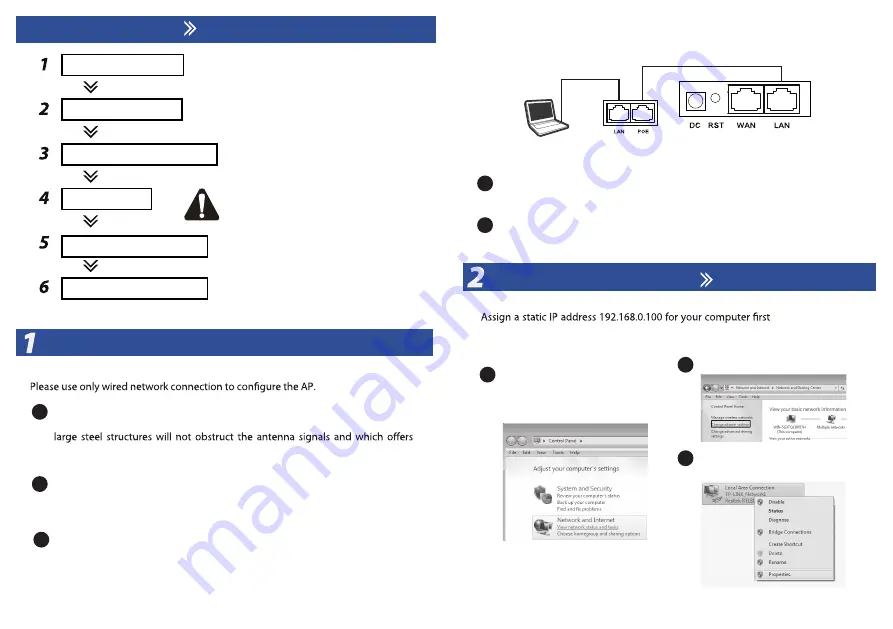
Hardware Connection

Setting the Computer

Log in the Web Management

Setting the AP

Test the Wireless Network

Install the AP to the Ceiling

Note:

1. Before Install the AP on the Ceiling, you would
better complete the software setting.
2. Before the setting of the AP, you would better
complete the design of  Topology of network
and IP address the devices.

Hardware Connection

1

Locate a suitable mounting site for your CPE. To achieve the best performance 

of the devices, please select an elevated location where trees, buildings and 

maximum line-of-sight propagation for the devices.

2

Adjust the direction of your CPE for a best signal. Place the straps through the 

slots on the back of the CPE and then around the pole. Tighten the straps.

3

Connect one end of an Ethernet cable to the PoE port of the provided PoE and 

the other end of the Ethernet cable to the LAN port of the CPE. Then, connect 

the LAN port of the PoE to a PC using another Ethernet cable. Finally, plug the 

provided power adapter into a standard electrical wall socket.  

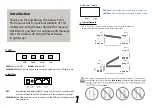
Access Point

POE Power Supply

Turn on all your network devices and then check to see if the LEDs on the AP 

display normally as the diagram below describes.

5

If you use two CPEs to build the network, please make sure that the two CPEs 

are placed 

face to face

4

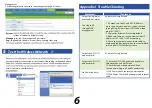
Setting the Computer

before

 logging in 

the management page. Here we take the procedures in Windows 7 for example.

1

Go to 

Start

 > 

Settings

 > 

Panel

, and then you will see the 

following  page.  Click 

network status and tasks

2

Click 

Change adapter settings

3

Right-click 

Local Area Connec-

tion, 

then click 

Properties

Summary of Contents for LF-R500U

Page 1: ...2 4Ghz 150Mbps Outdoor Wireless Access Point Quick Installation Guide 2 4Ghz 150Mbps Outdoor Wireless Access Point Quick Installation Guide...

Page 2: ...on OFF WAN LAN When a device linked to the corresponding port the LED light is On WLAN Wi fi on OFF wifi led is off and then the AP reboots to its factory default settings WAN LAN The Ethernet port is...

Page 3: ...and then around the pole Tighten the straps 3 Connect one end of an Ethernet cable to the PoE port of the provided PoE and the other end of the Ethernet cable to the LAN port of the CPE Then connect...

Page 4: ...s bar 1 2 After successful login you can see web management page of the CPE please go to Wizard on the top menu Enter the User name Passwords preset as admin admin then you can found on the label atta...

Page 5: ...the LAN IP address of the system will reboot are you sure to continue Please chilck the Sure 2 The IP Address will be change to a same sunbet with former Router Switch s LAN Here the Router which AP A...

Page 6: ...for AP B you can disable the wifi status of AP then click Finished 5 After AP is reboot successful choose the wireless connect you can see the AP Signal Strength and Link Quality that means AP B and A...

Page 7: ...Power indicator 1 Check the AP s DHCP and make it enable in Gateway mode and WISP mode 2 Check the connection between AP and the top networking in AP and Repeater mode 1 If DC Power check the local p...

Page 8: ...Power Supply Appendix 3 The PoE power supply of Access Point line 1 2 3 6 is using transfer the data and 4 5 7 8 is using transfer the power 4 5 is 7 8 is Hotel Wireless Solution Appendix 2 Topology R...

Reviews: