4L User Manual
3. Using 4L-gui
The graphical application, called
4L-gui
, allows to print any image on a LightScribe disc. The interface consists in three simple elements
:
the main window, the print options dialog and the print progress dialog.
3.1 Main Window
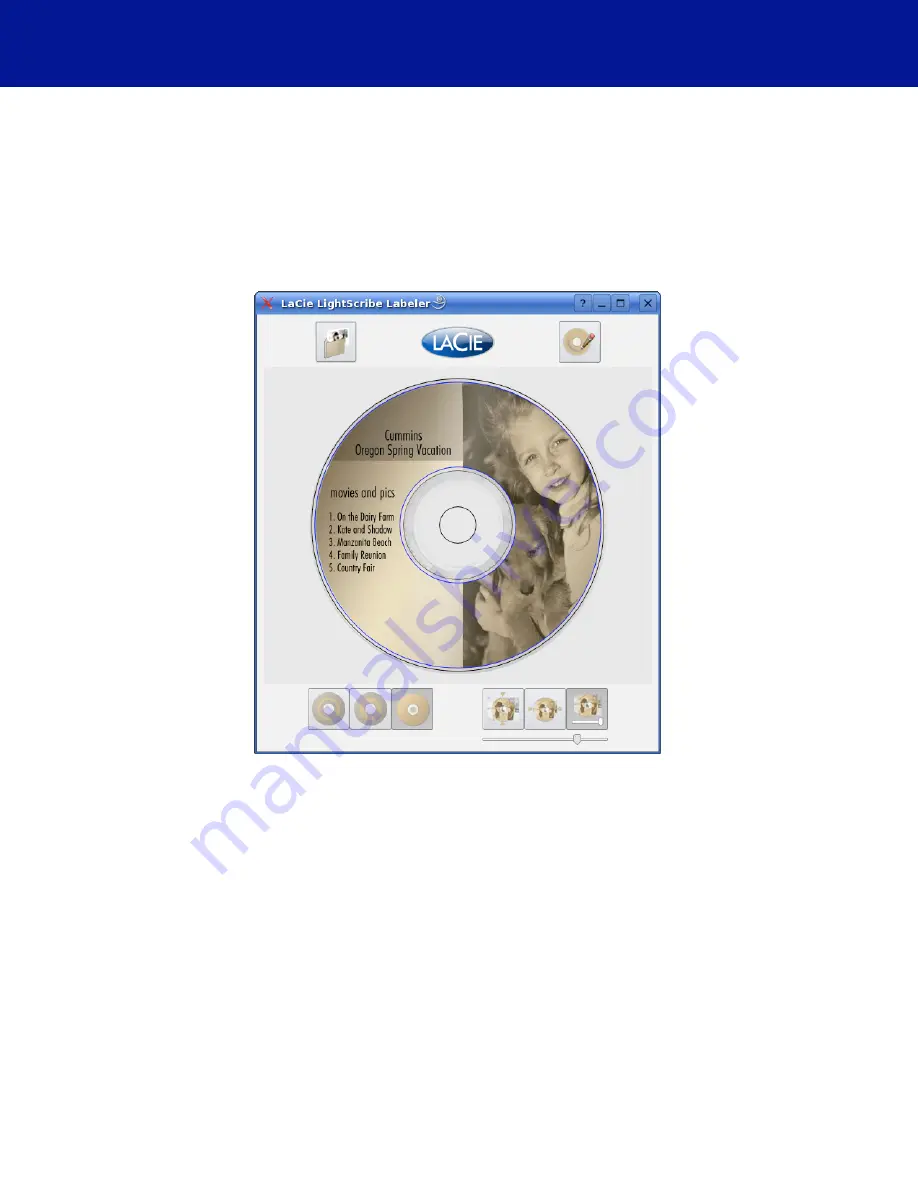
Here is a screenshot of the main window
:
It shows
• the main preview of the label.
The area that will be printed is between the two blue circles. It depends on the chosen printing mode. (see below)
The narrower the print area, the shorter the printing time.
• two action buttons
:
■
Open an image file
: this allows you to select an image file to print. (If you start 4L-gui from a console, you can also specify the image
file you would like to open as an argument).
■
: this opens the Print Options dialog box, that will be described in detail later in this document.
• three print mode buttons, corresponding to the three LightScribe standard print modes
:
■
Title
, which gives you room to print a circular title text.
■
Content
, that adds printing space for detailed information about the content of the disc.
■
Full
, which allows you to print an image over the whole surface of the disc.
• three scaling buttons and a slider, allowing you to scale the image as you want.
■
Scale Height
: The image will be scaled so that its height matches the media height. The image proportion is retained.
■
Scale Width
: The image will be scaled so that its width matches the media width. The image proportion is retained.
■
Manual scaling
: the image will be scaled at a size defined with the slider. The main preview closely reflects the final result, except that
the image will be printed grayscaled.
You can position the image wherever you want on the disc by dragging it with the mouse in the main view.
Template images showing the printing area boundaries are present in /usr/4L/templates for the three print modes (full, title and content) to help
you design labels with your favorite image editing application.
5


