background image

USER’S MANUAL


CORMATIN


Page 38 of 40 – US – 

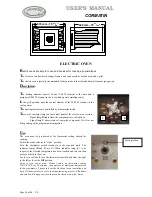
ELECTRIC FORCED CONVECTION OVEN 

T

he forced convection oven is a recent development in 

cooking techniques. Its principle is straightforward: air 
circulates over a heating element, is heated when it comes 
into contact with the element and the heat thus obtained in the 
oven is used to cook food. 

A

ir circulation is achieved by using one or two turbines inside the oven which draw in air and expel it onto one or two 

heating elements, thus producing movement of warm air referred to as “convection”. 

F

orced convection ovens have many advantages, the main benefit being that identical or different dishes can be cooked 

evenly at several levels. It is therefore particularly suitable for cooking cakes, pastries, Viennese bread or flaky pastry. 

I

t heats quickly and defrosts frozen food evenly. 

D

ifferent dishes can be cooked simultaneously without taste transference because odours are destroyed as the air passes 

over the heating element.


D

escription:


T

he oven is heated by one circular 2650 W element. 

T

his is fitted with an electric grill with a rating of 2850 W.


T

he heating element is controlled by a thermostat switch, the control panel has 2 indicator lamps: 

-  Signal lamp 

B

 lights when the components are switched on. 

-  Signal lamp 

C

 shows status of energised component. It is lit or not lit depending on the programmed 

temperature.


U

se:


The oven must be pre-heated at the thermostat setting chosen for cooking. 
Switch the mode selector to “convection” position. 
Turn  the  thermostat  switch  clockwise  to  the  required  mark.  The  indicator 
lamps  (

B

  and 

C

)  are  lit.  When  indicator  lamp  (

C

)  is  no  longer  lit,  the 

selected temperature has been reached and you can then place your dish in 
the oven. 
In order to switch off, turn the thermostat control knob from the right to the 
left as far as the 

Off

 position. 

Useful hints:


Prior  to  first  use  of  oven:  Preheat  empty  on  thermostat  setting  220°C/428°F for 20 minutes, then operate at maximum 
temperature  for  approximately  2  hours  to  heat  the  Rockwool  oven  insulation  and  burn  off  the  mineral  oil  used  in  the 
manufacturing process. All odours and smoke will disappear when the oven has been used a few times. 


Forced convection 
position 

Summary of Contents for Fourneau Cormatin

Page 1: ...hbor s phone Follow the gas supplier s instructions If you cannot reach your gas supplier call the fire department Installation and service must be performed by a qualified installer service agency or...

Page 2: ...Page 2 of 40 US...

Page 3: ...nition TRADITION model equipped with a 385 x 510 mm 15 5 32 x 20 5 64 heating plate Gas oven Enamelled sheet metal Dimensions L x D x H 535 mm 211 16 x 465 mm 1819 64 x 300 mm 1151 64 3 shelf level wi...

Page 4: ...egistered letter with confirmation of delivery to the carrier Appliance Width Depth Height mm Weight Gross Net LG 731 G 850 mm 33 4 840 mm 33 1 1070 mm 42 1 105 kg 89 kg 233 197 lb Gas connection 1 2...

Page 5: ...rmatin INSTALLER S MANUAL Appliances must be installed in a workmanlike manner in accordance with the instructions in this manual and locally applicable regulations This manual will be handed over to...

Page 6: ...Page 6 of 40 US...

Page 7: ...nit is to be placed next to cabinets the clearances shown in Figure 4 are required The range cooktop surface must be no lower than the adjacent base cabinet countertop surface Min clearances to combus...

Page 8: ...ure Pn U S Natural gas 6 WC U S L P propane 10 WC Fig 4 A Fig 12 B With gas oven IMPORTANT Manual shut off valve should be installed in an accessible location in the gas piping external to the applian...

Page 9: ...rear corner under the hob to gain access to the pressure regulator remove the top Convertible regulator The reversible cap is labeled either LP or Nat and is easily recognized by the raised center sc...

Page 10: ...ies are kept in place by a transversal bar H fig 15 In order to take them out unscrew screws I fig 16 then G fig 14 Note When one or more nozzles are changed the sealing ring should be changed as well...

Page 11: ...n changing from maximum setting to minimum setting Refitting the cooking surface When refitting the cooking surface it is vital to tighten fastening screws figures 6 and 7 Failure to do so can cause d...

Page 12: ...r orifice Gas pilot LP 65103032 Gas pilot NG 65103031 Table 5 GAS Pressure Gas oven Pilot burner Natural gas 6 WC 1 40 0 45 L P propane 10 WC 0 95 0 25 Adjustment of oven primary airflow Remove the ba...

Page 13: ...type SRD SRDT S SO or ST Where local Codes do not permit grounding through neutral use a 4 wire power supply cord or pigtail kit Cord must be agency approved for use with household ranges Remove acce...

Page 14: ...spacer vent onto these brackets by using the washers and nuts supplied with the range STABILITY DEVICE INSTALLATION INSTRUCTIONS Screw the anti tip bracket T to the wall according to figures 30 31 and...

Page 15: ...rew the head from the body of the burner valve 4 Grease the tap shaft High temperature lubricant for example SILICAL GEL BARBAHL Caution Any excess grease should be removed Reverse operation 3 to 1 in...

Page 16: ...INSTALLER S MANUAL CORMATIN Page 16 of 40 US...

Page 17: ...105 65 52863 Injector Dia 120 65 14973 Injector Dia 130 65 14974 Injector Dia 140 65 14975 Injector Dia 145 65 27781 Injector Dia 170 65 30546 Brass knob Gas model 65 044013 Chrome knob Gas model 65 0...

Page 18: ...INSTALLER S MANUAL CORMATIN Page 18 of 40 US 4 screws 65 129101 4 disc 65 30932 65 39895 65 226006 65 080005 1 5 kW 65 064007 3 0 kW 65 064007 4 0 kW 65 064007 5 0 kW 65 064007 65 033018...

Page 19: ...INSTALLER S MANUAL CORMATIN Page 19 of 40 US D tail A D tail B...

Page 20: ...UIT DIAGRAMMES Item n Designation B Top burner electrode 65 226006 S1 Switch 65 103030 120 V 60 Hz N L1 GR S HT N 4 L 5 HT N 4 L 5 GR S HT N 4 L 5 HT N 4 L 5 GR Top burners code A E 5 N D T I C 01 02...

Page 21: ...EV Valve 65 103033 L1 120 V 60 Hz N S S3 HT 6548 G Reig N 1 M 2 R 3 C L S HT N 4 L 5 GR GR GR P2 1 P1 L TH EV Top burners gas oven 120 V code G B B1 L1 120 V 60 Hz N S S3 HT 6548 G Reig N 1 M 2 R 3 C...

Page 22: ...R1 R2 KM KM KM R S2 I convection static electric oven code D Item n Designation TL Three pole limiting thermostat 65 39942 TH Oven regulating thermostat 65 224010 KM Contactor 65 223001 S2 Thermostat...

Page 23: ...Page 23 of 40 US...

Page 24: ...ces for servicing and proper operation by not obstructing front or side of appliances WARRANTY The warranty is stated on the sales contract Please contact your approved Dealer if any work has to be ca...

Page 25: ...Page 25 of 40 US...

Page 26: ...low of combustion or ventilation air to the appliance Be sure a fresh air supply is available When using the cooktop do not touch the burner grates or the immediate surrounding area Areas adjacent to...

Page 27: ...Page 27 of 40 US...

Page 28: ...mended for small sauceboats small saucepans or blinis pans for example A reducing adapter can be placed on the pan support in order to obtain greater stability accessories Fast and Intensive burners a...

Page 29: ...uces the preset minimum burner power This setting is adjustable behind the knob Useful hint Always choose a burner that matches the diameter of the utensil used Cleaning The burners are made in two pa...

Page 30: ...g the heating plate is ideal for cooking a pot au feu coq au vin warming a veal or fish stock or even binding a sauce By removing the central plug of the plate the burner can be used as a traditional...

Page 31: ...To rotate burner valve handle to the OFF position slightly depress handle then move to the OFF position A reduced flow rate position identified by the Low mark produces the preset minimum burner powe...

Page 32: ...cooking and underside browning These materials are recommended for cooking cakes and roasts Enamelled cast iron anodised aluminium tin plated iron ovenproof glass heat resistant porcelain and alumini...

Page 33: ...the use of electric ovens for dishes that have to be cooked in a dry atmosphere or at very low temperatures below 150 C 302 F such as meringues and certain cakes and pastries 1 Bottom heat is obtaine...

Page 34: ...o purge the fuel lines of air before the oven pilot will ignite This may take up to 2 minutes The handle must be fully depressed for this peroid of time at the IGN position Prior to first use of oven...

Page 35: ...e of the oven is 68 l 2 40 ft3 with 3 shelf positions 70 mm spacing To select the operating function it is necessary to make sure the switch is On position to operate in static mode On position to ope...

Page 36: ...hed on Signal lamp C shows status of energised component It is lit or not lit depending on the programmed temperature Use The oven must be pre heated at the thermostat setting chosen for cooking Switc...

Page 37: ...r l es or obtain perfect cooking of a rib of beef for example Use Turn the thermostat control knob to mark BROIL In order to switch off return the control knob to position Off Useful hints CAUTION the...

Page 38: ...ted by one circular 2650 W element This is fitted with an electric grill with a rating of 2850 W The heating element is controlled by a thermostat switch the control panel has 2 indicator lamps Signal...

Page 39: ...es vary place them in the oven so that they are cooked just in time to serve them and remove them as soon as they are ready In a forced convection oven cooking can take place at temperatures lower tha...

Page 40: ...inegar and 50 warm water with a scouring pad or nylon brush to remove grease before cleaning Increase the concentration of vinegar and soak for stubborn grease stains Rinse with water and towel dry af...

Reviews: