background image

12

Visit 

www.labnetinternational.com

  for additional product and technical information.

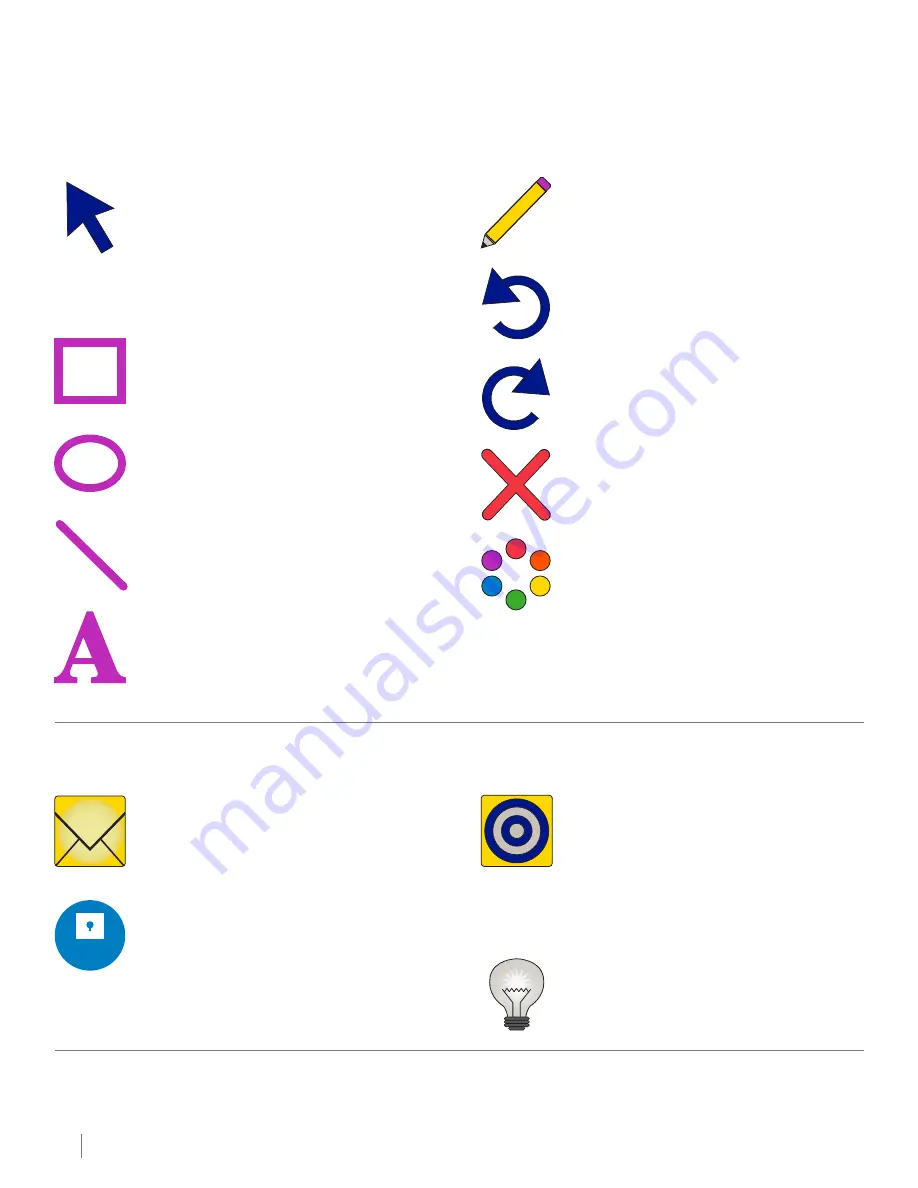
Annotations Tab

The annotations tab lets you annotate or draw on an open image.

Pointer 

This is the object selector. It allows selection of 
text boxes, objects, lines, etc., in order to edit or 
delete them. For example, to change the color of 
a box, select the pointer, double click on the box 
to be changed, then select the color select tool 
and click on the color desired. 

Rectangle 

Draw a rectangle on the image

Ellipse 

Draw an ellipse on the image

Line 

Draw a line on the image

Text

Click on the text box, then draw a rectangle. This 
rectangle will be where your text appears. You 
can change the size of the font after you type 
your text. 

Pencil 

Use this to free-hand draw on the image. 

Undo 

Use this tool to undo your last few steps. 

Redo 

Redo your last step. 

Delete 

Delete the highlighted annotation object. 

Font/Color/Line Width 

Once an annotation object is selected using 
the pointer, you can edit the line width and the 
color, and in the case of text, the font. 

Settings Tab

The password for settings is 

admin

.

Create Flats 

This tool is used to create flat field image 
for certain light sources. Flat files are used 

to calibrate light sources for the most even 

illumination. Flat field calibration is required 

if you purchase the White Light Tray accessory. 
Instructions for calibration and use are included 
with the tray. 

@

@

Email Settings 

You can email files to yourself if you set up an 

email account for the imaging system. Contact 
your IT department for the best values to set. 

Change Password 

The default system password is 

admin 

(all 

lowercase). If you would like to change this 

password, you can do so here. 

Help Tab

Allows you to view this user manual, save it, or print it.

8. Overview of Software Features 

(continued)

Enable Trans White 

When optional White Light Tray is purchased, 
enables Trans White to appear as an option in 
the darkroom. 

Summary of Contents for Enduro GDS II

Page 1: ...Labnet Enduro GDS II and Enduro GDS Touch II Gel Documentation System Instruction Manual Catalog Numbers GDS2 1302 GDS2 1365 GDST2 1302 GDST2 1365...

Page 2: ...gulatory Compliance 4 3 Specifications 5 4 System Placement 5 5 Labnet Enduro GDS II Gel Documentation System Installation Guide 6 6 Labnet Enduro GDS Touch II Gel Documentation System Installation Gu...

Page 3: ...es imaging software calibration files 3 power cables 110V 220V US EU UK Please select the correct one for your region The Labnet Enduro GDS Touch II Gel Documentation System includes the following com...

Page 4: ...tion devices such as the safety switch on the light cabinet apparatus are working properly If not discontinue use until the device s are properly repaired Use only UV lamps in the transilluminator Ele...

Page 5: ...gigabyte GB RAM 32 bit or 4 GB RAM 64 bit 16 GB available hard disk space 32 bit or 20 GB 64 bit Operating system Windows 10 Processor 1 gigahertz GHz or faster processor Intel RAM 2 gigabyte GB for 3...

Page 6: ...Setup file You may see a message pop up that says Do you want to allow the following program from an unknown publisher to make changes to this computer Select Yes Click Next to begin the Setup Wizard...

Page 7: ...S II system using the switch in the back Wait about 20 seconds before proceeding to the next step Launch the capture software The first time you run the Enduro Capture Software you will receive the me...

Page 8: ...tem from its packaging Locate the tablet computer Remove the wing nuts from the back of the tablet Mount the tablet on the system Secure the tablet in place with the wing nuts Connect the mini USB cab...

Page 9: ...o GDS II Gel Documentation System Labnet Enduro GDS Touch II Gel Documentation System EtBr Gel UV 302 or 365 UV 302 or 365 Sybr Safe Gel UV 302 or 365 Epi Blue Coomassie Gel Visible Visible Requires o...

Page 10: ...op window to your desired size and then select Crop ROI from the bottom of the screen If you do not want to crop select Cancel Rotate Rotate allows you to rotate your image one of four ways Right 90 d...

Page 11: ...the live image so you can make sure your gel is vertically and horizontally straight Select ROI Select ROI has two functions Select ROI then select Image Capture this results in a final cropped imaged...

Page 12: ...ighlighted annotation object Font Color Line Width Once an annotation object is selected using the pointer you can edit the line width and the color and in the case of text the font Settings Tab The p...

Page 13: ...d in the supplied instruction manual This warranty does not cover damage caused by accident neglect misuse improper service natural forces or other causes not arising from defects in original material...

Page 14: ...not be disposed of with domestic waste Consequently the buyer shall follow the instructions for reuse and recycling of waste electronic and electrical equipment WEEE provided with the products and av...

Page 15: ...t your local Corning sales office Corning Incorporated Life Sciences 836 North St Building 300 Suite 3401 Tewksbury MA 01876 t 800 492 1110 t 978 442 2200 f 978 442 2476 www corning com lifesciences A...

Reviews: