S201
- Advanced Features
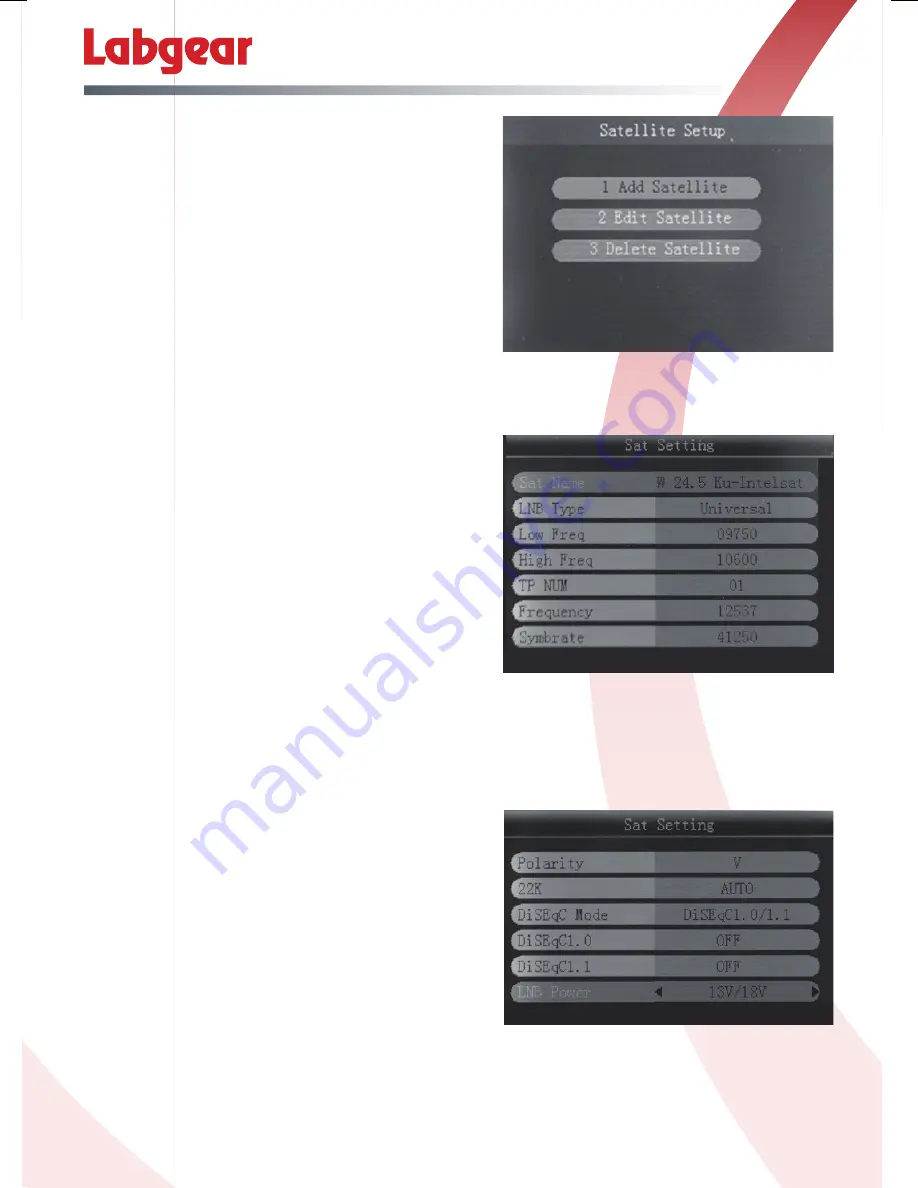
11a SAT MANAGER
Your Labgear satellite meter has been loaded with
information on 100 of the most popular broadcasting
satellites around the world but if you want to add or
amend one you can do this in the
Sat Manager
option:
•
Add Satellite
•
Edit Satellite
•
Delete Satellite
Add Satellite: the setting refer to Antenna Setup.
Edit Satellite: press
pq
key to page up /down;
then press
t
u
key to select the satellite; press
OK
to edit satellite setting, refer to Antenna Setup.
Delete Satellite: refer to Edit Satellite then press
OK
to delete satellite.
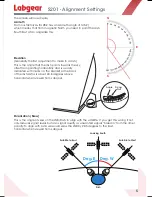
11b SAT SETTING
For any of the satellites already loaded onto your
meter you can amend a wide range of settings by
entering
Sat Setting
•
Sat Name
- press
t
u
to select satellite.
•
LNB Type
- press
t
u
to select LNB Type.
•
Low Freq
- press
t
u
to select Low Frequency or
press
OK
, then use the
pq
key to input the value.
•
High Freq
- press
t
u
to select Hi Frequency or
press
OK
, then use the
pq
to input the value.
•
TP NUM
(Transponder) - press
t
u
to select TP number.
•
Frequency
- Frequency of the current transponder, input the value by using the
pq
keys.
•
Symbrate
- symbol rate of the current transponder, input the value by using the
pq
and
t
u
keys.
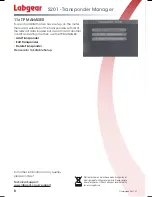
Use the
q
key to scroll down to see the rest of the
Sat Setting
menu options.
•
Polarity
- press
t
u
to change to vertical or
horizontal polarization.
•
22K
- press
t
u
to switch the 22KHz tone; if you
select “Universal” the 22K setting is AUTO.
•
DiSEqC Mode
- press
t
u
to set the
communication protocol DiSEqC1.0/1.1 or
Unicable.
•
DiSEqC type & Input
- If you select
DiSEqC 1.0/1.1
,
then press
t
u
to set the port number. If you select
Unicable, then press
t
u
to select the
IF Channel,
and use
pq
to input
Centre Frequency
.
•
LNB Power
- press
t
u
to switch LNB power ON/OFF.
When all of settings are correct, press
RETURN
, then press
OK
for save the edit.
7


