SECTION 1 STARTUP AND SHUTDOWN
1.A
Familiarize yourself to your boiler
Indicates a Call for Heat
Temp Settings (default Fahrenheit)
The Ignition LED’s light in sequence
Active Status LED's
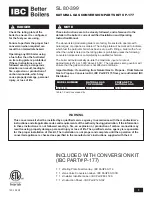
Figure 1. The indicator lights on the Digital Dashboard
SYSTEM START-UP
1
Carbon monoxide hazard. The vent damper must be fully open and the flue must be clear
before the main burner fires. If the burner fires when the vent damper is not fully open or the
flue is blocked, dangerous flue products such as carbon monoxide will escape into the house
causing severe personal injury or death. The vent damper and flue must be checked for
proper operation before allowing the system to operate.
Electrical shock hazard. The ignition circuit of the control can produce over 10,000 volts
which can cause severe injury or death.
Decimal lights on a call for heat.
LEDs light in sequence.
Study the entire hydronic heating system. The unit
does not have an external power button. Locate the
power switch which is mounted nearby as per local
codes. Locate the fuel valve and make sure that it is
turned on and the unit has a supply of fuel.
The digital dashboard is located at the front of the
boiler and has several indicator LED's that display the
current status of the boiler while it is in operation. See
Figure 1.
Getting to know the Digital Dashboard.
For full operating details, please refer to the
Installation & Operating Manual which should be stored
near the boiler.
The primary indicators on the digital dashboard are
illustrated in Figure 1. Normal Operation indicators are
Green.
1.B System Start Up
1. Give the entire heating system an overall visual
inspection. Check for Water, Power, and Fuel. Make
certain that the boiler (or any part of the hydronic
heating system) has not been drained or winterized.
Inspect the boiler for any damage. Inspect the
area around the boiler and remove any items or
combustibles that might have been stored in the
boiler room.
If the unit has been
drained or does
not have power or fuel, or has been damaged,
DO
NOT CONTINUE
. Contact your qualified service
technician.
Otherwise, if the boiler is ready for startup,
• Locate the power switch nearby and make sure that
the power is OFF.
• Locate the fuel valve and make sure that it is turned
on and the unit has a supply of fuel.
2. With all visual inspections completed as per the
previous step, locate the thermostat and raise the
thermostat temperature to above the current room
temperature, to give the boiler a call for heat.
3. Turn ON the power switch to the boiler and observe
the boiler as it goes through it's start up sequence.
4. The third decimal, lower right of the JX Control
display will light indicating a call for heat.
See Figure 1.
5. The Ignition LED's will light in sequence starting
with the LIMITS. Then Vent POWER and Vent
SWITCH will turn on.
6 The spark will energize and the pilot valve will turn
on. There will be an audible spark every 1 second
until flame is sensed. Once the flame is sensed, the
FLAME Indicator will stay on.
NOTE: If flame is not sensed in 75 seconds the pilot
valve will de-energize, the spark will terminate, and
the green “flame” LED will blink. After a 5 minute
delay the sequence will retry at step 5. There will be
an unlimited number of retries.
7. When pilot flame is sensed, the main valve is
energized.
NOTE: The limits, damper switch and pilot flame are
continuously monitored during main valve operation.
If any of these are opened or pilot flame is lost the
main valve is immediately de-energized. A blinking
green LED will indicate the cause of the shutdown
(limits, v-sw, or flame).
LAARS Heating Systems