


Assembly instructions
5
IMPORTANT – Remove any packaging before use, but retain safety instructions and store them with this
product.
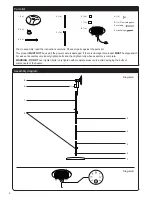
ASSEMBLY
STEP 1 – Remove 4 x preattached inner screws on the base (1) and connect base pole (3) to the base (1).
STEP 2 – Slide the screw cover (2) over the base pole (3).
STEP 3 – Remove the preattached screws on the base pole (3) and slide over one of the cable clips (6).
Secure using preattached screw.
STEP 4 – Attach the middle pole section (4) to the base pole (3) using 3 x preattached screws.
STEP 5 – Remove the preattached screws on the middle pole (4) and slide over one of the cable tie clips (6).
Secure using preattached screw.
STEP 6 – Attach the Extending Top Pole (5) to the Middle Pole (4) using the 3 x preattached screws.
STEP 7 – Slide the small Cable Tie Clip (7) over the Extending Top Pole (5). Secure with pre-attached screw.
STEP 8 – Join heater head (8) to the extending top pole (5) using knob (A) and hand tighten.
STEP 9 – Clip the cable into the 3x Cable Tie Clips (6 + 7).
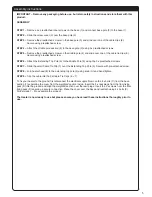
To fix your heater to the ground, first disconnect the electrical supply. Remove the 8 x bolts (C) from the base
section (1) separating the cover from the weighted section inside. Insert the 3 x rawl plugs from the floor fixing
pack (D) into the ground and align the weighted section over the rawl plugs. Insert the 3 x screws from the floor
fixing pack (D) ensuring a secure connection. Place the cover over the base and reattach using 4 x bolts (C).
Follow steps 1 - 9 to assemble the product.
The Heater is now ready to use but please ensure you have read these instructions thoroughly prior to
use.