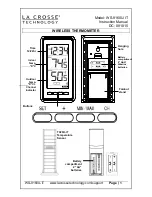

WS-9160U-IT www.lacrossetechnology.com/support
Page | 2
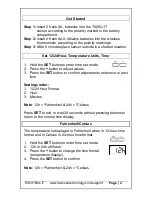
Get Started
Step 1:
Insert 2 fresh AA, batteries into the TX29U-IT
sensor according to the polarity marked in the battery
compartment.
Step 2:
Insert 2 fresh AAA, Alkaline batteries into the wireless
thermometer according to the polarity markings.
Step 3:
After 5 minutes place sensor outside in a shaded location.
Set 12/24 Hour, Temperature Units, Time
1.
Hold the
SET
button to enter time set mode.
2.
Press the
+
button to adjust values.
3.
Press the
SET
button to confirm adjustments and move to next
item.
Settings order:
1.
12/24 Hour Format
2.
Hour
3.
Minutes
Note
: 12h = ºFahrenheit & 24h = ºCelsius
Press
SET
to exit, or wait 30 seconds without pressing buttons to
return to the normal time display.
Fahrenheit/Celsius
The temperature is displayed in Fahrenheit when in 12-hour time
format and in Celsius in 24-hour time format.
1.
Hold the
SET
button to enter time set mode.
2.
12h or 24h will flash.
3.
Press the
+
button to change the time format
(temperature display).
4.
Press the
SET
button to confirm.
Note
: 12h = ºFahrenheit & 24h = ºCelsius


