


Page 3 of 6
x
Wall mounting case
x
Mount in a sheltered place. Avoid direct rain
and sunshine.
x
Under the eaves of your home is an ideal
place.
Positioning the Temperature Sensor:
The Sensor is supplied with a holder that may be attached to a wall with the
two screws supplied. The Sensor can also be positioned on a flat surface by
securing the stand to the bottom to the Transmitter.
Note:
Before permanently fixing the Sensor wall base, place all units in the
desired locations to check that the outdoor temperature reading is
receivable. If the signal is being received, the signal reception icon
will be
displayed on the Atomic Clock. In event that the signal is not received,
relocate the Sensor or move it slightly as this may help the signal reception.
To ensure a good connection, there should be a distance of no more than
200 feet between the final position of the Atomic Clock and the Sensor.
To wall mount the Temperature Sensor:
1. Secure the bracket onto a desired wall using the screws
and plastic anchors.
2. Clip the remote temperature sensor onto the bracket.
WWVB (Atomic Time) Radio signal:
x
The clock must receive the WWVB Radio Signal to automatically set
the time, date and weekday.
x
The clock automatically starts the WWVB on the top of the hour
between the hours of 12:00 AM and 6:00 AM.
x
If this synchronization attempt is successful the radio tower icon
appears on the display. The radio tower icon
will disappear if the
signal reception is unsuccessful.
About WWVB (Atomic Time) Radio Signal Reception:
x
A continuously displayed radio tower icon
indicates that the
WWVB signal was received successfully during the last attempt. If
the clock attempts to receive the WWVB signal and is unsuccessful,
the tower icon will not be continuously displayed on the LCD.
x
We recommend a minimum distance of 8 feet (2.5 meters) to all
sources of interference, such as televisions or computer monitors
x
Radio reception is weaker in rooms with concrete walls (e.g.: in
cellars) and in offices. In such environments, place the system close
to the window.
Setup of Time and Display Options:
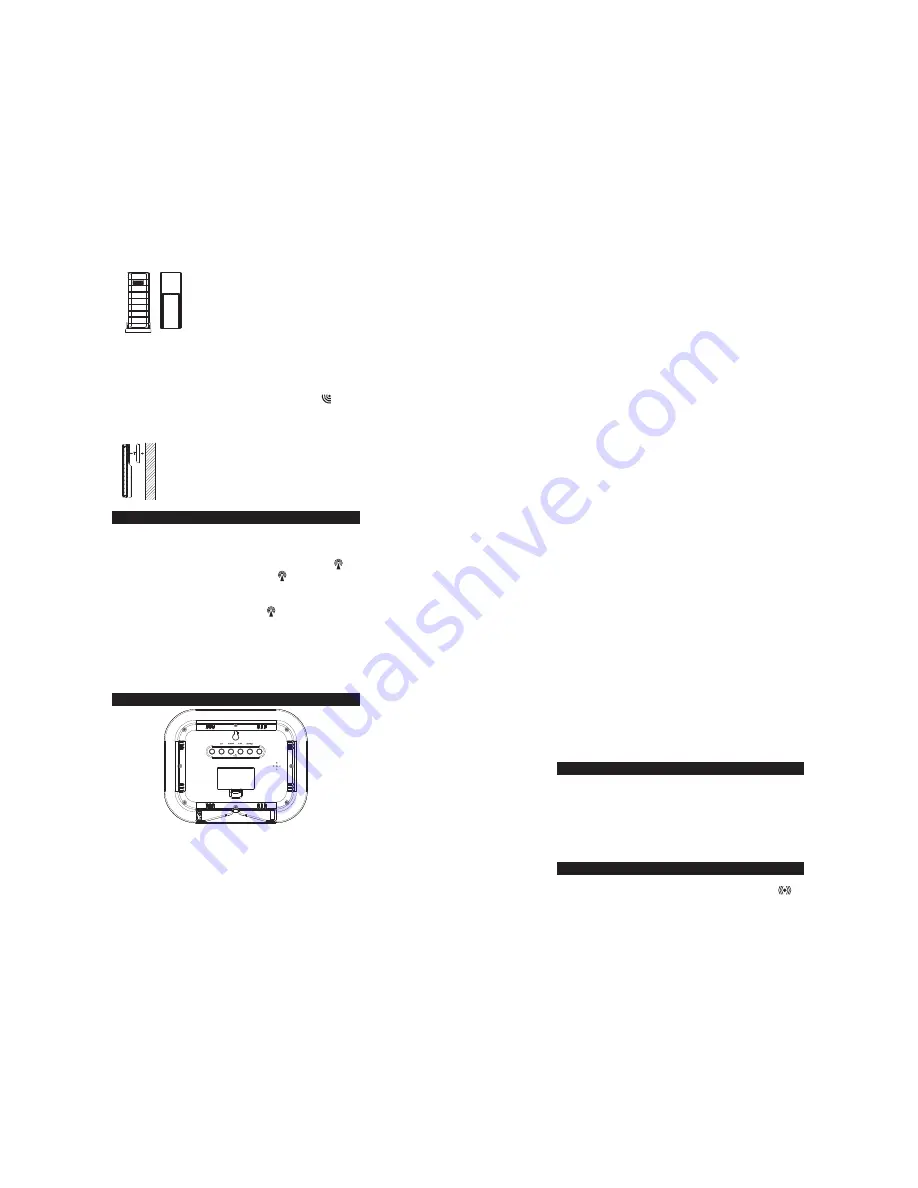
Above:
Back view of Atomic Clock showing buttons and battery
compartment.
Note:
The "
SET
" button is used to enter SET mode. The display will exit
SET mode automatically after 10 seconds of inactivity. If the display exits
SET mode while you are following the setup instructions, press the "
SET
"
button the indicated number of times to return to the portion of the SET mode
desired.
Page 4 of 6
1. Set the Time Zone:
Press the “SET” button and the Time Zone display will flash. Use the
“
PLUS
” button to select the correct Time Zone setting from the
available selections below:
-1,-2,-3: Other time zones
-4:
ATL
- Atlantic
-5:
EST
- Eastern (default setting)
-6:
CST
- Central
-7:
MST
- Mountain
-8:
PST
- Pacific
-9:
ALA
- Alaska
-10,-11,-12,12,11,10,9,8,7,6,5,4,3,2,1: Other time zones
0: - Greenwich Mean Time (GMT)
2. Set Daylight Saving Time ON/OFF:
Press the “
SET
” button a second time and
DST
will flash. Press the
"
PLUS
" button to toggle Daylight Saving Time on ("
On
") or off ("
OFF
").
See "
Daylight Saving Time
" on page 4 for more information.
3. Set Language:
Press the “
SET
” button a third time and the
Language Abbreviation
will flash. Press the "
PLUS
" button to switch the Language to be
displayed. The three-letter abbreviation for the day of the week will
display in the bottom of the LCD while the setting flashes above.
US
: English (default setting)
F
: French (Français)
E
: Spanish (Español)
d
: German (Deutsch)
Note:
Manual time and date settings are
optional
. In most cases, the time
and date will set automatically via WWVB radio signal. If placement for the
display does not allow for WWVB reception due to interference, you will need
to set the time and date manually.
4. Set Time Manually - Hour:
Press the “
SET
” button a fourth time and the
Hours
digits will flash. Use
the “
PLUS
“ button to set the correct hour.
5. Set Time Manually - Minute:
Press the “
SET
” button a fifth time and the
Minutes
digits will flash. Use
the “
PLUS
“ button to set the correct minute.
6. Set Date Manually - Year:
Press the “
SET
” button a sixth time and the
Year
digits will flash. Use
the “
PLUS
“ button to set the correct year.
7. Set Date Manually - Month:
Press the “
SET
” button a seventh time and the
Month
digits will flash.
Use the “
PLUS
“ button to set the correct month.
8. Set Date Manually - Date:
Press the “
SET
” button an eighth time and the
Date
digits will flash. Use
the “
PLUS
“ button to set the correct date.
9. Set Date Manually - Day of Week:
Press the “
SET
” button a ninth time and the
Day of Week
abbreviation
will flash. Use the “
PLUS
“ button to set the correct day of week.
10. Set 12 or 24 Hour Time Mode:
Press the “
SET
” button a tenth time and the
12 or 24 Hour Time
Mode
digits will flash. Use the “
PLUS
“ button to set the time mode to
either a 12 or 24 hour clock.
11. Set Temperature Mode - °F or °C:
Press the “
SET
” button an eleventh time and the
Temperature Mode
abbreviation will flash. Use the “
PLUS
“ button to set the temperature
mode to °F or °C.
Daylight Saving Time
x
The National Institute of Standards and Technology and WWVB
encode a special DST “bit” in the WWVB transmission for DST.
x
Your La Crosse Technology® clock will read this information (only if
"DST" is set to "On") and automatically advance the time one hour in
the spring and back an hour in the fall.
x
Arizona and Indiana: If you live in an area that does not recognize
DST you must de-activate Daylight Saving Time by setting "DST" to
"OFF"
x
See
"
Set Daylight Saving Time ON/OFF
" on page 4 for instructions.
Setting the Daily Alarms:
x
To turn the alarm on:
Press the "
ALARM
" button. The LCD will display the alarm icon
.


