


Nap Feature
Backlight
6
5
8
7
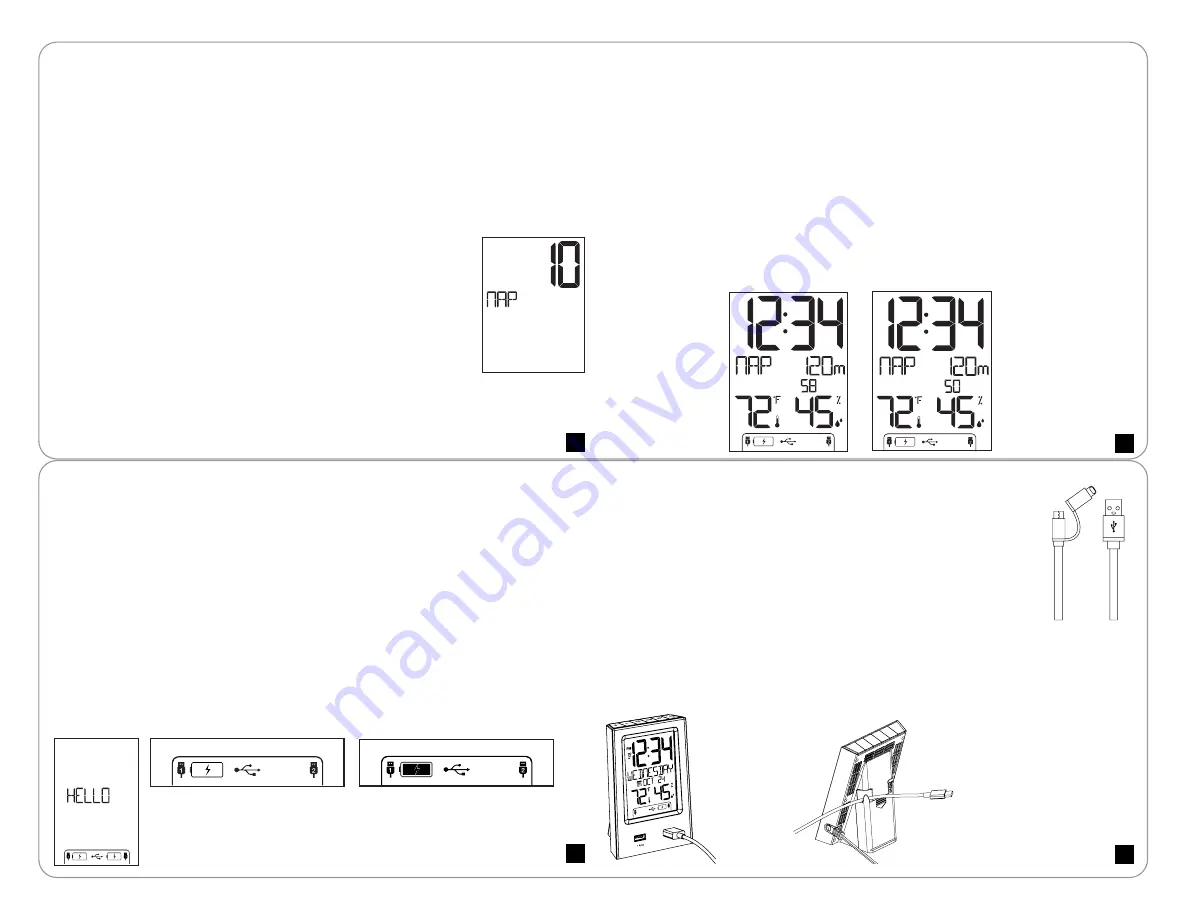
Sometimes, we just want a quick nap without having to set
a new alarm. Set the nap duration one time, then, a simple
press of the
NAP
button starts the nap countdown.
Set Nap Duration:
1. Hold the
NAP
button for 3 seconds. NAP and
the duration will show (default is 10 minutes).
2. Use the
+/-
buttons to select a nap duration
(up to 120 minutes).
3. Press and release the
NAP
button to confirm
and start nap count down to zero.
4. Press the
SNZ/LIGHT
button at any time to exit.
Ready for a Nap?
Press the
NAP
button once, and the clock will wake you at the
preselected time.
•
From normal time display, press the
NAP
button once to start the nap feature
for the preset time.
NAP
will show with the preset duration.
•
Minutes and seconds will countdown.
•
When the alarm sounds
NAP
and
0m
will flash. The alarm will sound for two
minutes and then stop if no buttons are pressed.
•
Press any button except
SNZ/LIGHT
, at any time to exit nap mode.
PM
PM
•
When operating with the power cable, the backlight is adjustable:
HI-LOW-OFF.
•
Press and release the
SNZ/LIGHT
button to adjust the backlight.
•
When operating on batteries only, the backlight will come on briefly when the
SNZ/LIGHT
button is pressed.
USB Charging Ports
USB Output:
• Charge devices that self-regulate.
• Do not charge multiple devices from the same USB port.
• For Tablets and other high power devices, use the USB port on the right
(2 Amp).
• Must operate clock with power cable to charge other devices.
• Plug your device into one of the USB ports on the front of the clock.
• The clock will show HELLO for 3 seconds.
• The lightning bolt will flash while charging.
• When no device is connected, no battery will show.
• As your device becomes full and less current is drawn, solid battery icon may
show, before the charge is complete.
Charging
Not Connected
Full
Not Connected
Note:
The FULL icon will show when full. After charging, the clock
will provide a trickle charge and show the charging icon. Your
device may not show fully charged.
Included USB to Micro USB or Lightning Cable
•
The included USB cord offers a Micro USB connection or a
Lightning connection on the same cord.
•
Use your own charge cord or the included cord to charge
your device.
•
Place your cord in the handy hook on the back of the clock.
Cable Hooks
• On the back of the clock there are two cable hooks to secure your charging
cables.
• Simply slide your cable into the hook and the end of your cable will be easy to
find every time.