background image

Table of Contents

BASICS

OUTDOOR SENSOR

Initial Setup

Buttons

LCD Display

LCD Display Brightness

Auto-Dim 

Display Modes

Display Mode Options

Use the 

+/-

 buttons on 

the back of the clock to 
adjust the values.

02

Initial Setup

Power Up

Settings Menu Order

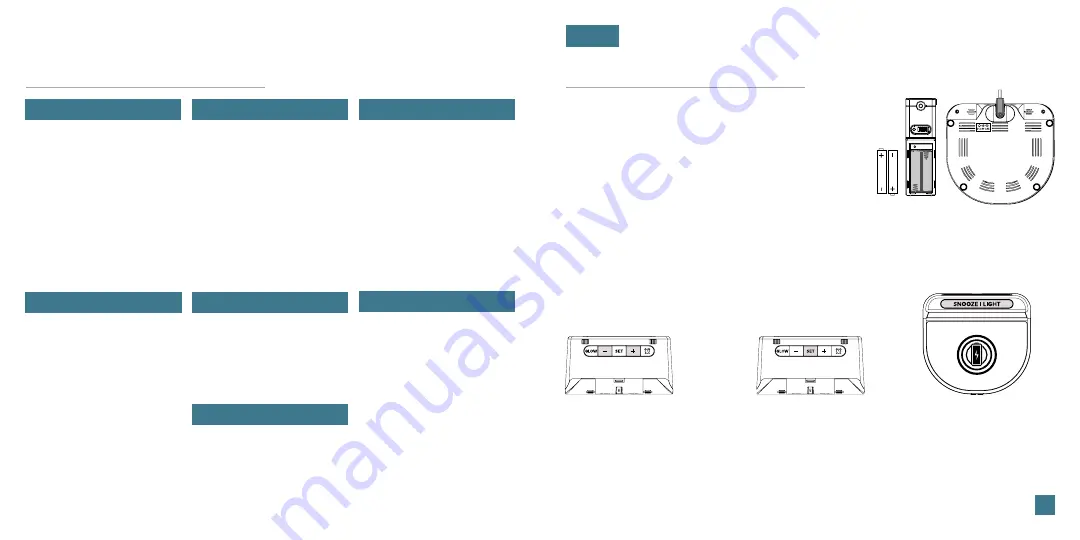
1. Insert 2 AA batteries into your Outdoor Sensor. 
2. Insert the 5V Power Adapter into an outlet, and then 

into the Power Jack on the bottom of the alarm clock. 

3. A greeting will appear and then bring you into your 

Settings Menu. Use the instructions below to adjust your 
settings.

4. Position your outdoor sensor in a shaded location.    

See page 

12

 for details.

    Note: 

To access the Settings Menu after this startup, 

    press and hold the SET button. 

• 

Language 

• 


Hour  

• 


Minutes  


Year  


Month  


Date 

• 


Fahrenheit/Celsius  


Thank you

Press the 

SNOOZE/LIGHT


button at anytime to exit.

02

03

04

04

05

05

06

APPENDIX

ALARM

Setting the Alarm

Activate/Deactivate

Snooze Duration

07

07

08

GLOW LIGHT

Glow Light Selection

Glow Light Brightness

09

09

CHARGING

BASICS

Press the 

SET


button 

to confirm selection 
and move to next 
step. 

Language: 

Whichever language is selected, the following instructions and weekday 

will be presented in that language. 

Weekday: 

Weekday will set automatically after year, month, & date settings are 

adjusted.

Position Outdoor Sensor

Optional Sensor Shield

Search for Outdoor Sensor

12

13

13

Specifications

Factory Reset

Warranty

Recycling & Disposal

Cautions

Care & Maintenance

Statements

14

14

16

16

16

17

17

5W Wireless Charger 

Phone Compatibility

Wireless Charging FAQs

1 Amp USB Charging Port

10

10

11

12

AA

AA

Bottom View

Power Jack

SUPPORT

Support Information

Stay in Touch

15

15

Summary of Contents for 617-148TXT

Page 1: ...SET UP GUIDE MODEL NUMBER 617 148TXT WIRELESS CHARGING ALARM CLOCK...

Page 2: ...Year Month Date Fahrenheit Celsius Thank you Press the SNOOZE LIGHT button at anytime to exit 02 03 04 04 05 05 06 APPENDIX ALARM Setting the Alarm Activate Deactivate Snooze Duration 07 07 08 GLOW L...

Page 3: ...to Dim settings Press to change Display Modes Hold to enter Settings Menu Top View 5 1 4 3 2 Back View Press to factory reset your clock 6 RESET 5 SNOOZE LIGHT 04 LCD Display BASICS AM PM Indicator Au...

Page 4: ...the starting hour Press SNOOZE LIGHT to confirm Press the buttons to adjust the stopping hour Press SNOOZE LIGHT to confirm and exit BASICS The icon will appear on the LCD when activated 06 Display M...

Page 5: ...te the alarm and to view your alarm time The icon will appear on the LCD when the alarm is active 3 Use the buttons to set your desired time Press to confirm 08 Time Alarm Ascending Alarm Snooze Durat...

Page 6: ...n off the Glow Light 10 CHARGING 5W Wireless Charger Charging your Phone Phone Compatibility Place your phone on the platform Your phone should sit flush and centered on the charging pad The blue Char...

Page 7: ...ay reduce performance or damage magnetic strips or RFID chips found in some credit cards security badges passports and key fobs If your phone case holds any of these sensitive items be sure to remove...

Page 8: ...ord Included HX13 0502500 AU 001 The plug on the power adapter is intended to serve as the disconnect device the socket outlet shall be installed near the equipment and shall be easily accessible LCD...

Page 9: ...ative and potentially irreversible impacts on our environment Check with local donation centers to see if your product can be donated for future use If disposal is the only option federal agencies loc...

Page 10: ...FCC Rules Operation is subject to the following two conditions 1 This device may not cause harmful interference and 2 This device must accept any interference received including interference that may...

Reviews: