background image

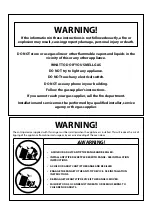
DO NOT store or use gasoline or other flammable vapors and liquids in the 

vicinity of this or any other appliance.

WHAT TO DO IF YOU SMELL GAS

DO NOT try to light any appliance.

DO NOT touch any electrical switch.

DO NOT use any phone in your building.

Follow the gas supplier’s instructions.

If you cannot reach your gas supplier, call the fire department.

Installation and service must be performed by a qualified installer, service 

agency or the gas supplier.

WARNING!

If the information in these instructions is not followed exactly, a fire or 

explosion may result, causing property damage, personal injury or death.

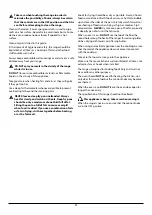
WARNING!

The anti-tip device supplied with this range must be installed when the appliance is installed. This will reduce the risk of 

tipping of the appliance from abnormal usage or by excessive loading of the oven door.

ArtNo.030-0030 - RM tipping
warning symbols

WARNING!

•   A CHILD OR ADULT CAN TIP THE RANGE AND BE KILLED.

•  INSTALL ANTI-TIP BRACKET PACKED WITH RANGE - SEE INSTALLATION 

INSTRUCTIONS.

•  A CHILD OR ADULT CAN TIP THE RANGE AND BE KILLED

•  ENGAGE THE RANGE TO THE ANTI-TIP DEVICE - SEE INSTALLATION 

INSTRUCTIONS.

•  RE-ENGAGE THE ANTI-TIP DEVICE IF THE RANGE IS MOVED.

•  FAILURE TO DO SO CAN RESULT IN DEATH OR SERIOUS BURNS TO 

CHILDREN OR ADULTS.

Summary of Contents for C1LP

Page 1: ...07101 21c w w w l a c o r n u e c o m This book contains many important safety messages Always read and obey all safety messages Installer Leave these instructions with the appliance Important Save the installation instructions for the local electrical inspector s use ...

Page 2: ...actly a fire or explosion may result causing property damage personal injury or death WARNING The anti tip device supplied with this range must be installed when the appliance is installed This will reduce the risk of tipping of the appliance from abnormal usage or by excessive loading of the oven door ArtNo 030 0030 RM tipping warning symbols WARNING A CHILD OR ADULT CAN TIP THE RANGE AND BE KILL...

Page 3: ...rising from dangerous voltages PROTECTIVE EARTH GROUND To identify any terminal which is intended for connection to an external conductor for protection against electric shock in case of a fault or the terminal of a protective earth ground electrode Meaning Description Symbol HEAVY This product is heavy and reference should be made to the safety instructions for provisions of lifting and moving DI...

Page 4: ...ion Instructions 18 8 Service and parts 20 9 Installation safety instructions 21 10 Installation 23 Positioning the range 25 Moving the range 26 Lowering the two rear rollers 26 Installing the cooling fan cover 26 Installing the flue grille 26 Leveling 27 Anti tip device 27 Fitting the anti tip device 27 Wall fixing 27 Side panel extension kit 28 11 Gas connection 29 12 Electrical connection 31 13...

Page 5: ...and liquids If the range is installed near a window proper precautions should be taken to prevent curtains from blowing over the burners n NEVER leave any items on the range cooktop The hot air from an oven vent may ignite flammable items and may increase pressure in closed containers which may cause them to burst Many aerosol type spray cans are EXPLOSIVE when exposed to heat and may be highly fl...

Page 6: ...from steam NEVER let a potholder touch hot heating elements DO NOT use a towel or other bulky cloth in place of a glove They might catch fire if they touch a hot surface Use dry oven gloves when applicable using damp gloves might result in steam burns when you touch a hot surface NEVER operate the range with wet hands Important safety notice and warning The California Safe Drinking Water and Toxic...

Page 7: ...m escape before removing or replacing food n NEVER heat unopened food containers Pressure buildup may make the container burst and cause injury n Keep oven vent ducts unobstructed Placement of oven racks n Always place oven racks in the desired location while the oven is cool If the rack must be moved while the oven is hot DO NOT let the potholder contact the hot heating element in the oven n WARN...

Page 8: ...se overspill when food is added If you use a combination of oils or fats in frying stir them together before heating or as the fats melt Foods for frying should be as dry as possible Frost on frozen foods or moisture on fresh foods can cause hot fat to bubble up and over the sides of the pan Carefully watch for spills or overheating of foods when frying at high or medium high temperatures NEVER tr...

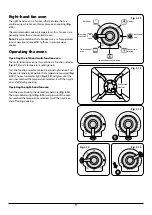
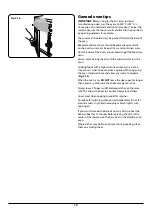
Page 9: ...afety device has not held in Turn the control to the OFF position and wait one minute then try again this time holding in the control knob for slightly longer Adjust the flame height to suit by turning the knob On this range the low position is beyond high not between high and off The LO marks the low position Turn the knob towards it after the contents of a pan have boiled Fig 2 4 Make sure flame...

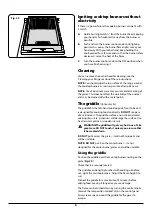
Page 10: ...lish The griddle Optional extra The griddle fits the left hand cooktop grids front to back It is designed for cooking food on directly DO NOT use pans of any kind on it The griddle surface is non stick and metal cooking utensils e g spatulas will damage the surface Use heat resistant plastic or wooden utensils n WARNING The griddle will get very hot in use Take great care DO NOT touch it unless yo...

Page 11: ...on convection assisted and conventional cooking These functions should be used to complete most of your cooking The browning element and warming can be used in the latter part of the cooking process to fine tune the results to your particular requirements Use convection broiling for all your broiling needs and thaw and serve to safely thaw small items of frozen food Table 2 1 gives a summary of th...

Page 12: ...est results we recommend that the grill pan is not located on the uppermost shelf Convection assisted oven This function operates the fans circulating air heated by the elements at the top and the base of the oven The combination of fan and conventional cooking top and base heat makes this function ideal for cooking large items that need thorough cooking such as a large meat roast It is also possi...

Page 13: ...g the ovens Operating the left hand multi function oven The multi function oven has two controls a function selector Fig 2 13 and a temperature setting knob Turn the function selector control to a cooking function Turn the oven temperature knob to the temperature required Fig 2 14 The oven indicator light Fig 2 15 will glow until the oven has reached the temperature selected It will then cycle on ...

Page 14: ...moisture content can create a steam burst when the oven door is opened When opening the oven stand well back and allow any steam to disperse Fig 2 16 When the oven is on DO NOT leave the door open for longer than necessary otherwise the knobs may get very hot Always leave a finger s width between dishes on the same rack This allows the heat to circulate freely around them Cover meat when cooking t...

Page 15: ...orwards Fig 2 23 Refit in the reverse order making sure to push it fully back Oven light Press the appropriate button to turn on the oven lights If one of the oven lights fail turn off the range circuit breaker before you change the bulb See the Troubleshooting section for details on how to change an oven light bulb Fig 2 24 Storage The bottom drawer is for storing oven trays and other cooking ute...

Page 16: ...open for longer than necessary otherwise the knobs may get very hot The telescopic racks with runners can be utilized on levels 2 3 4 and 5 It is not possible to utilize the rack on level 1 Fig 3 1 Always leave a finger s width between dishes on the same rack This allows the heat to circulate freely around them To reduce fat splashing when you add vegetables to hot fat around a roast dry them thor...

Page 17: ...nutes Pork veal 300 2 300 35 40 minutes per 1 lb 35 40 minutes 375 2 375 25 30 minutes per 1 lb 25 30 minutes Poultry Chicken 300 2 300 20 25 minutes per 1 lb 20 25 minutes 375 2 375 15 20 minutes per 1 lb 15 20 minutes Turkey slow cook 300 2 300 25 30 minutes per 1 lb 25 30 minutes 375 2 375 20 minutes per 1 lb 20 minutes Turkey fast cook 300 2 300 20 minutes per 1 lb 20 minutes 375 2 375 15 minu...

Page 18: ...ey may react together with hazardous results Recommended cleaning materials are shown in Table 5 1 Cleaning the range daily care Cleaning the range is not a welcomed chore but it has to be done to maintain efficiency and appearance Remember it is better to wipe up any spills as they occur this will prevent them burning on and becoming more difficult to remove later n Make sure the flow of combusti...

Page 19: ...dels only Uncoated natural brass is used as part of the authentic finish on some models and this may tarnish with age To regain a polished finish these areas should be cleaned using a gentle brass cleaner Take care to ensure the cleaner does not affect surrounding areas Ovens The side panels can be removed for cleaning and for cleaning behind them Removing the panels to clean the enamel interior S...

Page 20: ...Yes this is caused by heat rising from the oven and heating them up Do not leave the oven door open The fascia gets hot when I use the oven or broiler The range is cooled by a fan If the fascia becomes excessively hot when the range is in use then the cooling fan may have failed Should this occur please contact your installer a qualified repair engineer or Customer Service to arrange for its repai...

Page 21: ...urn on the circuit breaker and check that the bulb now lights For bulb type 2 Pull the existing bulb to remove it When handling the replacement bulb avoid touching the glass with your fingers as oils from your hands can cause premature failure Push click in the replacement bulb Replace the bulb cover by turning it a quarter turn clockwise Turn on the circuit breaker and check that the bulb now lig...

Page 22: ...hese instructions is not followed exactly a fire or explosion may result causing property damage personal injury or death WARNING The anti tip device supplied with this range must be installed when the appliance is installed This will reduce the risk of tipping of the appliance from abnormal usage or by excessive loading of the oven door ArtNo 030 0030 RM tipping warning symbols WARNING ALL RANGES...

Page 23: ... for connection to an external conductor for protection against electric shock in case of a fault or the terminal of a protective earth ground electrode Meaning Description Symbol HEAVY This product is heavy and reference should be made to the safety instructions for provisions of lifting and moving DISCONNECT MAINS SUPPLY Disconnect incoming supply before inspection or maintenance The following s...

Page 24: ...ng difficulty please contact Tech Support at 800 914 4799 or email techsupp middlebyresidential com Please note For warranty information or to register your AGA range email customersupport middlebyresidential com You may also refer to the warranty document provided with the appliance or contact 888 845 4641 Option 3 Out of warranty We recommend that our appliances are serviced regularly throughout...

Page 25: ...en flame Immediately call your gas supplier n Improper installation adjustment alteration service or maintenance can cause injury or property damage Refer to this manual For assistance or additional information consult a qualified engineer n NEVER reuse old flexible connectors The use of old flexible connectors can cause gas leaks and personal injury Always use NEW flexible connectors when install...

Page 26: ...r The range is freestanding and should not be placed on a separate base DO NOT locate the range where it may be subject to strong drafts Any openings beneath the range or behind the range should be sealed The range should be positioned on a solid substrate n Your range is heavy DO NOT place on soft floor coverings such as cushioned vinyl or carpeting Use care when moving the range on cushioned vin...

Page 27: ...evel 9 Open end or adjustable wrench 10 Pencil and ruler 11 Pipe wrenches 12 13 mm spanner or socket wrench Additional materials you may need Gas line shut off valve Pipe joint sealant or UL approved pipe thread tape with Teflon that resists action of natural and LP gases Teflon Registered trademark of DuPont Flexible metal appliance connector I D A 5 foot length is recommended for ease of install...

Page 28: ...se Trays 2 flat oven racks Cooling fan cover Anti tip location bracket Anti tip device Conversion kit from natural gas to propane gas kit number A060048 Storage drawer mat in base of storage drawer Side extension kit Toe kick ArtNo 020 0019 Conversion Kit USA ArtNo 351 0001 Side extension panel USA ArtNo 350 0007 Plinth USA 2 sets of oven door knob parts 5 burner control knobs A and 3 oven control...

Page 29: ...ramic tiles the gap on each side can be reduced from 3 to 1 2 5 cm A minimum space of 31 80 cm is required between the top of the cooktop and a horizontal combustible surface The maximum depth for cabinets installed above cooktops is 13 33 cm The depth of the range is 283 8 72 cm overall Fig 10 3 Any range hood should be installed in accordance with the hood manufacturer s instructions Any splash ...

Page 30: ...ut Fig 10 4 Rotate the nut clockwise to raise counter clockwise to lower Make 10 complete 360 turns clockwise Make sure you lower BOTH REAR ROLLERS Unfold the rear edge of the cardboard base tray Get a good grip on the top of the oven cavity panel as you move the oven Carefully push the range backwards off the cardboard base Remove the base tray Position the range close to its final position leavi...

Page 31: ...racket to engage through the slot of the device Fig 10 11 and Fig 10 12 n DO NOT operate the range before the appliance is in its installed position and the anti tip devices are engaged n If the appliance is moved ensure that the anti tip devices are re engaged and the range has been returned to its original installed position n DO NOT step lean or swing on the range doors or drawer as this could ...

Page 32: ... Large washer 4x Shake proof washer Procedure 1 Place a screw and washer in the top hole in the rear edge of the range side panel Add a shake proof washer and start the nut on the screw threads so that the screw is loosely held in place Repeat with the other hole Fig 10 14 2 Slide the side extension in from the side behind the washers Fig 10 15 3 Tighten the top and bottom screws to hold the side ...

Page 33: ...to installation make sure that the local distribution conditions nature of the gas and gas pressure and the adjustment of the appliance are compatible A conversion kit for LP gas Propane is supplied with the range When converted to LP gas a pressure of 10 of the water column 2 49 kPa is required Make sure you are supplying your range with the correct type of gas We recommend that the range be conv...

Page 34: ...rnal pipe threads A Make sure everyone operating the range knows where and how to shut off the gas supply to the range B Use a backup wrench on the regulator fitting to avoid damage When installing the range from the front remove the 90 elbow for easier installation C Install male or flare union adapters to the NPT internal thread of the manual shut off valve taking care to back up the shut off va...

Page 35: ...at the power cord is routed so that it cannot become damaged during the installation This appliance must be supplied with the proper voltage and frequency and connected to an individual properly grounded branch circuit protected by a circuit breaker or time delay fuse as noted on the rating plate Wiring must conform to National Electric Codes If the electric service provided does not meet the abov...

Page 36: ...ide terminals Fig 12 3 Fitting a 4 Wire Power Cord Disconnect the supplied power cord from the terminal block and ground post Keep the terminal block parts you will need them Insert the new power cord through the strain relief device but do not tighten the device yet Fit the wires to the ground post and terminal block Fig 12 4 After fitting your 3 wire or 4 wire Power Cord n Please Torque Tighten ...

Page 37: ...tion cup Fig 13 5 Turn the tube over and push on the other end cap using the second friction cup making sure that you DO NOT scratch or damage the first end piece and confirm the two end pieces are lined up correctly The Allen screws should be on the underside Fig 13 6 Installing the door handle Attach the door knob to the door knob base and screw it to the mounting on the oven door Hand tighten o...

Page 38: ...e n MAKE SURE THE FLOW OF COMBUSTION AND VENTILATION AIR TO THE RANGE IS UNOBSTRUCTED n MAKE SURE ALL CONTROLS ARE LEFT IN THE OFF POSITION Customer care Please complete your details in the table at the end of the Using your Range section of this guide Place these instructions into the colored CornuFé folder in the instruction pack and hand them to the user Thank you How to move the range for serv...

Page 39: ...INSTALLATION Check the appliance is electrically safe when you have finished 35 Removing the drawer Fitting the drawer ...

Page 40: ...Multi function oven fan element A7 Left hand Multi function oven fan B1 Right hand oven thermostat B2 Right hand oven thermostat control switch B3 Right hand oven fan element B4 Right hand oven fan Code Description C1 Hotplate ignition switches C2 Spark generator D1 Left hand oven light switch D2 Left hand oven light F1 Right hand oven light switch F2 Right hand oven light G Cooling fan H Neon I T...

Page 41: ...e Positioning of Cooker Overall depth 28 5 8 723mm Minimum space for cooktop 31 800mm Weight unpacked 385 lbs 175 kg Ratings Oven Fan element 2 5 kW Top element 1 2 kW Browning element 1 15 kW Bottom element 1 0 kW Gas Hob Bypass Screw Natural Gas 4 WC Propane Gas 10 WC Input Orifice Input Orifice Center burners 55 17 000 btu hr 205 17 000 btu hr 118 Larger burners 41 12 000 btu hr 150 12 000 btu ...

Page 42: ...lation not in accordance with local electrical codes or plumbing codes or improper storage of the appliance 4 Repairs due to other than normal home use 5 Service labor during limited warranty period 6 Travel fees and associated charges incurred when the product is installed in a location with limited or restricted access i e airplane flights ferry charges isolated geographic regions Warranty appli...

Page 43: ...39 NOTE ...

Page 44: ...AGA CONSUMER PRODUCTS USA CANADA Middleby Residential 4960 Golden Parkway Buford GA 30518 770 932 7282 www lacornueusa com ...

Reviews: