


STEP 1
Read through these instructions thoroughly before you
begin assembly. We have found this to be of great
value when first assembling this product.
STEP 2
Remove all parts and hardware from packing material.
Wooden pieces should be placed on a non-abrasive
surface (like the carton or carpet) to prevent damage
to the finish.
STEP 3
Identify all parts using diagram at right.
Removable Shelf (G)
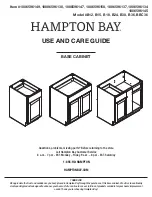
STEP 4
Identify and count hardware using diagrams at right
and below.
(2) Door Pulls
(4) 5/8” Pan Screws
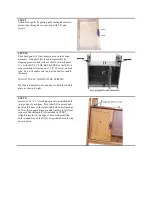
STEP 5
Stand the side assembly (A) on edge and attach floor
assembly (B) (floor assembly has groove on one face
and two wooden cleats on the other) with two 1-1/4”
#8 screws. Ensure that groove in floor assembly faces
inside of finished unit. Repeat to attach other side.
DO NOT TIGHTEN SCREWS AT THIS TIME.