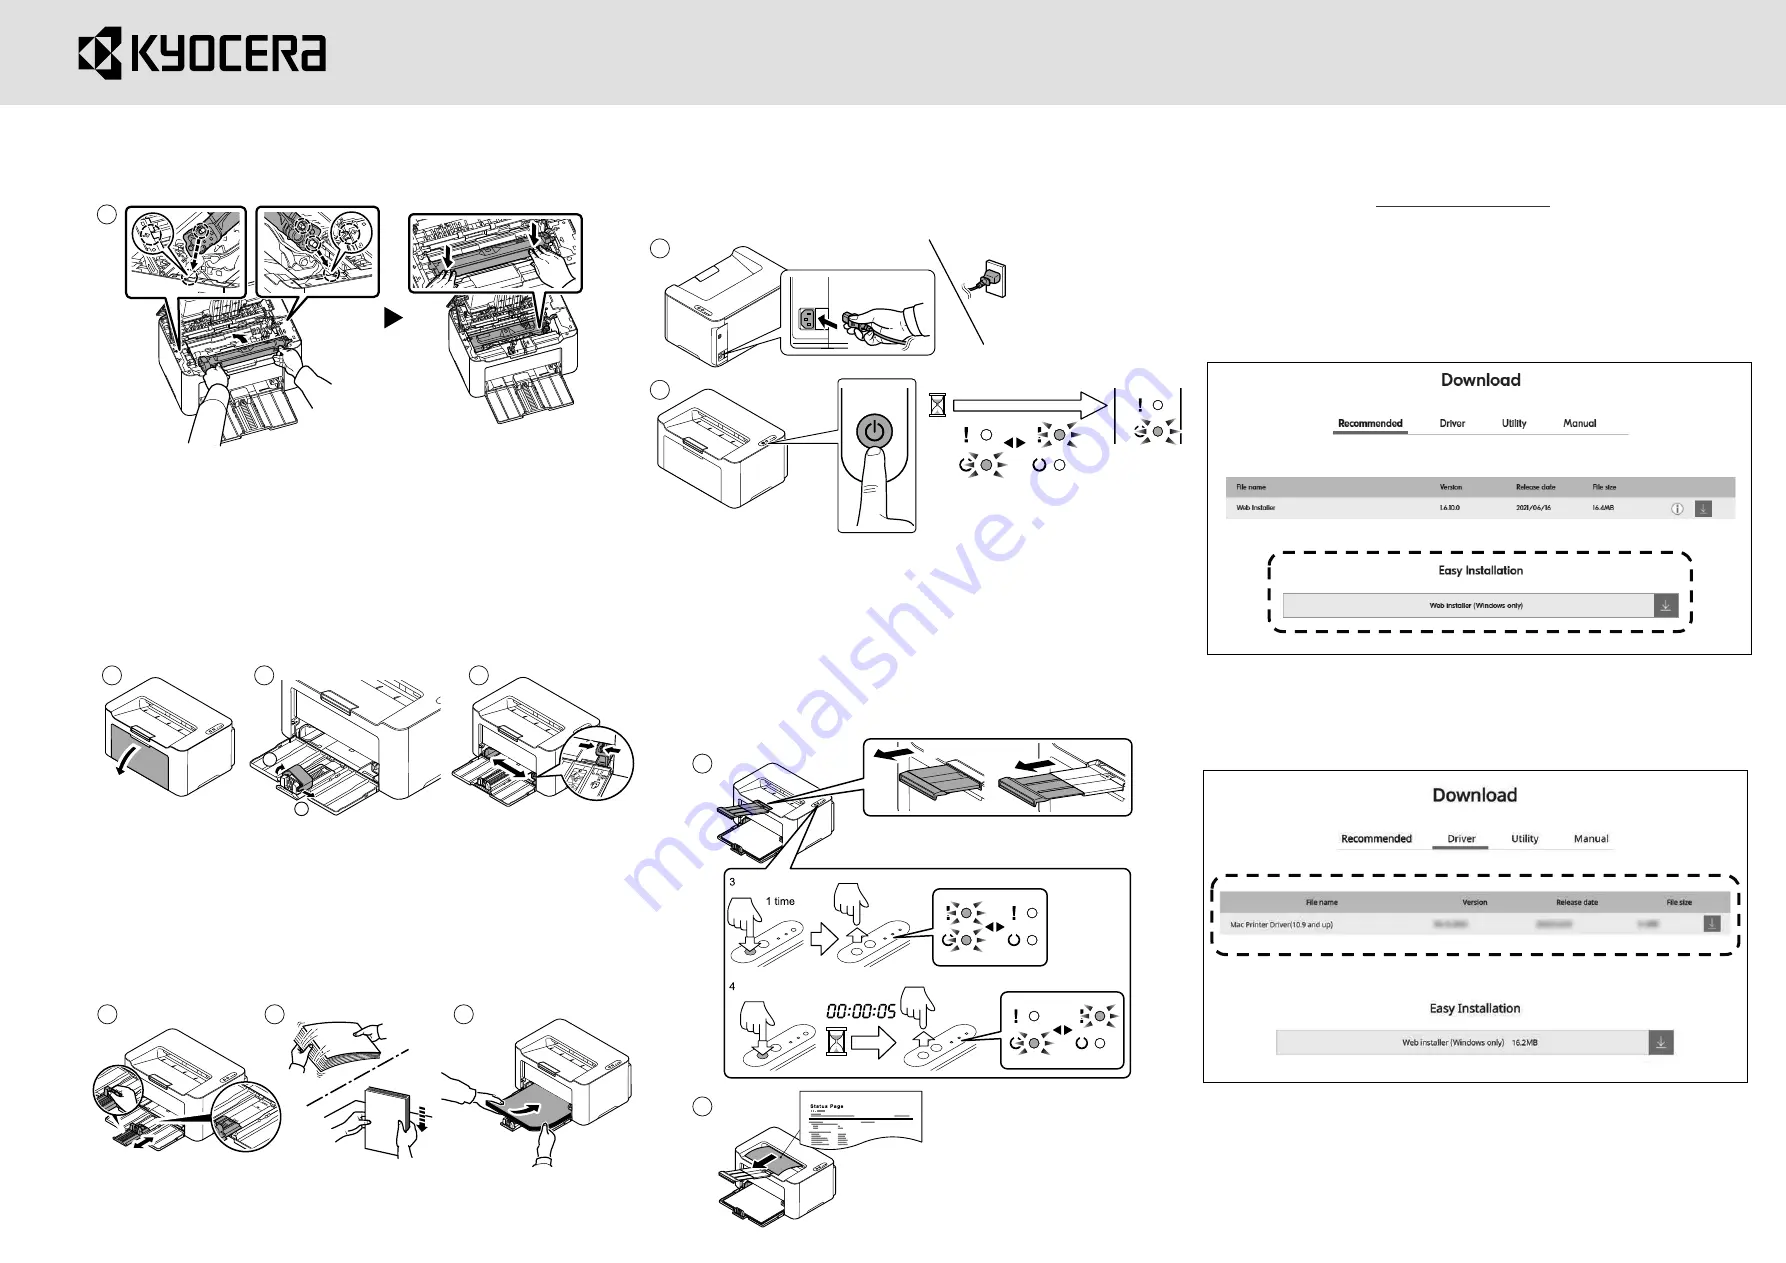
PA2000w/PA2000 Setup
8.
Set the toner cartridge to its position, aligning the
guides at both ends with the slots in the machine. Press
the levers on both ends of the Unit until they click in
place.
Step2 Loading Paper
1.
Open the Front Cover.
2.
When using paper other than A5 (Landscape), remove
the stopper from the paper length guide. Keep the
removed Stopper for future use.
3.
Adjust the position of the width guides located on the
left and right sides of the cassette.
4.
Adjust the paper length guide to the paper size required.
5.
After removing paper from the packaging, fan through
the sheets to separate them prior to loading.
6.
Load the paper all the way in the cassette until the
paper touches the far inner side. Ensure the side to be
printed is facing up and the paper is not folded, curled,
or damaged.
Step3 Power up the machine
1.
Connect the power cord to the rear of the machine
①
and
the other end to the power outlet.
②
Turn the power switch
ON at the front of the printer.
Step4 Print a Status Page
1.
Print a Status page.
・
When the Main Power key is pressed, the attention light
and the Main Power light flash at the same time.
Then press and hold the Main Power key for 5 seconds.
The attention light and the main power light start will be
flashing twice alternately, and status page will be printed.
・
Step5 Installing the software
Access the following URL and select your model and OS.
Download Center:
https://kyocera.info/
Videos on machine setup, software installation, etc. are also
available on this site.
For Windows
Download and run the Web Installer and follow the on-
screen instructions to install the driver and software.
For macOS
Download and run the driver and follow the on-screen
instructions to install.
11
1
2
3
4
5
6
1
2
1
2
・
1
2
1
2
2
1
2 times
Press and hold


