background image

FAX Operation (Advanced) 

4-15

4

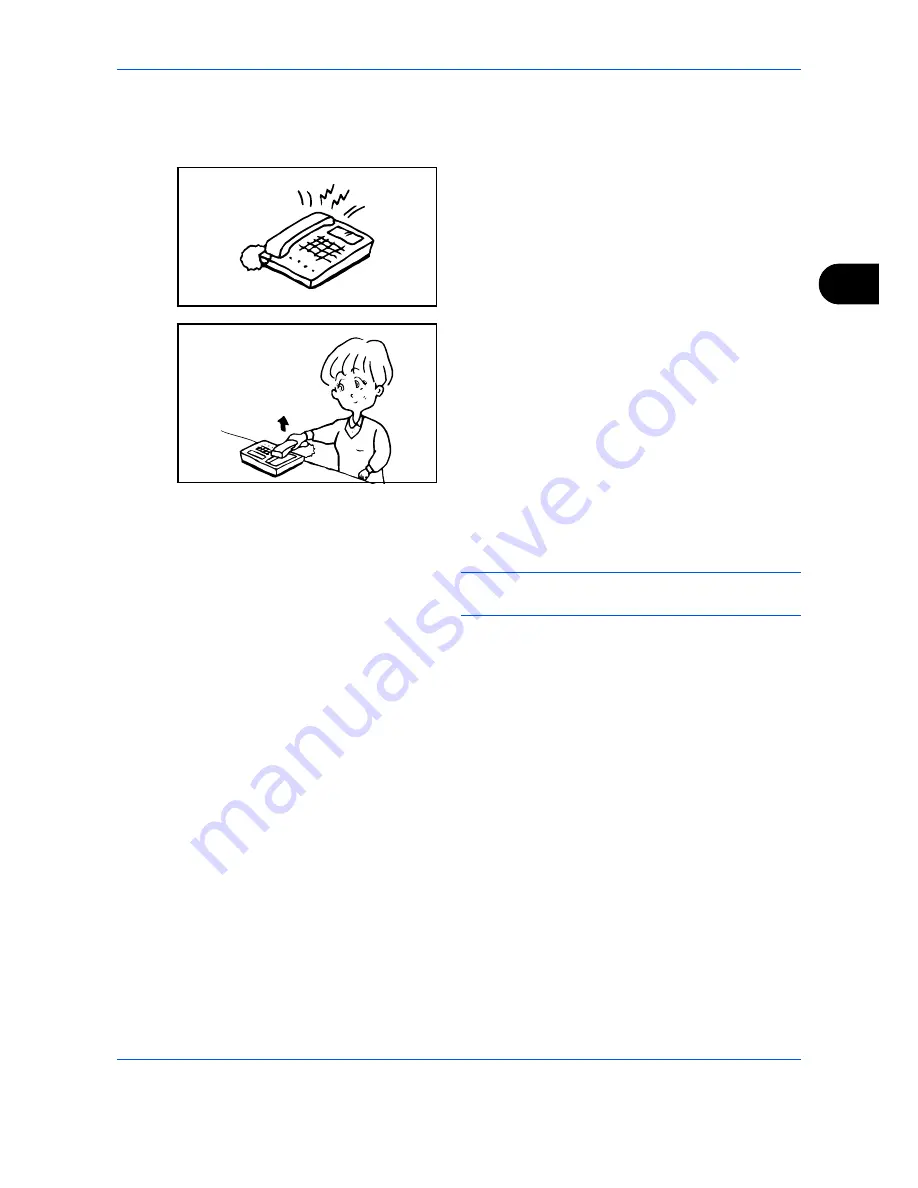
Using the Remote Switch Dial

To start fax reception by operation from the connected telephone set, use the following operation.

1

The connected telephone set makes a ringing 
tone.

2

Lift the handset of the telephone.

3

When you hear the fax tone from the handset, 
enter the two-digit remote switch dial number using 
the dial button on the telephone set.

NOTE: 

The remote switch dial is set to 55 at the 

factory.

4

The telephone line switches to the machine, and 
reception starts.

Summary of Contents for ECOSYS FS-C2126MFP

Page 1: ...Fax Operation Guide FS C2126MFP ...

Page 2: ......

Page 3: ...cates that the related section includes safety warnings Specific points of attention are indicated inside the symbol The symbol indicates that the related section includes information on prohibited actions Specifics of the prohibited action are indicated inside the symbol The z symbol indicates that the related section includes information on actions which must be performed Specifics of the requir...

Page 4: ...ii Note Due to performance updating information in this Operation Guide is subject to change without notice ...

Page 5: ...terrupt Send 4 7 Chain Dial 4 8 Manual Send 4 10 Manual Reception 4 12 Remote Switch Function 4 14 Printing Forwarding Received Documents Memory Forwarding 4 16 Sub Address Communication 4 32 Sub Address Box Function 4 35 Program Dial 4 41 Polling Communication 4 43 Account Management 4 51 Other Convenient Functions 4 55 5 Checking Transmission Results and Registration Status Various Tools for Che...

Page 6: ...ection to PBX Private Branch Exchange Europe only 6 39 Remote Diagnostics 6 40 7 About Network FAX What is Network FAX 7 2 Setup 7 4 8 Troubleshooting Indicators During Sending Receiving Operation 8 2 Precautions When Turning Power OFF 8 3 Error Messages 8 4 Troubleshooting 8 6 Appendix Character Entry Method Appendix 2 Specifications Fax function Appendix 6 Menu List Appendix 7 Received FAX Sizes...

Page 7: ...ase read the Operation Guide before you start using the machine During use refer to the Operation Guide for your machine for information regarding the sections listed below Caution Labels Installation Precautions Precautions for Use Loading Paper Toner Container and Waste Toner Box Replacement Clearing Paper Jams Solving Malfunctions Cleaning ...

Page 8: ...ephone network must comply with the applicable FCC Part 68 rules and requirements adopted by the ACTA A compliant telephone cord and modular plug is provided with this product It is designed to be connected to a compatible modular jack that is also compliant See installation instructions for details 4 The REN is used to determine the number of devices that may be connected to a telephone line Exce...

Page 9: ...rst page of the transmission the date and time it is sent and an identification of the business or other entity or other individual sending the message and the telephone number of the sending machine or such business other entity or individual The telephone number provided may not be a 900 number or any other number for which charges exceed local or long distance transmission charges In order to p...

Page 10: ... aux règlements pertinents quant à l élimination des piles CONSERVER CES INSTRUCTIONS CANADIAN IC REQUIREMENTS This product meets the applicable Industry Canada technical specifications The Ringer Equivalence Number is an indication of the maximum number of devices allowed to be connected to a telephone interface The termination on an interface may consist of any combination of devices subject onl...

Page 11: ...mation technology equipment EN55022 Class B Limits for harmonic currents emissions for equipment input current 16A per phase EN61000 3 2 Limitation of voltage fluctuations and flicker in low voltage supply systems for equipment with rated current 16A EN61000 3 3 Safety of information technology equipment including electrical business equipment EN60950 1 Terminal Equipment TE Attachment requirement...

Page 12: ...06R00 AN for D GR and P ES 01R01 National AN for E AN 07R01 AN for D E P and N GR 01R00 National AN for GR AN 09R00 AN for D GR 03R00 National AN for GR AN 10R00 AN for D GR 04R00 National AN for GR AN 11R00 AN for P NO 01R00 National AN for N AN 12R00 AN for E NO 02R00 National AN for N AN 16R00 General Advisory Note P 03R00 National AN for P DE 03R00 National AN for D P 04R00 National AN for P D...

Page 13: ...switched telephone networks PSTN in the following countries Austria France Liechtenstein Slovakia Belgium Germany Lithuania Slovenia Bulgaria Greece Luxembourg Spain Cyprus Hungary Malta Sweden Czech Iceland Norway Switzerland Denmark Ireland Poland The Netherlands Estonia Italy Portugal United Kingdom Finland Latvia Romania ...

Page 14: ...iginals for each requirement Furthermore explains sub address communication functions of the machine that are compatible with other makers systems and job accounting functions convenient for checking the communication status of fax Chapter 5 Checking Transmission Results and Registration Status Explains how to check the status of recent transmissions on the message display Also explains how to pri...

Page 15: ...ls refer to the machine s Operation Guide Note Indicates supplemental information or operations for reference NOTE Important Indicates items that are required or prohibited so as to avoid problems IMPORTANT Caution Indicates what must be observed to prevent injury or machine breakdown and how to deal with it CAUTION Underline A link function allows you to jump to a related page Position the pointe...

Page 16: ...xiv ...

Page 17: ...1 1 1 Part Names and Functions This chapter explains the names of parts of the fax device For other parts refer to the machine s Operation Guide Operation Panel 1 2 Machine 1 4 ...

Page 18: ...es between on hook and off hook when manually sending a FAX Shifts to switch the one touch key numbers 1 to 11 and 12 to 22 Lamp is lit while shifted 12 to 22 Destinations can be checked and added Calls the previous destination Also used to enter a pause when entering a FAX number Displays the Address Book screen where you can add destinations Used to call destinations registered to the one touch ...

Page 19: ... settings and displays the basic screen Starts sending operations and processing for setting operations Clears entered numbers and characters Numeric keys Enter numbers and symbols Displays the function menu for FAX Used to select a menu item move the cursor when entering characters change a value etc Returns the Message Display to the previous screen Lights or blinks when an error occurs Selects ...

Page 20: ... operation panel 1 2 3 4 5 1 Operation panel Perform the fax operation with this panel 2 Main power switch Set this switch to ON when performing the fax or copier operation The message display lights to enable operation 3 MP Multi Purpose tray Set the paper in this tray when using a type of paper other than the cassette e g when using special paper 4 LINE connector Connect the modular cord for the...

Page 21: ...inal jammed in the Document Processor 7 Original width guides Adjust these guides according to the original width 8 Original table Stack the sheet originals on this table 9 Original eject table Read originals are ejected onto this table 10 Opening handle Hold this handle when opening or closing the Document Processor ...

Page 22: ...Part Names and Functions 1 6 ...

Page 23: ...on of Telephone Line Inch version only 2 2 Selection of Transmit Terminal Identification TTI 2 3 Setting the TTI information 2 4 Date and Time Entry 2 6 Connection to PBX Europe only 2 8 out by a service representative There is no need for the customer to undertake this preparation if it has already been carried ...

Page 24: ... to select FAX 3 Press the OK key 4 Press the U or V key to select Transmission 5 Press the OK key 6 Press the U or V key to select FAX Dialing Mode 7 Press the OK key 8 Press the U or V key to select Tone DTMF Pulse 10pps or Pulse 20pps according to the type of telephone line you are contracted with 9 Press the OK key FAX a b 1 TX RX Common 3 Reception Exit 2 Transmission Transmission a b 3 Local...

Page 25: ...the information to be printed you can select inside or outside of the page image being sent NOTE Normally the Local FAX Name is printed in the transmit terminal identification TTI However when job accounting has been enabled and you send originals after entering an Account ID the Account Name is printed 1 Press the System Menu Counter key 2 Press the U or V key to select FAX 3 Press the OK key 4 P...

Page 26: ...rinted on in the transmit terminal identification NOTE To change the entry follow the same operation 1 Press the System Menu Counter key 2 Press the U or V key to select FAX 3 Press the OK key 4 Press the U or V key to select Transmission 5 Press the OK key 6 Press the U or V key to select Local FAX Name 7 Press the OK key 8 Enter the Local FAX Name to be registered Up to 32 characters can be ente...

Page 27: ...er the Local FAX ID go to step 10 Local FAX Number Entry 6 Press the U or V key to select Local FAX Number 7 Press the OK key 8 Use the numeric keys to enter the local FAX number to be registered Up to 20 digits can be entered NOTE Press the Y or Z key to move the cursor To correct the number press the Clear key to delete the digits one by one before reentering the number To delete all entered dig...

Page 28: ...s the U or V key to select Common Settings 3 Press the OK key 4 Press the U or V key to select Date Setting 5 Press the OK key 6 A login screen will appear Then enter the Login User Name and Login Password to log in 7 Press Login the Right Select key The Date Setting menu appears 8 Press the U or V key to select Time Zone 9 Press the OK key 10 Press the U or V key to select your region 11 Press th...

Page 29: ...the OK key 16 Press the U or V key to select Date Time 17 Press the OK key 18 Press the Y or Z key to move the cursor position enter year month and day 19 Press the OK key 20 Press the Y or Z key to move the cursor position enter hours minutes and seconds 21 Press the OK key Summer Time a b 2 On 1 Off Date Time a b Year Month Day 2010 01 01 Time Zone Tokyo Date Time a b Hour Min Second 11 45 50 Ti...

Page 30: ...ed PBX Setting 1 Refer to Basic Operation Procedure on page 6 7 2 Press the U or V key to select FAX Call Set 3 Press the OK key 4 Press the U or V key to select Exchange Select 5 Press the OK key 6 Press the U or V key to select PBX 7 Press the OK key 8 Press the U or V key to select Dial No to PSTN 9 Press the OK key 10 Use the numeric keys to enter the number to access the outside line 11 Press...

Page 31: ...his chapter explains the following basic operations Automatic Send 3 2 FAX Automatic Reception 3 9 Cancelling Communication 3 12 Using the Address Book 3 15 Using One touch Keys 3 26 Dialing the Same Receiving System Redial 3 29 ...

Page 32: ...TP transmission in a single transmission job Multi Sending Press the Send key to select the destinations For details refer to Sending in the Operation Guide for the machine Selection of Transmission Method 2 There are two transmission methods memory transmission and direct transmission The default is memory transmission To select direct transmission use the following procedure 1 Press the Function...

Page 33: ...ed you perform an operation to allow continued scanning and after all the originals have been stored in memory the receiving system is dialed Direct Transmission When originals are placed in the document processor After the telephone line has connected with the receiving system scanning of the originals placed in the document processor starts When multiple page originals are placed each page is sc...

Page 34: ...ers Use Y or Z to move the cursor To correct the number press the Clear key to delete the digits one by one before reentering the number To delete all entered digits and return to the default screen press the Reset key Address Recall Pause Pressing this key adds about three seconds of waiting time during dialing For example when dialing the receiving system on an external line you can use this met...

Page 35: ... Refer to page 3 29 Key Description Sub Address To communicate using the sub address press this key For details refer to Sub Address Communication on page 4 32 Encrypted TX To send faxes using encryption press this key For details refer to Encryption on page 6 21 TX Start Speed If a communication error occurred press this key to change the TX Start Speed Select the speed from 33 600 bps 14 400 bps...

Page 36: ...ng originals with minute characters and lines more finely Typical character size 6 point example Resolution Resolution NOTE The default setting is 200 100 dpi Normal The higher the resolution the clearer the image However higher resolution also means longer send times Normally 400 400 dpi Ultra Fine is recommended The scan resolution should be equal to or higher than the fax resolution If the sele...

Page 37: ...nt at an image quality of 200 200 dpi Fine Selecting the Density 6 Adjusting the density when scanning originals Manual 3 to 3 You can adjust the density using seven levels Auto The optimal density is chosen according to the density of the originals 1 Press the Function Menu key 2 Press the U or V key to select Density 3 Press the OK key 4 Press the U or V key to select Auto or Manual 5 Press the ...

Page 38: ...d Job Status 3 Press the OK key A list of send job statuses appears Cancelling the Transmission 1 In the above screen for checking send jobs press the U or V key to select the job you want to cancel 2 Press Cancel the Left Select key 3 Press Yes the Left Select key This cancels the transmission NOTE Pressing the Stop key on the operation panel while originals are being scanned cancels the transmis...

Page 39: ...hange the reception method to Auto DRD For details refer to DRD Reception on page 6 11 Part that is operated Reception Method This machine allows the following five reception methods Auto Normal Auto FAX TEL Refer to page 6 2 Auto TAD Refer to page 6 4 Auto DRD Refer to page 6 11 Manual Refer to page 4 12 Checking and Changing the Reception Method 1 Press the System Menu Counter key 2 Press the U ...

Page 40: ...ings on page 6 16 To cancel the reception refer to Cancelling Transmission Disconnection of Communication on page 3 13 Reception Print 2 Received originals are output on the top tray with the print side facing downward Up to 150 sheets of plain paper 80 g m can be held on the top tray However the number of sheets varies with the condition of the paper to be used IMPORTANT When the number of sheets...

Page 41: ...ginals that have been sent in the image memory When the machine returns to the printable state printing starts During memory reception FAX Reception Printing Jobs are displayed on Printing Jobs of the Status screen To print the received originals supply paper or remove jammed paper NOTE For the Status screen refer to the machine s Operation Guide ...

Page 42: ...nsmission to cancel communication after it has started following the completed scanning of originals use the following procedure NOTE If user management is set to On the administrator or the user who performs the memory transmission can be canceled the job You can cancel transmission by disconnecting the telephone line For details refer to Cancelling Transmission Disconnection of Communication on ...

Page 43: ...e OK key 8 Press Yes the Left Select key Communication is canceled Or communication starts if sending the job immediately Cancelling Direct Transmission During direct transmission to cancel communication during transmission press the Stop key on the operation panel The originals that have been scanned are ejected and the screen returns to the default screen for sending When originals remain in the...

Page 44: ...connects the line in communication Cancelling Polling Transmissions To cancel a polling transmission delete the polling transmission original saved in the polling box For information on how to delete the saved original refer to Deleting Originals in a Polling Box on page 4 49 FAX b Sending Line Off Log ...

Page 45: ...ons as a unit Contact Registration fax Up to 100 destinations can be registered Destination name fax number sub address communication encryption transmission start speed and ECM communication can be registered for each destination 1 Press the System Menu Counter key 2 Press the U or V key to select Edit Destination 3 Press the OK key 4 Press the U or V key to select Address Book 5 Press the OK key...

Page 46: ...y available number out of 120 numbers 100 for individuals and 20 for groups 14 Press the OK key 15 Press the Y or Z key to select Contact Name 16 Press Edit the Right Select key 17 Use the numeric keys to enter the destination name to be displayed in the Address Book Up to 32 characters can be entered NOTE For details on character entry refer to Specifications Fax function on Appendix 6 18 Press t...

Page 47: ...22 Press Detail the Right Select key and then use the Y or Z key to select Sub Address If you do not use Sub Address proceed to step 28 23 Press Edit the Right Select key 24 Use the numeric keys to enter the sub address Up to 20 digits can be entered NOTE A sub address can be entered using numerals from 0 to 9 spaces and characters and 25 Press the OK key 26 Use the numeric keys to enter the sub a...

Page 48: ...mber 33 Press the OK key NOTE Register the encryption key in advance For details refer to Registering an Encryption Key on page 6 22 34 Press the U or V key to select On or Off 35 Press the OK key Proceed to the next step or step 38 when On or Off is selected in step 34 respectively 36 Use the numeric keys to enter the encryption box number 4 digits 37 Press the OK key FAX Detail C b Encrypted TX ...

Page 49: ...be designated at one time Up to 20 groups can be registered NOTE Group registration requires destinations that have been registered as contact registration Perform the necessary contact registration in advance 1 Press the System Menu Counter key 2 Press the U or V key to select Edit Destination 3 Press the OK key FAX Detail C b TX Start Speed 3 4 33600bps Change Key Description TX Start Speed To c...

Page 50: ... Edit the Right Select key 13 Use the numeric keys to enter any address number between 001 and 120 NOTE An address number is an identification number for each destination You can select any available number out of 120 numbers 100 for individuals and 20 for groups 14 Press the OK key Edit Destination a b 2 Print List Exit 1 Address Book Address Book a b l Fiala l Maury Menu k Design Menu a b 1 Deta...

Page 51: ...to select Group Member 20 Press Edit the Right Select key 21 Press Menu the Right Select key 22 Press the U or V key to select Add Member 23 Press the OK key 24 Press the U or V key to select the destination individual you want to register to the group NOTE You can search for a destination by destination name 25 Press the OK key 26 Press Menu the Right Select key 27 Press the U or V key to select ...

Page 52: ...c 3 22 28 Press the OK key 29 To add more destinations repeat steps 21 to 28 30 Press the Back key 31 Use the Y or Z key to check if the group was set correctly 32 Press the OK key The group is added to the Address Book ...

Page 53: ...ered in the destination list Searching for a Destination You can search for a destination registered in the Address Book 1 In the basic screen for sending press the Address Book key 2 Press the U or V key to select Address Book 3 Press the OK key 4 Press Menu the Right Select key 5 Press the U or V key to select Search Name 6 Press the OK key Ready to send 2010 01 01 12 30 Text Photo 200x100dpi Or...

Page 54: ...ss Book 5 Press the OK key 6 Press the U or V key to select the destination or group to edit 7 Press Menu the Right Select key 8 When editing the destination of a contact registration 1 Press the U or V key to select Detail Edit 2 Press the OK key 3 Change the contents of the destination For details refer to steps 11 to 39 in Contact Registration fax When editing a group 1 Press the U or V key to ...

Page 55: ...ion contents is reflected on the Address Book Printing Address List You can print the list of destinations registered in the Address Book You can sort the list in the order of names or address numbers of the destinations 1 Press the System Menu Counter key 2 Press the U or V key to select Edit Destination 3 Press the OK key 4 Press the U or V key to select Print List 5 Press the OK key 6 Press the...

Page 56: ...ed 1 Press the One touch key that you want to register and hold it 2 seconds 2 Press the U or V key to select the number to which you want to register the destination Numbers 12 to 22 are the One touch key numbers when the Shift Lock key is pressed 3 Press the OK key 4 Press the U or V key to select the destination individual or group you want to register to the One touch key from the Address Book...

Page 57: ...y In the destination entry screen press the One touch key where the destination is registered When recalling from One touch keys 12 to 22 press the Shift Lock key to turn on the lamp next to the keys and then press the One touch key where the destination is registered ...

Page 58: ...ant to edit Numbers 12 to 22 are the One touch key numbers when the Shift Lock key is pressed 3 Press the OK key 4 When changing the destination to another destination 1 Press the U or V key to select Edit 2 Press the OK key 3 Press the U or V key to select the new destination individual or group 4 Press the OK key 5 Press Yes the Left Select key The destination is registered to the One touch key ...

Page 59: ...system does not respond when you have tried to send a fax When you want to send the fax to the same receiving system press the Address Recall Pause key and you can call the receiving system you dialed on the destination list 1 Press the Address Recall Pause key The receiving system you dialed is displayed on the destination list NOTE When the last transmission included multi address transmissions ...

Page 60: ...FAX Operation Basic 3 30 ...

Page 61: ...by Transmission 4 6 Interrupt Send 4 7 Chain Dial 4 8 Manual Send 4 10 Manual Reception 4 12 Remote Switch Function 4 14 Printing Forwarding Received Documents Memory Forwarding 4 16 Sub Address Communication 4 32 Sub Address Box Function 4 35 Program Dial 4 41 Polling Communication 4 43 Account Management 4 51 Other Convenient Functions 4 55 ...

Page 62: ...mission before the specified time Refer to Cancelling and Sending Delayed Transmissions Queued on page 3 13 You can change destinations of a delayed transmission any time before the specified transmission time Refer to Checking Scheduled Job on page 4 3 Batch Transmission Function When fax originals to be sent to the same destination are set to the same transmission start time with delayed transmi...

Page 63: ...g Scheduled Job You can check the details of a scheduled job NOTE For cancelling memory transmission or sending a scheduled job immediately refer to Cancelling Memory Transmission during communication on page 3 12 1 Press the Status Job Cancel key 2 Press the U or V key to select Scheduled Job 3 Press the OK key 4 Press the U or V key to select the job you want to check 5 Press Menu the Right Sele...

Page 64: ...stinations For details refer to Sending in the Operation Guide for the machine 1 Press the FAX key 2 Place the originals 3 Select the destination Enter the fax number 1 Use the numeric keys to enter the fax number NOTE When On is selected in Entry Check for New Destination a confirmation screen is displayed for the entered FAX number Re enter the same FAX number and press the OK key For details re...

Page 65: ...6 You can select destinations using a combination of direct entry the Address Book and One touch keys 4 After selecting all the destinations press the Start key Transmission begins NOTE When On is selected in Destination Check before Send a destination confirmation screen is displayed when you press the Start key For details refer to Confirmation Screen of Destinations on page 5 13 ...

Page 66: ...s such as broadcast transmission For the transmission method use memory transmission To select memory transmission refer to Selection of Transmission Method on page 3 2 1 Press the FAX key 2 Place the originals 3 Select the destination and set transmitting functions if you want to use any 4 Press the Start key Scanning of the originals starts and the next transmission is scheduled NOTE When On is ...

Page 67: ...u key 4 Press the U or V key to select FAX Direct TX 5 Press the OK key 6 Press the U or V key to select On 7 Press the OK key 8 Set the destination and press the Start key The panel display will switch to the standby screen and the transmission will start when transmission becomes possible NOTE When On is selected in Destination Check before Send a destination confirmation screen is displayed whe...

Page 68: ...212 using the numeric keys 4 Press Chain the Left Select key 5 Enter the fax number to connect to the chain number Use the numeric keys to enter a fax number 1 212 is already entered and then enter the fax number NOTE When On is selected in Entry Check for New Destination a confirmation screen is displayed for the entered FAX number Re enter the same FAX number and press the OK key For details ref...

Page 69: ...212 is automatically added to the destination Select fax number from One touch key Select the destination from One touch keys The chain number 212 is automatically added to the destinations 6 Press the Start key Transmission begins NOTE When On is selected in Destination Check before Send a destination confirmation screen is displayed when you press the Start key For details refer to Confirmation ...

Page 70: ...ncel the operation press On Hook key or Reset key 5 When you hear the fax tone the telephone line has connected to the receiving system Press the Start key Transmission begins NOTE When On is selected in Destination Check before Send a destination confirmation screen is displayed when you press the Start key For details refer to Confirmation Screen of Destinations on page 5 13 Using a Telephone to...

Page 71: ... system The telephone line has connected to the telephone of the receiving system When the conversation is over follow steps 1 to 3 above 4 When sending starts when the Processing indicator on the operation panel starts blinking return the handset to its original position ...

Page 72: ...eception To change to manual mode refer to Receiving Mode on page 6 17 Receiving after Confirming Connection to the Sending System You can receive originals after confirming by sound that the telephone line has connected to the sending system 1 When there is an incoming call the machine makes a ringing tone 2 Press the FAX key 3 Press the On Hook key 4 Press ManualRX the Left Select key 5 After th...

Page 73: ...tone signals use the telephone to start the reception of originals with the remote switch function Refer to Remote Switch Function on page 4 14 When you hear a voice from the receiving system The telephone line has connected to the telephone of the sending system When the conversation is over follow steps 1 to 2 above After the sending system has started transmission the machine starts receiving o...

Page 74: ...rcially available product to the machine However even if it is a tone signal sending telephone set this function may not be used satisfactorily depending on the type of telephone set For details contact our agent or the store where you purchased this machine How to Register Remote Switch Dial Remote switch dial is set to 55 at the factory but you can change the dial number 1 Press the System Menu ...

Page 75: ...ration 1 The connected telephone set makes a ringing tone 2 Lift the handset of the telephone 3 When you hear the fax tone from the handset enter the two digit remote switch dial number using the dial button on the telephone set NOTE The remote switch dial is set to 55 at the factory 4 The telephone line switches to the machine and reception starts ...

Page 76: ...orwarding destination can be specified When forwarding is set to On all received documents will be forwarded to the specified destination Type of Forwarding Destination You can forward the document to other fax machines or Sub Address Boxes or for e mail transmission or folder SMB or FTP transmission Setting Forwarding Use the procedure below to set forwarding 1 Press the System Menu Counter key 2...

Page 77: ...cedure below to register a forwarding destination 1 Press the System Menu Counter key 2 Press the U or V key to select FAX 3 Press the OK key 4 Press the U or V key to select Reception 5 Press the OK key 6 Press the U or V key to select Forward Settings 7 Press the OK key Reception a b 3 Rings TAD 4 Rings FAX TEL Exit 5 Forward Settings Forward Settings a b 2 Forward Dest 3 File Format 1 Forwardin...

Page 78: ...u want to register as a forwarding destination Entering Forwarding Destination Directly 1 Press the U or V key to select Address Entry 2 Press the OK key 3 Press the U or V key to select FAX E mail Folder SMB or Folder FTP 4 Press the OK key 5 Use the numeric keys to enter the address to be registered as a forwarding destination Up to 128 characters can be entered for e mail transmission up to 64 ...

Page 79: ... delete registration contents 1 Press the System Menu Counter key 2 Press the U or V key to select FAX 3 Press the OK key 4 Press the U or V key to select Reception 5 Press the OK key 6 Press the U or V key to select Forward Settings 7 Press the OK key 8 Press the U or V key to select Forward Dest 9 Press the OK key 10 Press the U or V key to select Confirmation 11 Press the OK key Reception a b 3...

Page 80: ...ination is deleted 14 Press Exit the Right Select key Forwarding Time Setting Register the start time and end time between which forwarding is enabled 1 Press the System Menu Counter key 2 Press the U or V key to select FAX 3 Press the OK key 4 Press the U or V key to select Reception 5 Press the OK key 6 Press the U or V key to select Forward Settings 7 Press the OK key 8 Press the U or V key to ...

Page 81: ...the end time 15 Press the OK key NOTE Enter the time on the 24 hours system File Format Setting for Each Requirement If you are sending the file as an E mail attachment or transferring it to a folder SMB or FTP select PDF TIFF or XPS as the file format 1 Press the System Menu Counter key 2 Press the U or V key to select FAX 3 Press the OK key 4 Press the U or V key to select Reception 5 Press the ...

Page 82: ...When adding information you can select either Sender Name or Sender 1 Press the System Menu Counter key 2 Press the U or V key to select FAX 3 Press the OK key 4 Press the U or V key to select Reception 5 Press the OK key 6 Press the U or V key to select Forward Settings 7 Press the OK key 8 Press the U or V key to select Subject Add Info 9 Press the OK key Forward Settings a b 1 Forwarding 2 Forw...

Page 83: ...y to select Forward Settings 7 Press the OK key 8 Press the U or V key to select FTP Encrypted TX 9 Press the OK key 10 Press the U or V key to select On or Off 11 Press the OK key Print Setting You can set whether the machine should print received originals when forwarding them 1 Press the System Menu Counter key 2 Press the U or V key to select FAX 3 Press the OK key 4 Press the U or V key to se...

Page 84: ...u can append information such as the date time and the job number or fax number 1 Press the System Menu Counter key 2 Press the U or V key to select FAX 3 Press the OK key 4 Press the U or V key to select Reception 5 Press the OK key 6 Press the U or V key to select Forward Settings 7 Press the OK key Reception a b 3 Rings TAD 4 Rings FAX TEL Exit 5 Forward Settings Forward Settings a b 6 Forward ...

Page 85: ...nals are forwarded with folder SMB transmission and folder FTP transmission 11 Press the OK key 12 When Not Appending Information to Document Name 1 Press the U or V key to select None 2 Press the OK key 3 Press the U or V key to select On or Off for appending of sender information When Appending Information to Document Name 1 Press the U or V key to select Date Job No Job No Date or Date Job No 2...

Page 86: ...8 21 The web page displays basic information about the machine and COMMAND CENTER as well as the current status of the machine 3 Select a category from the navigation bar on the left to view and set values for that particular category 4 If administrator privileges have been enabled on COMMAND CENTER remember to enter the correct user name and password when trying to access the relevant screens Set...

Page 87: ...r a time is specified Activating Time Registers times when the specified requirements are enabled or disabled You can register any time between 00 00 and 23 59 File Name Sets the name of the file created when a fax is forwarded Additional Information Appends information such as the date time job number and destination address to the file name Add Sender Information Sets the position appended in th...

Page 88: ...e are shown below After completing the settings click Submit to save the settings Print To print the fax click Print The Print page is displayed Refer to Print Settings on page 4 28 Forward To select the forwarding destination click Forward The Forwarding page is displayed Refer to Forwarding Settings on page 4 29 Item Description Print Specifies whether faxes forwarded to this machine are printed...

Page 89: ...IFF as the file format used for storing forwarded files FTP Encrypted TX Turn On to enable encryption for transmission Note the SSL protocol must also be turned on Subject Additional Information When a forwarding address is specified as destination Sender Name or Sender FAX No Address is appended at forwarding When None these will not be appended Page Separate Choose whether pages are separated wh...

Page 90: ...e registered destinations Click the checkboxes for the destinations to be enabled so that they are ticked To change a destination click the name of the destination to be changed The Forward Edit page is displayed Change the destination information and click Submit Delete To delete a destination click the checkbox for the destination to be deleted so that it is ticked and then click Delete Item Des...

Page 91: ... destination type specify the settings below Host Name Port number Path Login User Name Login Password If you selected FAX as the destination type specify the settings below FAX Number Transmit Start Speed ECM Sub Address Password Encryption Key No Encryption Box Encryption Box No After completing the settings click Submit to save the settings ...

Page 92: ...ion can be used together with various kind of functional communication When registering a sub address and sub address password in the Address Book and One touch keys you can omit their entry before transmission For details refer to the explanations in the procedure of each communication method and registration method Sub Address With the machine sub address and sub address passwords are called sub...

Page 93: ...eys NOTE You can use up to 20 digits including the numbers from 0 to 9 space and characters to enter a sub address 7 Press the OK key and enter the sub address password using the numeric keys NOTE You can use up to 20 digits including the numbers from 0 to 9 alphabets space and characters to enter a sub address password When the machine receives originals a sub address password is not used 8 Press...

Page 94: ...efore transmission in the Operation Guide for the machine 10 Press the Start key Transmission begins NOTE When On is selected in Destination Check before Send a destination confirmation screen is displayed when you press the Start key For details refer to Confirmation Screen of Destinations on page 5 13 ...

Page 95: ...ect Sub Address Box and press the OK key 4 Press the U or V key to select Detail Edit and press the OK key 5 Press Menu the Right Select key 6 Press the U or V key to select Add Box and press the OK key 7 Use the numeric keys to enter the sub address NOTE You can use up to 20 digits including the numbers from 0 to 9 space and characters to enter a sub address 8 Press the OK key and use the numeric...

Page 96: ...name 1 Press the U or V key to select Local User Network User or None 2 When selecting Local User press the U or V key to select user name form the Local User List When selecting Network User use the numeric keys to enter the login user name 3 Press the OK key Follow the steps to change the permission of the subaddress box 1 Press the U or V key to select Shared or Private 2 Press the OK key Follo...

Page 97: ... Open and press the OK key NOTE You must enter a box password in the following situations If user login is disabled If user login is enabled but the Sub Address Box has been selected by another user when you login with user privileges 6 Press the U or V key to select the document from the list press Menu the Right Select key The selected original is indicated by a checkmark To cancel the selection...

Page 98: ...er Printing from a Sub Address Box To automatically delete the originals printed form the Sub Address Box use the following operation 1 Follow steps 1 to 4 in Printing Originals from a Sub Address Box on page 4 37 2 Press the OK key 3 Press the U or V key to select the document from the list press Select the Right Select key The selected original is indicated by a checkmark 4 Press the OK key 5 Pr...

Page 99: ...ess Box You can also use this procedure to rename files 1 Follow steps 1 to 5 in Printing Originals from a Sub Address Box on page 4 37 2 Press the U or V key to select the document press Menu the Left Select key 3 Press the U or V key to select Detail Edit and press the OK key 4 Press the Y or Z key to move the item to be changed and press Edit the Right Select key The details for the selected or...

Page 100: ...can be printed when user login has been enabled and the machine is logged in with administrator privileges 1 Press the System Menu Counter key 2 Press the U or V key to select Document Box and press the OK key 3 Press the U or V key to select Sub Address Box and press the OK key 4 Press the U or V key to select SubAddr Box List and press the OK key 5 When the printing confirmation screen appears p...

Page 101: ...ments to be registered are set press the Program key and hold it 2 seconds The program is registered to the key When you press a number where a program is already registered proceed to the next step 2 Press the U or V key to select Overwrite 3 Press the OK key 4 Press Yes the Left Select key The program is registered overwriting the previous one Deleting Registration Contents 1 Press the Program k...

Page 102: ...dvanced 4 42 NOTE When On is selected in Destination Check before Send a destination confirmation screen is displayed when you press the Start key For details refer to Confirmation Screen of Destinations on page 5 13 ...

Page 103: ...elete them You can use polling transmission with the same originals as many times as you wish Refer to page 4 43 NOTE You can store up to 10 originals for polling transmission You can also add to or overwrite originals up until a polling request arrives from the destination Refer to Overwrite Setting on page 4 43 Deleting Originals After Polling Transmission Originals intended for polling transmis...

Page 104: ... the machine s Operation Guide Function Description Original Size Select the size of originals to be scanned Be sure to select the original s size when using custom size originals Original Image Select image quality Scan Resolution Chooses the level of detail used for scanning originals Orig Orientation To ensure that the originals are stored in the correct orientation this indicates which end of ...

Page 105: ...lows you to rename the files created from scanned originals You can also use this function to add the job number and or date Job Finish Notice Sends a notice by an e mail when a transmission is complete Density Adjusts the density used for scanning originals Duplex Select the type and binding of originals Function Description ...

Page 106: ...ommunication modes described below Sub Address Bulletin Board Reception If the recipient s machine has a sub address bulletin board function you can use sub addresses to communicate with that machine even if it is a third party machine IMPORTANT The recipient s machine must also be equipped with a sub address bulletin board function Some fax machines cannot store originals and some do not support ...

Page 107: ...nations using a combination of numeric keys input and Address Book or One touch keys selection When On is selected in Entry Check for New Destination a confirmation screen is displayed for the entered FAX number Re enter the same FAX number and press the OK key For details refer to Destination confirmation screen before transmission in the Operation Guide for the machine 8 Press the Start key The ...

Page 108: ...ction from the Address Book containing registered sub addresses When On is selected in Entry Check for New Destination a confirmation screen is displayed for the entered FAX number Re enter the same FAX number and press the OK key For details refer to Destination confirmation screen before transmission in the Operation Guide for the machine 3 Press the Start key The operations for reception begin ...

Page 109: ...original for which you want to search NOTE For details on character entry refer to Specifications Fax function on Appendix 6 5 Select the document from the list To select the document follow the step 5 7 Press the OK key 8 Press the U or V key to select Print 9 Press the OK key 10 Press the Start key Printing starts Deleting Originals in a Polling Box Use this procedure to delete an original store...

Page 110: ...4 48 2 Press Menu the Left Select key 3 Press the U or V key to select Detail Edit 4 Use the Y or Z key to check the details of the selected original 5 When you have finished checking the details press the OK key Item Description File Name File name of the original Press Edit the Right Select key to rename the file Page Number of pages in the original Resolution Resolution used during scanning Dat...

Page 111: ...ng NOTE For details refer to the machine s Operation Guide Item Description Registration of User Register user access privileges Login User Name and Login Password Enable Disable User accounting Enable User accounting Item Description Registration of Account Register Account Name and Account ID Up to 8 digits can be entered Enable Disable job accounting Enable job accounting FAX send restriction R...

Page 112: ...s Box Encrypted transmission Manual send when dialed from this machine to the receiving system Polling transmission Network FAX transmission Transmission from the document box IMPORTANT You can use Make a call Checking FAX Job History and Communication Control Report Output functions without entering an Account ID or Administrator No When job accounting has been enabled batch transmission function...

Page 113: ...o enter the login user name NOTE For details on character entry refer to Specifications Fax function on Appendix 6 5 Press the OK key 6 Press the U or V key to select Login Password 7 Press the OK key 8 Use the numeric keys to enter the login password NOTE For details on character entry refer to Specifications Fax function on Appendix 6 9 Press the OK key 10 Check the login user name and password ...

Page 114: ...job accounting have been enabled the screen for entering a Login User Name and Login Password is displayed 1 Use the numeric keys to enter Account ID and press the OK key NOTE You can check the number of pages used by a department by entering the Account ID and pressing Counter the Left Select key 2 Perform the fax operation NOTE When the operation is completed press the Logout key Account ID b Co...

Page 115: ...on To ensure that the originals are sent in the correct orientation for reading indicate which end of the original is the top To use the following functions select the orientation of the originals 1 sided 2 sided Selection Selection of Original Image Select Original Image Original Type Binding Orientation 1 sided sheet original 1 sided 2 sided sheet original 2 sided BindingLeft Right Biding Top To...

Page 116: ...into the document processor at one time the multi page originals can be scanned in batches and sent as one job In this method originals are scanned until you press END Scan the Right Select key Job Finish Notice This function is used to inform when the transmission of e mail is completed ...

Page 117: ...check fax transmission results and functional registration status Various Tools for Checking Transmission Results and Registration Status 5 2 Checking FAX Job History 5 3 Printing Administrative Reports 5 5 Reporting FAX Receipt Result by E mail 5 11 Confirmation Screen of Destinations 5 13 ...

Page 118: ...time 5 3 Send result report Receiptresult report Report printing Latest send or receipt result Automatic printout after every sending or receiving operation No Print Output or Error Only is also optionally available 5 5 5 6 Activity report Report printing Latest 50 send or receipt results Any time and automatic printout after every 50 sending receiving 5 8 Status page Report printing Registration ...

Page 119: ... check reception results Send Job Log to check transmission results or Store Job Log to check results of storage in Sub Address Boxes Polling Boxes and USB memory 3 Press the OK key 4 Press the U or V key to select the job you want to check 5 Press the OK key 6 Press the Y or Z key to check the details of the job 7 Press the OK key Description of Detailed Information Screen Print Job Status a b 00...

Page 120: ...information is available Page and Copy Number of pages in the printing page and copies Original Pages Number of pages in the original Color B W Color mode used during scanning Sender Info Transmission information Destination Recipient The number of destinations is displayed Item Description ...

Page 121: ...hether the fax was sent successfully You can also print the transmitted image in the send result report 1 Press the System Menu Counter key 2 Press the U or V key to select Report 3 Press the OK key 4 Press the U or V key to select Result Rpt Set 5 Press the OK key 6 Press the U or V key to select Send Result 7 Press the OK key 8 Press the U or V key to select FAX 9 Press the OK key Result Rpt Set...

Page 122: ...receive a fax you can print a report to confirm whether the fax was received successfully NOTE Fax receipt can also be notified by e mail instead of checking the receipt result report Refer to Reporting FAX Receipt Result by E mail on page 5 11 1 Press the System Menu Counter key 2 Press the U or V key to select Report 3 Press the OK key 4 Press the U or V key to select Result Rpt Set 5 Press the ...

Page 123: ...lt report when the job is canceled before being sent 1 Press the System Menu Counter key 2 Press the U or V key to select Report 3 Press the OK key 4 Press the U or V key to select Result Rpt Set 5 Press the OK key 6 Press the U or V key to select Send Result Result Rpt Set a b 1 Send Result 3 JobFinish Notice Exit 2 FAX RX Result FAX RX Result a b 2 On 3 Error SubAddress 1 Off FAX RX Result Repor...

Page 124: ...a report is printed out automatically after every 50 faxes sent or received Printing Activity Reports The latest 50 sent or received fax data are printed as a report 1 Press the Status Job Cancel key 2 Press the U or V key to select FAX 3 Press the OK key 4 Press Log the Right Select key 5 Press the U or V key to select Outgoing FAX Rpt to print the sent fax report or Incoming FAX Rpt to print the...

Page 125: ...ed 1 Press the System Menu Counter key 2 Press the U or V key to select Report 3 Press the OK key 4 Press the U or V key to select Admin Rpt Set 5 Press the OK key 6 Press the U or V key to select Outgoing FAX Rpt or Incoming FAX Rpt 7 Press the OK key 8 Press the U or V key to select Off not to print or On to print 9 Press the OK key FAX TX Report FAX RX Report ...

Page 126: ... FAX Number Local FAX Name fax line setting etc You can print it out as necessary 1 Press the System Menu Counter key 2 Press the U or V key to select Report 3 Press the OK key 4 Press the U or V key to select Report Print 5 Press the OK key 6 Press the U or V key to select Status Page 7 Press the OK key 8 Press Yes the Left Select key The status page is printed Status Page ...

Page 127: ... every fax If the setting is Error SubAddress E mail notification is only provided when an error occurs or the received original is forwarded to Sub Address Boxes 1 Press the System Menu Counter key 2 Press the U or V key to select Report 3 Press the OK key 4 Press the U or V key to select Result Rpt Set 5 Press the OK key 6 Press the U or V key to select FAX RX Result 7 Press the OK key 8 Press t...

Page 128: ...1 Press the U or V key to select Address Entry 2 Press the OK key 3 Use the numeric keys to enter the address you want to register as the report destination Up to 128 digits can be entered NOTE For details on character entry refer to Character Entry Method on Appendix 2 13 Press the OK key ...

Page 129: ...w to confirm the destinations 1 Press the U or V key to confirm every destination To confirm a destination select the destination and press the OK key and then select Detail and press the OK key To delete a destination select the destination you want to delete and press the OK key and then select Delete and press the OK key Press Yes the Left select key in the confirmation screen The destination i...

Page 130: ...Checking Transmission Results and Registration Status 5 14 ...

Page 131: ...ode 6 6 Basic Operation Procedure 6 7 Volume Adjustment 6 9 Prohibiting FAX Printing at Specified Times Unusable Time 6 10 DRD Reception 6 11 Retry Times 6 13 Media Type for Print Output 6 14 Rings 6 16 Receiving Mode 6 17 Reception Date Time 6 18 2 in 1 Reception 6 19 Print all at once Batch Print 6 20 Encryption 6 21 Duplex Print Output 6 27 Transmission Restriction 6 28 Remote Diagnostics 6 ...

Page 132: ...es not respond Flow of reception NOTE At the end of the conversation you can also manually receive the originals Refer to Manual Reception on page 4 12 FAX FAX Telephone When the other party has sent originals with automatic send When the other party has sent originals with manual send When the other party is calling from a telephone Receives incoming call without making ringing tone The other par...

Page 133: ... the ringing tone rings Refer to Rings on page 6 16 2 When the call is from a telephone 1 The machine makes a ringing tone urging the user to respond Lift the handset of the telephone within 30 seconds NOTE If you do not lift the handset within 30 seconds the machine switches to fax reception 2 Talk to the other party NOTE At the end of the conversation you can manually receive the originals Refer...

Page 134: ...der to use FAX Answering Machine Auto Switch Reception it is necessary to connect an answering machine equipped telephone set commercially available product to the machine For details such as responding to messages refer to the Operation Guide of each answering machine Set the number of rings to be made by the machine more than the number of rings to be made by the answering machine Refer to Rings...

Page 135: ...the machine enters a status the same as manual reception Refer to Manual Reception on page 4 12 2 The answering machine responds When the call is from a telephone but the user is absent The answering machine plays a response message and starts recording the other party s message NOTE When silence continues for at least 30 seconds during recording the machine switches to fax reception When the call...

Page 136: ...Setup and Registration 6 6 FAX Country Code To use this menu consult your dealer or service representative ...

Page 137: ...age 4 51 2 Press the U or V key to select Common Settings 3 Press the OK key 4 Move to the screen where you want to configure a setting Follow the procedure in the explanation of the setting To set Connection to PBX page 6 39 or Remote Diagnostics page 6 40 1 Press the System Menu Counter key If user management or account management is enabled the login screen will appear For the login procedure r...

Page 138: ...eiving an encrypted transmission page 6 25 Duplex Print Output page 6 27 Configuring settings from TX RX Restrict Transmission Restriction page 6 28 Registering changing and deleting Permit fax numbers page 6 29 page 6 30 Registering changing and deleting Reject fax numbers page 6 32 page 6 33 Transmission restriction settings page 6 36 Reception restriction settings page 6 37 Registering changing...

Page 139: ...ook key such as in memory transmission Part that is operated 1 Refer to Basic Operation Procedure on page 6 7 2 Press the U or V key to select Sound 3 Press the OK key 4 Press the U or V key to select FAX Speaker or FAX Monitor 5 Press the OK key 6 Press the U or V key to select the desired volume of the speaker 7 Press the OK key Common Settings a b 1 Language 2 Default Screen Exit 3 Sound Sound ...

Page 140: ...er management or account management is enabled the login screen will appear For the login procedure refer to Account Management on page 4 51 4 Press the U or V key to select Unusable Time 5 Press the OK key 6 Press the U or V key to select On 7 Press the OK key 8 Press the U or V key to enter the start time 9 Press the OK key 10 Press the U or V key to enter the end time 11 Press the OK key NOTE I...

Page 141: ... only possible if you subscribe to the Distinctive Ring Pattern service provided by your telephone company Contact your telephone company for further information on the Distinctive Ring Pattern service available Flow of reception Preparation Refer to Receiving Mode on page 6 17 to select Auto DRD 1 When a call comes in the telephone will ring NOTE If you lift the handset while the telephone is sti...

Page 142: ...edetermined ring pattern When the call is from a telephone Lift the handset and speak with the other party When the conversation is over fax reception can be initiated manually When the call is from a fax Once the ringing tone stops fax reception will start automatically ...

Page 143: ...etry times can be set to between 0 and 14 For Redial refer to Dialing the Same Receiving System Redial on page 3 29 1 Refer to Basic Operation Procedure on page 6 7 2 Press the U or V key to select Retry Times 3 Press the OK key 4 Use the numeric keys to enter the number of retry times 5 Press the OK key ...

Page 144: ...ou do not specify any paper type select All Media Type 5 Press the OK key Setting the cassette for the print output of received faxes By specifying the media type faxes can be received on the corresponding cassette 1 Refer to Basic Operation Procedure on page 6 7 2 Press the U or V key to select Orig Paper Set 3 Press the OK key 4 Press the U or V key to select Cassette 1 Set Cassette 2 Set or Cas...

Page 145: ...rs 10 Press the U or V key to select Cassette 1 Type Cassette 2 Type or Cassette 3 Type 11 Press the OK key 12 Press the U or V key to select the desired paper type 13 Press the OK key The previous screen reappears 14 Press the Back key to return to the default System Menu screen 15 Now make the FAX receiving settings Refer to Media Type for Print Output on page 6 14 for the setting procedure Sele...

Page 146: ...d Auto FAX TEL NOTE The number of ringing times can be set to between 1 and 15 times for Rings Normal and Rings TAD and 0 and 15 times for Rings FAX TEL For Rings FAX TEL this change is possible with some countries 1 Refer to Basic Operation Procedure on page 6 7 2 Press the U or V key to select Rings Normal Rings TAD or Rings FAX TEL 3 Press the OK key 4 Press the U or V key to enter the number o...

Page 147: ...lect the mode appropriate for the way the machine is used NOTE DRD reception mode is available for some countries 1 Refer to Basic Operation Procedure on page 6 7 2 Press the U or V key to select RX Settings 3 Press the OK key 4 Press the U or V key to select the desired receiving mode 5 Press the OK key Proceed to the next step if you selected Auto DRD in step 4 6 Press the U or V key to select t...

Page 148: ...ifferent time zone NOTE When the received data is printed on multiple pages the reception date time is printed on the fist page only It is not printed on the pages that follow When the received fax data is forwarded after retrieving it from memory the reception date time is not added to the forwarded data 1 Refer to Basic Operation Procedure on page 6 7 2 Press the U or V key to select RX Date Tim...

Page 149: ... A5 size original this function prints 2 pages of the original at a time on one Letter or A4 size sheet of paper 1 Refer to Basic Operation Procedure on page 6 7 2 Press the U or V key to select 2 in 1 Printing 3 Press the OK key 4 Press the U or V key to select On or Off 5 Press the OK key ...

Page 150: ...d the pages are printed in a batch after all pages are received If Off is set each page is printed as it is received 1 Refer to Basic Operation Procedure on page 6 7 2 Press the U or V key to select Batch Print 3 Press the OK key 4 Press the U or V key to select On or Off 5 Press the OK key ...

Page 151: ...same 16 digit encryption key When the encryption key differs between the sending system and the receiving system the encryption cannot be conducted Therefore the sending system and the receiving system need to have the same encryption key and 2 digit key No registered in advance Description of settings at sending and receiving systems NOTE Set the same characters for the numbers indicated by the s...

Page 152: ...ation Procedure on page 6 7 2 Press the U or V key to select Encryption Key 3 Press the OK key 4 Press the U or V key to select an unregistered encryption key and then press Menu the Right Select key 5 Press the U or V key to select Register NOTE Refer to Character Entry Method on Appendix 2 for details on entering characters 6 Press the OK key 7 Use the numeric keys to enter the 16 digit encrypti...

Page 153: ...tail 2 Press the OK key Proceed to step 5 Deleting the encryption key 1 Press the U or V key to select Delete 2 Press the OK key 3 Press Yes the Left Select key This deletes the encryption key 5 Repeat steps 2 to 4 to confirm or delete other encryption keys Encryption Key a b 2 Key 02 3 Key 03 Menu 1 Key 01 Menu a b 1 Register 3 Delete 2 Detail Menu a b 1 Register 2 Detail 3 Delete Delete Are you ...

Page 154: ...tem Refer to Registering an Encryption Key on page 6 22 When an encryption key has already been registered go to the next step 2 Press the FAX key 3 Place the originals 4 Use the numeric keys to enter the FAX number of the other party and press Detail the Right Select key NOTE When encrypted transmission has been set to a destination in the Address Book or One touch keys you can use the destinatio...

Page 155: ...E When On is selected in Destination Check before Send a destination confirmation screen is displayed when you press the Start key For details refer to Confirmation Screen of Destinations on page 5 13 Operation at the Receiving System To conduct encryption communication operating the receiving system follow the steps below NOTE In encryption communication sub address communication cannot be used 1...

Page 156: ...ey 7 Press the U or V key to select the desired encryption key number 8 Press the OK key 9 The sending system conducts encrypted transmission When encryption communication is conducted normally the machine decrypts the encrypted originals received and prints the originals Encryption RX a b 1 Off 2 On Encryption Key a b 2 Key 02 3 Key 03 1 Key 01 ...

Page 157: ...data are the same width they can be printed out on both sides of paper having the same width as the data 1 Refer to Basic Operation Procedure on page 6 7 2 Press the U or V key to select Duplex Printing 3 Press the OK key 4 Press the U or V key to select On or Off 5 Press the OK key ...

Page 158: ...ion Establishing Requirements Send Restrictions Register Permitted FAX numbers or Permitted ID numbers Refer to Registering Permit FAX No on page 6 29 or Registering Permit ID No on page 6 34 Send restriction settings are specified in Permit Addr Book in Send Restrictions Refer to Setting Send Restriction on page 6 36 Register the Local FAX Numbers or Local FAX IDs of other parties The recipient s...

Page 159: ...erequisites Reception Rejection Requirements Reception Rejection Register Reject FAX numbers Refer to Registering Reject FAX No on page 6 32 Reception restriction settings are specified in Reject List in Reception Restrictions Refer to Setting Reception Restriction on page 6 37 The sender s Local FAX Number is not registered The sender s Local Fax Number matches a Reject FAX No registered on the m...

Page 160: ...one before reentering the number To delete all entered digits and return to the default screen press the Reset key 8 Press the OK key 9 When registering other Permit FAX numbers repeat steps 4 to 8 Changing and Deleting Permit FAX No 1 Follow steps 1 to 4 of Registering Permit FAX No on page 6 29 2 Press the U or V key to select the Permit FAX No to be changed or deleted 3 Press Menu the Right Sel...

Page 161: ... to delete the digits one by one before reentering the number To delete all entered digits and return to the default screen press the Reset key 4 Press the OK key Proceed to step 5 Deleting Permit FAX No 1 Press the U or V key to select Delete 2 Press the OK key 3 Press Yes the Left Select key This deletes the Permit FAX number 5 To change or delete other Permit FAX numbers repeat steps 2 to 4 Men...

Page 162: ...be entered NOTE Press the Address Recall Pause key to insert a pause between two digits Press the Y or Z key to move the cursor To correct the number press the Clear key to delete the digits one by one before reentering the number To delete all entered digits and return to the default screen press the Reset key 8 Press the OK key 9 To register other Reject FAX numbers repeat steps 4 to 8 TX RX Res...

Page 163: ...ed NOTE Press the Address Recall Pause key to insert a pause between two digits Press the Y or Z key to move the cursor To correct the number press the Clear key to delete the digits one by one before reentering the number To delete all entered digits and return to the default screen press the Reset key 4 Press the OK key Proceed to step 5 Deleting Reject FAX No 1 Press the U or V key to select De...

Page 164: ...bers can be registered 1 Refer to Basic Operation Procedure on page 6 7 2 Press the U or V key to select Permit ID List 3 Press the OK key 4 Press Menu the Right Select key 5 Press the U or V key to select Add FAX ID Delete Are you sure z b 0667640001 Yes No TX RX Restrict a b 2 RX Restriction 3 Permit No List Exit 4 Permit ID List Permit ID List a b b 0007 Menu b 0004 Menu a b 1 Detail Edit 2 Del...

Page 165: ...ermit ID No on page 6 34 2 Press the U or V key to select the Permit ID No to be changed or deleted 3 Press Menu the Right Select key 4 Changing Permit ID No 1 Press the U or V key to select Detail Edit 2 Press the OK key 3 Use the numeric keys to reenter a Permit ID number 0000 to 9999 NOTE Press the Clear key to display the previous number 4 Press the OK key Proceed to step 5 Permit ID M b 0000 ...

Page 166: ...e Address Book To change the sending restriction follow the steps below 1 Refer to Basic Operation Procedure on page 6 7 2 Press the U or V key to select TX Restriction 3 Press the OK key 4 Press the U or V key to select sending restriction To not use the sending restriction select Off To restrict the other parties only to the ones registered in Permit FAX No and Permit ID No as well as the ones r...

Page 167: ...select reception restriction To not use the reception restriction select Off To restrict the other parties only to the ones registered in Permit FAX No and Permit ID No as well as the ones registered in the Address Book select Permit Addr Book To block incoming faxes from senders registered in Reject FAX No select Reject List 5 Press the OK key Unknown Number Reception Select whether to receive th...

Page 168: ... Registration 6 38 4 Press the U or V key to select the reception restriction number To permit reception select Permit To reject reception select Reject 5 Press the OK key UnknownNumber RX a b 2 Permit 1 Reject ...

Page 169: ...epresentative and register a Predetermined ID on the machine For more information contact your Service Representative or Authorized Service Center 1 Refer to Basic Operation Procedure on page 6 7 2 Press the U or V key to select Service Setting 3 Press the OK key 4 Press the U or V key to select Remote Diag Set 5 Press the OK key 6 Press the U or V key to select On 7 Press the OK key 8 Press the U...

Page 170: ...Setup and Registration 6 40 ...

Page 171: ...to use Network FAX Please also read the Network FAX Driver Operation Guide Online Manual contained in the included CD ROM which describes how to operate your PC to send a fax using Network FAX and make various settings What is Network FAX 7 2 Setup 7 4 ...

Page 172: ...on is available Operation is as simple as printing Flow of Network FAX Sending Network FAX sending is performed in the following sequence Flow of Network FAX Receiving Network FAX receiving is performed in the following sequence Prepare a document using a PC networked to this machine T Forward the document data from the PC to this machine using the same operation as for printing T The machine send...

Page 173: ...About Network FAX 7 3 7 NOTE The memory forwarding function allows not only reception by the networked PC but also forwarding of the received fax by e mail or forwarding to another fax machine ...

Page 174: ...refer to the Network FAX Driver Operation Guide contained in the included CD ROM Network FAX Driver Operation Guide The Network FAX Driver Operation Guide Online Manual is contained in the included CD ROM in PDF Portable Document Format The main contents include the following Installing Network FAX Driver Performing Network FAX Sending Specifying the Network FAX Transmission Settings Specifying th...

Page 175: ...8 1 8 Troubleshooting This chapter explains how to deal with problems Indicators During Sending Receiving Operation 8 2 Precautions When Turning Power OFF 8 3 Error Messages 8 4 Troubleshooting 8 6 ...

Page 176: ... show the fax transmission status The Processing indicator blinks when the machine is sending receiving a fax The Memory indicator blinks when source data is being stored in memory for memory transmission The Memory indicator is lit when there is source data stored in the memory for delayed transmission ...

Page 177: ...ch is turned off Before turning off the main power switch press the Power key on the operation panel Make sure that the Memory indicator is off before turning off the main power switch CAUTION The device may still be operating as long as the Memory indicator is lit Turning the machine off at the main power switch while the memory indicator is lit may cause malfunctions Make sure that the indicator...

Page 178: ...d and plug it in again If the message still appears note the error code Turn the main power switch off and unplug the power cord Call your service representative Polling box limit exceeded Job is canceled Polling box capacity is used up with document data Press the OK key The job is canceled Try to perform the job again after printing or deleting the data in the polling box 4 32 Job Accounting res...

Page 179: ...dicated cassette or MP tray out of paper Add paper of the same size as indicated When the type of printing paper is specified the necessary paper types are also displayed To use another paper source select the paper source and press the OK key To use another paper source press Paper the Right Select key select the desired paper source and then press the OK key Is the type of printing paper specifi...

Page 180: ...gistrations correct both at sender and recipient Double check the registrations both at sender and recipient 6 21 Cannot use the remote switching function Is a pulse line used Some phones may transmit tone signals using buttons Refer to the operation manual of your phone set Is the remote switching number correct Check the registration Default 55 4 14 No print output after reception Is memory forw...

Page 181: ... transmission cannot be performed unless the recipient fax machine has a similar sub address transmission feature Is the entered sub address identical to the sub address registered in the recipient fax machine If your entry is correct check with the recipient This machine does not use a sub address password for reception 4 16 Cannot output from a Sub Address Box Is the box password been set Enter ...

Page 182: ...Troubleshooting 8 8 ...

Page 183: ...try Method Appendix 2 Menu List Appendix 7 Specifications Fax function Appendix 6 Received FAX Sizes and Paper Priority Inch Model Appendix 10 Received FAX Sizes and Paper Priority Metric Model Appendix 11 Error Code List Appendix 12 ...

Page 184: ...he character to the left of it is deleted 3 Back Key Press this key to return to the screen from which you invoked the character entry screen 4 Cursor Keys Use these to select the entry position or select a character from the character list 5 Numeric Keys Use these keys to select the character you want to enter 6 Reset Key Press this key to cancel the character entry procedure and return to the st...

Page 185: ...screen press Text the Right Select key to select the type of characters you want to enter Each time you press Text the Right Select key the character type switches as follows ABC 123 Symbol ABC NOTE By pressing on the numeric keys while entering characters you can directly display the Symbols screen File name input OsakaSD3 123 Text Current character type ABC Text 123 Text Symbols a b Text ...

Page 186: ...ic Symbol d e f D E F 3 Numeric 3 Alphabetic Symbol g h i G H I 4 Numeric 4 Alphabetic Symbol j k l J K L 5 Numeric 5 Alphabetic Symbol m n o M N O 6 Numeric 6 Alphabetic Symbol p q r s P Q R S 7 Numeric 7 Alphabetic Symbol t u v T U V 8 Numeric 8 Alphabetic Symbol w x y z W X Y Z 9 Numeric 9 Alphabetic Symbol _ space 0 Numeric 0 Alphabetic Symbol Switch between upper lowercase Numeric or decimal ...

Page 187: ...y the Symbols screen Use cursor keys to select the symbol you want to enter and then press the OK key Entry When Select Character Is Selected in Login Operation Settings In the login screen that appears when user management is enabled the character entry method may vary depending on the settings For the Login Operation refer to the machine s Operation Guide If a character palette appears on the sc...

Page 188: ...th 14 1 64 356 mm Automatic Document Feed Max 50 sheets Scanner Resolution Horizontal Vertical 200 100 dpi Normal 8 dot mm 3 85 line mm 200 200 dpi Fine 8 dot mm 7 7 line mm 200 400 dpi Super Fine 8 dot mm 15 4 line mm 400 400 dpi Ultra Fine 16 dot mm 15 4 line mm Printing Resolution 600 600 dpi Gradations 256 shades Error diffusion One Touch Key 22 keys Multi Station Transmission Max 100 destinat...

Page 189: ...page 3 6 Orig Orientation page 4 44 page 4 55 Continuous Scan page 4 44 page 4 56 File Name Entry page 4 24 JobFinish Notice page 4 56 FAX Delayed TX page 4 2 FAX Direct TX page 3 2 page 4 7 FAX RX Polling page 4 46 Density page 3 7 Duplex page 4 55 Status Job Cancel Key Send Job Status page 3 8 page 3 12 Scheduled Job page 3 13 page 4 3 Print Job Log page 5 3 Send Job Log page 5 3 Store Job Log p...

Page 190: ...age 6 14 Date Setting Date Time page 2 6 Time Zone page 2 6 Summer Time page 2 6 Timer Setting Unusable Time page 6 10 FAX TX RX Common Encryption Key page 6 22 Transmission TTI page 2 3 Local FAX Name page 2 3 Local FAX ID page 2 5 Local FAX Number page 2 5 FAX Dialing Mode page 2 2 Retry Times page 6 13 Reception FAX Media Type page 6 14 Rings Normal page 6 16 Rings TAD page 6 16 Rings FAX TEL p...

Page 191: ...iction page 6 36 RX Restriction page 6 37 Permit No List page 6 29 Permit ID List page 6 34 Reject No List page 6 32 UnknownNumber RX page 6 37 Document Box Sub Address Box page 4 35 page 4 37 page 4 40 Polling Box Delete TX File page 4 43 OverwriteSetting page 4 43 Edit Destination Address Book page 3 15 Print List page 3 25 Adjust Maint Service Setting FAX Country Code page 6 6 FAX Call Set page...

Page 192: ...er LG Legal When a paper type is selected in Media Type a received fax is printed using the matching paper source Refer to page 6 14 Even if All Media Types is selected paper types such as transparency cannot be used for fax printouts Priority Received FAX Size Paper Size 1 2 Paper orientation is different from the received document The image is printed after being rotated 90 automatically Receive...

Page 193: ...olio When a paper type is selected in Media Type a received fax is printed using the matching paper source Refer to page 6 14 Even if All Media Types is selected paper types such as transparency cannot be used for fax printouts Priority Received FAX Size Paper Size 1 2 Paper orientation is different from the received document The image is printed after being rotated 90 automatically Folio size ori...

Page 194: ...he sender machine although the line connection was established U00601 U00690 Communication was stopped due to the machine failure Send or receive again U00700 Communication was stopped due to failure on the part of the sender or recipient machine U00800 U00811 Page s not sent correctly Send again U00900 U00910 Page s not received correctly Ask the sender to resend U01000 U01097 Communication error...

Page 195: ...other party s fax machine Check with the other party U03200 Sub address bulletin board reception was attempted and the other party s machine is an our brand model but the specified sub address box contained no data Check with the other party U03300 An error occurred due to either 1 or 2 below Check with the other party 1 The other party s machine is an our brand model and transmission restrictions...

Page 196: ...4100 Recipient machine is not equipped with a sub address box function or the sub address does not match U04200 Encrypted transmission was canceled because the specified box is not registered U04300 Encrypted transmission was canceled because the recipient fax is not equipped with an encrypted communication function U04400 Encrypted transmission was canceled because the encryption key does not mat...

Page 197: ...cause there is no more free space in the memory of the recipient machine Check with the recipient U19000 Memory reception was stopped because there is no more free space in the memory of this machine Create free space by outputting the data stored in the memory and ask the sender to resend U19100 Transmission was stopped because there is no more free space in the memory of the recipient machine Ch...

Page 198: ...Appendix 16 ...

Page 199: ...tus 5 1 Confirmation Screen of Destinations 5 13 Confirming and Deleting Registration Contents of Encryption Key 6 22 Continuous Scan 4 56 D Date 2 6 Delayed Transmission 4 2 Cancel 3 13 Immediate Transmission 3 13 Density 3 7 Description of Operation Procedure xiii Direct Transmission 3 3 Cancel 3 13 Document Processor 1 5 DRD Reception 6 11 6 17 Duplex Print Output 6 27 E ECM Communication 3 5 3...

Page 200: ...ions 1 1 PBX 6 39 Permit Fax No Change Deletion 6 30 Registration 6 29 Permit ID No Change Deletion 6 35 Registration 6 34 Placing Originals 3 4 Polling Communication 4 43 Checking 4 50 Deleting Originals in a Polling Box 4 49 Polling Reception 4 46 8 7 Polling Transmission 4 43 Printing from a Polling Box 4 48 Renaming Files 4 50 Precautions for Use v Precautions When Turning Power OFF 8 3 Prepar...

Page 201: ...Originals after Printing from a Sub Address Box 4 38 Deleting Originals from a Sub Address Box 4 39 How to Change 4 36 How to Delete 4 36 How to Register 4 35 Printing Originals from Sub Address Box 4 37 Sub Address Bulletin Board Communication 8 7 Sub Address Communication 3 5 4 32 How to Conduct 4 32 Sub Address 4 32 Sub Address Password 4 32 T Telephone Line 2 2 Time 2 6 Transmission Restrictio...

Page 202: ...Index 4 ...

Page 203: ...MEMO ...

Page 204: ......

Page 205: ......

Page 206: ...First Edition 2010 07 2KXKMEN000 ...

Reviews: