1.5. MP (Multi-Purpose) Tray Feeding
1-19
3.
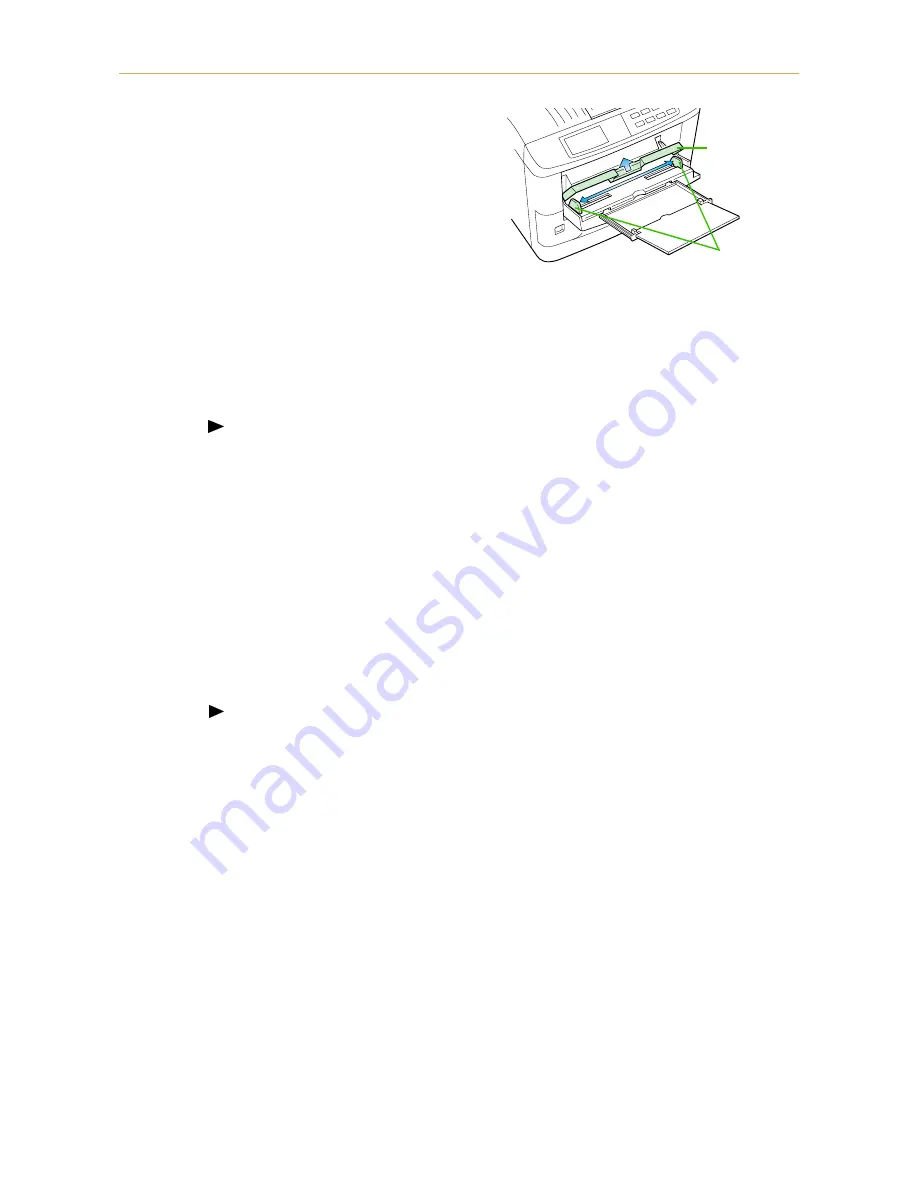
Raise the paper protector bar until it locks in the up
position. Then adjust the paper guides to the size of
the paper being fed.
4.
Check that the message
5HDG\
is displayed in the printer's message display, and that the ON LINE
indicator is lit.
5.
Set the paper source to the multi-purpose tray by pressing the
FEED
key until the message display indi-
cates
03ýWUD\
. The multi-purpose tray indicator on the control panel will flash, and
$GGýSDSHU
will be displayed.
6.
Press the
MODE
key. Then use
+
or
–
keys to display
3DSHUýKDQGOLQJýýý!
.
7.
Press the
(
Form Feed
) key to display
!03ýWUD\ýVL]H
or
!ý03ýWUD\ýW\SH
, then press the
ENTER
key so you can set the paper size or type to be fed from the MP tray. See
Mode Select Menu
at the end of
this manual.
☛
Make sure that the actual paper size matches the MP tray paper size setting. Otherwise, you may
have problems with paper jams or incorrect print positioning. An incorrect paper size setting can
also result in printing of tiny black dots on the page or other defects in image quality.
The following pages explain the use of the MP tray in the Cassette Mode and First Mode.
First Mode (Automatic Manual Feeding)
The printer automatically feeds the paper placed on the MP tray regardless of the current paper source selec-
tion. To use the first mode (automatic manual feeding mode), simply place a sheet of paper on the MP tray
in the same manner as above, even while the printer is presently feeding the paper in the printer's cassette.
1.
Press the
MODE
key. Then use
+
or
–
keys to display
3DSHUýKDQGOLQJýýý!
.
2.
Press the
(
Form Feed
) key to display
!03ýWUD\ýPRGH
.
3.
After pressing the
ENTER
key, the mode display is changed by pressing the
+
and
–
keys. Display
)LUVW
and then press the
ENTER
key.
!03 WUD\ PRGH
)LUVW
4.
Press the
EXIT
key.
☛
The printer will not switch to light the MP tray indicator while the paper is fed manually using the
automatic manual feeding mode.
Paper Guides
Protector Bar


