background image

When to plug or unplug the cable from the port in powering, the cable must be plugged back into the same port
it was removed from.

Hot Plugging Console Ports:

The USB keyboard, mouse can be hot plugged.

POWERING OFF AND RESTARTING

If it becomes necessary to power off one of the KVM unit, before starting it back up you must do the following:
1. Shut down all the computers that are attached to the unit.
Note: If the unit is operating under external power, unplug the power adapter cable.
2. Wait 10 seconds, then plug the power adapter back and power on all computers.

PORT SELECTION

AS-9104/08DA provides two methods to obtain instant access to any computer in your installation: man
ual and OSD.

Manual
Simply press the appropriate port selection switch on the AS-9104/08DA’s front panel. After pressing th
e switch, the selected LED lights to indicate that the port has been selected.

OSD
OSDOSD (On Screen Display), provides a menu driven interface to handle the computer switching proc
edure to provide instant access to any computer on the installation. OSD operation is discussed below.
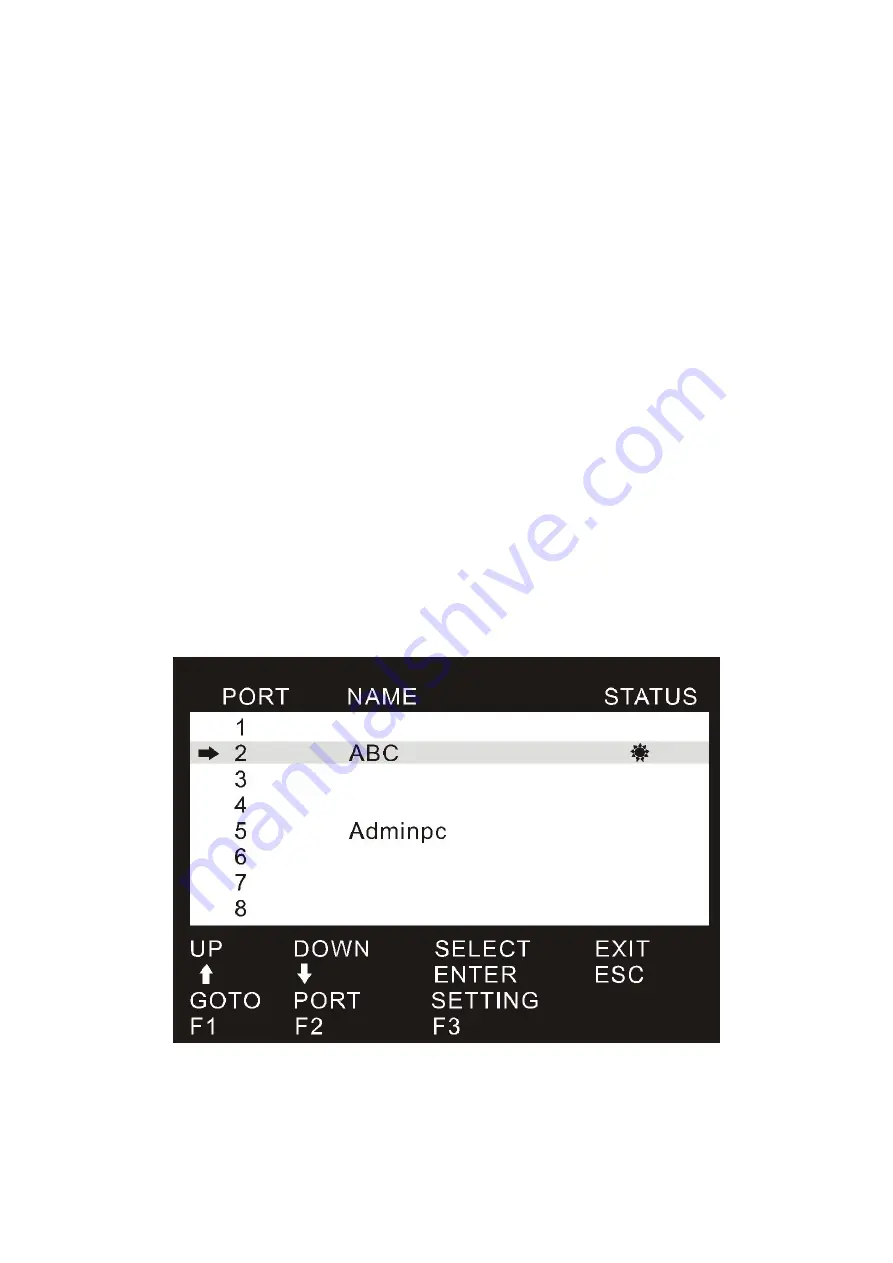
OSD OPERATION

OSD menu interface is shown as below:

Note: OSD always starts in List View, with the highlight bar at the same position it was in the last time it was
closed.

OSD NAVIGATION

To dismiss OSD, press [Esc].

To move up and down through the list one line at a time, use the Up and Down Arrow Keys. If there are
more list entries than what can appear on the main screen, the screen will scroll..

Summary of Contents for AS-9104/08DA

Page 1: ...d to try to correct the interference by one or more of the measures listed below Reorient or relocate the receiving antenna Increase the separation between the equipment and receiver Connect the equipment into an outlet on a circuit different from that to which the receiver is connected Consult the dealer or an experienced radio television technician for help PACKING LIST The complete AS 9104 08DA...

Page 2: ... View 5 AS 9104 08DA Rear View 5 INSTALLATION 6 BEFORE YOU BEIGIN 6 SINGLE STAGE INSTALLATION 6 OPERATION 6 HOT PLUGGING 6 POWERING OFF AND RESTARTING 6 PORT SELECTION 6 OSD OPERATION 7 OSD OVERVIEW 7 OSD NAVIGATION 7 OSD MAIN SCREEN HEADINGS 8 OSD FUNCTIONS 8 TROUBLE SHOOTING 9 SPECIFICATION 10 SAFE GUIDE 10 ...

Page 3: ...take up 3 saves on energy costs 4 eliminates the inconvenience and wasted effort involved in constantly moving from one computer to another FEATURES Control 4 8 computers with local or remote console The console is compatible with PS 2 USB mouse and keyboard The computer is compatible with USB mouse and keyboard Computer selection via front panel switches and OSD LEDs display for easy status monit...

Page 4: ...t AS 9104 08DA Device Connect PC KVM Console Power Cable Type Instruction Voltage Applicable models AC Power Cord National Standard 3 Plug AC 100 240V All External LCD Power Introduction AS 9104DA Front View ...

Page 5: ... button to access the computer attached to its corresponding port 3 Reset When the switch has no responding use needle or ballpoint pen to plug into the hole to reset the switch AS 9104DA Rear View AS 9108DA Rear View 1 2 3 1 Console Ports Ports to plug USB PS 2 Keyboard Mouse audio and monitor Each port has a corresponding icon prompt 2 Power Jack The DC power supply cable plugs into this jack 3 ...

Page 6: ... plug the USB terminal DVI video cable audio cable terminal into the corresponding port on the computer 4 Plug the power adapter cable into the switch s power jack then plug the power adapter into an AC power source 5 Repeat step 2 4 for any other computers you are connecting up 6 This completes the single stage installation and you can turn on the power to the computers Note The AS 9104 08DA init...

Page 7: ... to any computer in your installation man ual and OSD Manual Simply press the appropriate port selection switch on the AS 9104 08DA s front panel After pressing th e switch the selected LED lights to indicate that the port has been selected OSD OSDOSD On Screen Display provides a menu driven interface to handle the computer switching proc edure to provide instant access to any computer on the inst...

Page 8: ...e user to input again To use NAME method move highlight bar to NAME press Enter input name of a port then press Enter to confirm Note When keying name if there is a matching name the matched name will appear on the screen just press Enter to switch to that port To return to main menu press Esc F2 PORT To set or edit a name for a port Press F2 the pink edit box will appear enter the name and press ...

Page 9: ...the correct password before you can add new users The default password is admin and you can enter a new user name and password after the password is validated The setting takes effect immediately DISABLE AUTO LOGIN Enables the login user password setting Move the highlight to the option and press Enter Can be DISABLE AUTO LOGIN and ENABLE AUTO LOGIN selection switch the default is DISABLE AUTO LOG...

Page 10: ...sing Metal Weight 0 96 Kg 1 Kg Dimensions L x W x H 432 x 155 x 44 mm SAFE GUIDE Please follow the directions below when installing using and maintaining it in order to guarantee the device to work well When installing and operating the device please make sure proper power supply first and then do other operations after it is initialized As signal and power transfer need custom cable please use ma...

Reviews: