background image

SAFE OPERATION

-

6

ENGLISH

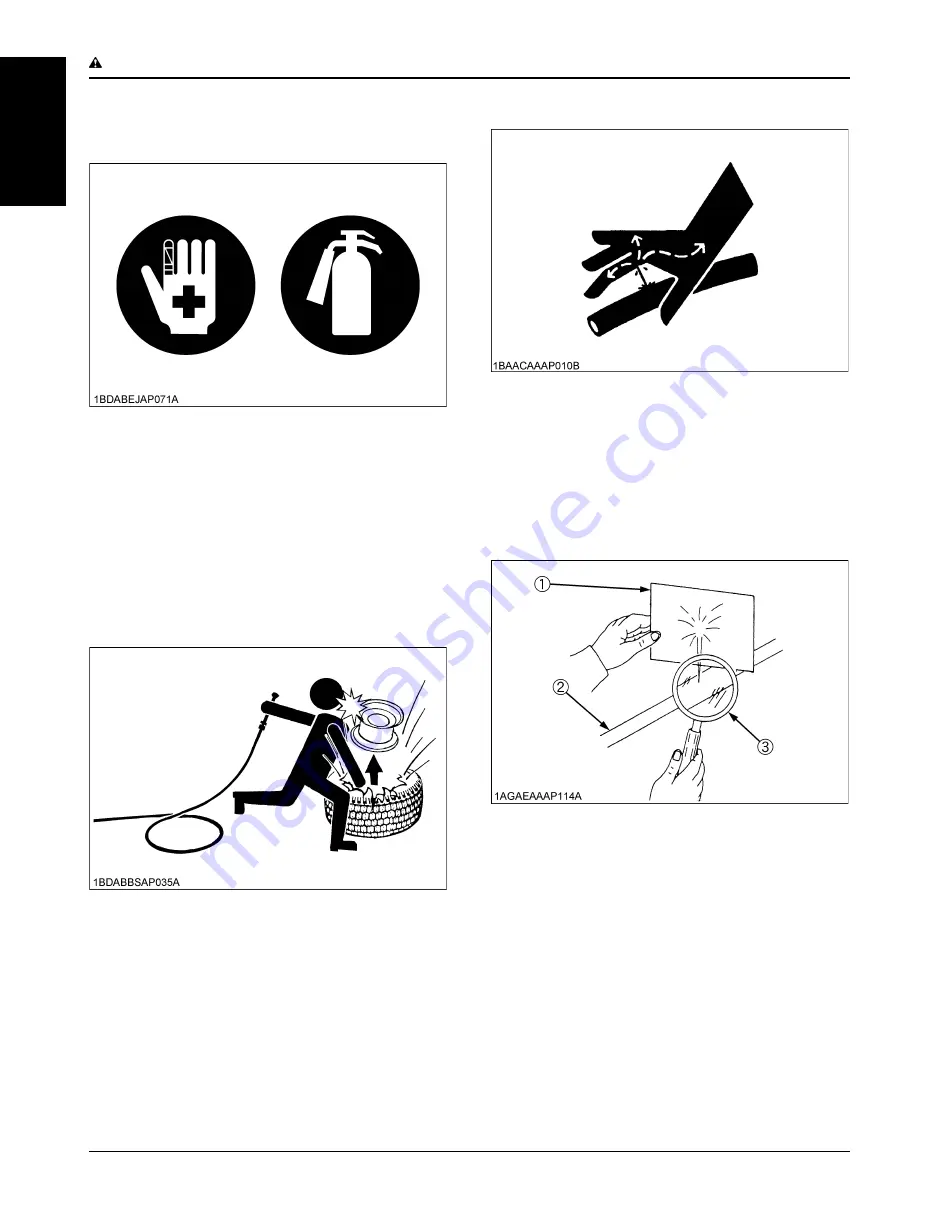
9. Keep first aid kit and fire extinguisher handy at all

times.

10. Do not remove the radiator cap while coolant is hot.

When cool, slowly rotate cap to the first stop and allow
sufficient time for excess pressure to escape before
removing the cap completely. If the machine has a
coolant recovery tank, add coolant there instead of the
radiator.

11. Do not attempt to mount a tire on a rim unless qualified

to do so and all proper safety precautions are followed.
Never allow untrained personnel to service machine.

12. Always maintain the correct tire inflation pressure. Do

not inflate tires above the recommended pressure
shown in the Operator's Manual.

13. Provide adequate support when changing wheels.
14. Make sure that wheel nuts and bolts have been

tightened to the specified torque.

15. Escaping hydraulic fluid under pressure has sufficient

force to penetrate the skin causing serious personal
injury. Before disconnecting lines, be sure to relieve all
pressure. Before applying pressure to the system,
make sure all connections are tight and that lines,
pipes, and hoses are not damaged.

16.Fluid escaping from pinholes may be invisible. Use a

piece of cardboard or wood to search for suspected
leaks: do not use hands. Use safety goggles or other
eye protection.
If you get injured by escaping fluid, see a medical
doctor at once. Serious infection or reaction will result
if proper medical treatment is not administered
immediately. This fluid can produce gangrene or
severe allergic reaction.

17.Keep hands and feet away from moving parts. If

possible, do not make adjustments or repairs with the
engine running.

18.Keep machine free of grass, leaves, or other debris

build-up.

19.Do not change the engine governor setting or

overspeed the engine.

20.Do not run a machine inside a closed area.
21.Mower blades are sharp and can cut your hands. Wrap

the blade(s) or wear gloves, and use extra caution
when servicing them. Never straighten or weld blades.

22.Keep nuts and bolts, especially blade attachment

bolts, tight and keep equipment in good condition.

23.Never tamper with safety devices. Check their

operation for proper function regularly.

(1) Cardboard
(2) Hydraulic line
(3) Magnifying glass

Summary of Contents for ZD1211

Page 1: ...OPERATOR S MANUAL READ AND SAVE THIS MANUAL MODELS ENGLISH ZD1211 ZD1211R ZD1211L ZD1211RL 1BDABEJAP0010 K3441 7125 5 ...

Page 2: ...by facing in the direction of forward travel Roll Over Protective Structures Revolutions Per Minute Revolutions Per Second Society of Automotive Engineers ENGLISH California Proposition 65 WARNING Engine exhaust some of its constituents certain vehicle components and fluids contain or emit chemicals known to the State of California to cause cancer and birth defects or other reproductive harm Canad...

Page 3: ...h an indication of their meaning Safety Alert Symbol Diesel Fuel Fuel Level Parking Brake Engine Stop Preheat Engine Run Starter Control Power Take Off Clutch Control Off Position Disengaged Power Take Off Clutch Control On Position Engaged Cutting Height Mower Lowered position Mower Raised position Fast Slow Engine Speed Control Battery Oil Pressure Coolant Temperature Neutral ...

Page 4: ...system It will give you long satisfactory service To obtain the best use of your machine please read this manual carefully It will help you become familiar with the operation of the machine and contains many helpful hints about machine maintenance It is KUBOTA s policy to utilize as quickly as possible every advance in our research The immediate use of new techniques in the manufacturing of produc...

Page 5: ...Engine Stop Lever Inside the Hood 14 CHECK DURING OPERATING 14 Immediately Stop the Engine if 14 Easy Checker TM 14 LCD MONITOR 15 Fuel Gauge 15 Coolant Temperature Gauge 16 Hourmeter 16 Battery Voltage Meter 16 Service Code Display 17 Overheat Alarm 17 Fuel Gauge Warning Lamp and Fuel Valve 17 COLD WEATHER STARTING 18 WARMING UP 18 Warm up and Transmission Oil in the Low Temperature Range 18 JUMP...

Page 6: ...ATTERING 35 Rubber Plates Installation 35 TIRES AND WHEELS 37 TIRES 37 Inflation Pressure 37 WHEELS 37 Remove and Install Front Caster Wheels 38 PERIODIC SERVICE 39 HOW TO OPEN THE HOOD FRONT COVER STEP 39 Hood 39 Front Cover 39 Step 39 HOW TO RAISE THE OPERATOR S SEAT 40 HOW TO TILT UP THE MACHINE 41 HOW TO OPEN THE LEVER GUIDE 42 LIFT UP POINT 43 Front side 43 Rear side 43 DAILY CHECK 44 LUBRICA...

Page 7: ...RS 68 Changing Transmission Fluid and Rear Axle Gear Case Oil RH and LH 68 Replacing Hydraulic Oil Filter 69 Replacing Fuel Filter 69 EVERY 800 HOURS 69 Adjusting Engine Valve Clearance 69 EVERY 1000 HOURS or EVERY 1 YEAR 69 Replacing Air Cleaner Primary Element and Secondary Element 69 EVERY 1500 HOURS 70 Checking Fuel Injection Nozzle Injection Pressure 70 EVERY 2000 HOURS or EVERY 2 YEARS 70 Fl...

Page 8: ...RD 77 MOTION CONTROL LEVER OPERATING FORCE 77 MOTION CONTROL LEVER ALIGNMENT 78 MOWER DECK LEVEL 79 ANTI SCALP ROLLERS 79 LEVEL MOWER DECK Side to Side 80 LEVEL MOWER DECK Front to Rear 81 GENERAL TORQUE SPECIFICATION 83 TIGHTENING TORQUE CHART 84 STORAGE 85 MACHINE STORAGE 85 REMOVING THE MACHINE FROM STORAGE 85 TROUBLESHOOTING 86 ENGINE TROUBLESHOOTING 86 POWER TRAIN TROUBLESHOOTING 87 BATTERY T...

Page 9: ... attempting to start and operate the machine 3 Pay special attention to the danger warning and caution labels on the machine itself 4 The ROPS is an integral and effective safety device KUBOTA recommends the use of a Roll Over Protective Structures ROPS and seat belt in almost all applications This combination will reduce the risk of serious injury or death should the machine be upset The machine ...

Page 10: ...t modify the machine Unauthorized modification may affect the function of the machine which may result in personal injury 18 Use only implements recommended by KUBOTA Use proper ballast to front or rear of machine to reduce the risk of upsets Follow the SAFE OPERATION procedures specified in the manuals with equipment 19 Keep your machine clean Accumulations of dirt grease and trash can contribute...

Page 11: ...hey may fall off and be seriously injured or interfere with safe machine operation 5 Never allow children to operate the machine even under adult supervision Local regulation can restrict the age of the operator 6 Use extra care when approaching blind corners shrubs trees or other obstructions that might hide children from sight 7 Do not mow in reverse unless it is absolutely necessary C Operators...

Page 12: ...f 3 Before you get off apply parking brake place the motion control levers in their neutral lock positions disengage the PTO lower all attachments to the ground turn off the engine and remove the key 4 Do not park the machine on dry grass or leaves 1 Before installing or using PTO driven equipment read the manufacturer s manual and review the safety labels attached to the equipment 2 Wait until al...

Page 13: ...or container opening at all times until fueling is complete Do not use a nozzle lock open device If fuel is spilled on clothing change clothing immediately Replace fuel cap and tighten securely Charge batteries in an open well ventilated area away from spark and flames A battery especially when charging will give off hydrogen and oxygen gases which can explode and cause serious personal injury Unp...

Page 14: ...ng pressure to the system make sure all connections are tight and that lines pipes and hoses are not damaged 16 Fluid escaping from pinholes may be invisible Use a piece of cardboard or wood to search for suspected leaks do not use hands Use safety goggles or other eye protection If you get injured by escaping fluid see a medical doctor at once Serious infection or reaction will result if proper m...

Page 15: ...ucts physical and health hazards safety procedures and emergency response techniques The seller of the chemical products used with your machine is responsible for providing the MSDS for that product upon request C Storage 1 Keep the machine and supply of fuel in locked storage and remove the ignition key to prevent children or others from playing or tampering with them 2 To avoid sparks from an ac...

Page 16: ...SAFE OPERATION 8 ENGLISH 7 DANGER WARNING AND CAUTION LABELS ...

Page 17: ... 9 SAFE OPERATION ENGLISH ...

Page 18: ...SAFE OPERATION 10 ENGLISH ...

Page 19: ...g danger warning and caution labels with new labels from your local KUBOTA Dealer 4 If a component with danger warning and caution label s affixed is replaced with new part make sure new label s is are attached in the same location s as the replaced component 5 Mount new danger warning and caution labels by applying on a clean dry surface and pressing any bubbles to outside edge 8 CARE OF DANGER W...

Page 20: ......

Page 21: ...nder the Kubota Limited Express warranty a copy of which may be obtained from your selling dealer No warranty shall however apply if the machine has not been handled according to the instruction given in the Operator s Manual even it is within the warranty period C Scrapping the machine and its procedure To put the machine out of service correctly follow the local rules and regulations of the coun...

Page 22: ...SERVICING OF MACHINE 2 ENGLISH 1 Mower identification plate 2 Mower serial No ...

Page 23: ...urized radiator Battery SMF51R 12V RC 80min CCA 430A Capacities Fuel tank L U S gals 49 12 9 Engine crankcase with filter L U S qts 3 9 4 1 Engine coolant L U S qts 3 5 3 7 Recovery tank L U S qts 0 25 0 26 Transmission case including Rear axle gear case L U S qts 12 1 12 8 3 Dimensions Overall length mm in 2260 89 0 2380 93 7 Overall width w o mower deck mm in 1510 59 4 1540 60 6 Overall height W...

Page 24: ...211RL 3 Oil amount when the oil level is at the upper level Model RCK60P 1200Z RCK60RP 1200Z RCK72P 1200Z RCK72RP 1200Z PRO Commercial Deck Fabricated deck Suitable machine ZD1211 ZD1211R ZD1211L ZD1211RL Mounting method Quick joint Parallel linkage Adjustment of cutting height Dial gauge Cutting width mm in 1524 60 0 1829 72 0 Cutting height mm in 25 to 127 1 0 to 5 0 Weight Approx kg lbs 150 331...

Page 25: ...sulting from use with improper implements are not covered by the warranty OPTION When using the hitch kit A Do not operate on slope when pulling loads A Total towed weight must not exceed combined weight of pulling machine ballast and operator A Follow the manufacturer s recommendations for weight limits for towed equipment UNIT Maximum loading weight Implement weight W Maximum total weight Front ...

Page 26: ...indicator 14 5 Cup holder 18 Glow plug indicator 14 6 Seat belt 24 19 Engine oil pressure warning indicator 14 7 Operator s seat 23 20 Engine overheat warning indicator 14 8 Hydraulic lift control pedal DOWN 24 21 Electrical charge warning indicator 14 9 Hydraulic lift control pedal UP 24 22 Fuel level indicator 14 10 Key switch 13 23 Coolant temperature gauge 16 11 Cutting height control dial 31 ...

Page 27: ...LUSTRATED CONTENTS 1 Anti scalp roller Front swivel type 32 2 Anti scalp roller Rear bolt shift type Rear RH roller is only for RCK72P 32 ILLUSTRATED CONTENTS 1 Anti scalp roller Front swivel type 32 2 Anti scalp roller Rear bolt shift type 32 ...

Page 28: ...k at the left side of the machine 5 Slide the mower deck under the machine and make sure that the mower gear case is placed properly in the center of the machine lower the axle from the tilt up position to the normal position 6 Place 50 mm 2 in wood blocks under each side of the mower deck 7 Depress the hydraulic lift control pedal DOWN and pull down the lift links 8 Attach the lift links to the m...

Page 29: ...eel boss sems bolt and locking nut A Choose the hole of the stay 3L gauge by cutting height See ADJUSTING CUTTING HEIGHT in OPERATING THE MOWER section A Left side of RCK72P shown right side of RCK72P and left side of RCK60P similar A Install the sems bolt from outside RCK60R RCK72R Install the gauge wheel with gauge wheel boss plain washer sems bolt and locking nut A Choose the hole of the skid b...

Page 30: ...stallation of Bolt Adjuster 1 Install the bolt adjuster with the nut 2 Adjust length L 3 Tighten the nut 1 Gauge wheel 2 Skid Left 3 Gauge wheel boss 4 Plain washer 5 Sems bolt 6 Locking nut 1 Bolt Adjuster 2 Nut L 25 mm Reference ...

Page 31: ...en getting on and getting off the machine When getting on the machine from either side step over the mower deck STARTING THE ENGINE To apply the parking brake Depress the parking brake pedal firmly with your right foot and the parking brake lock pedal simultaneously with your left foot Then release the parking brake pedal while holding the parking brake lock pedal down Parking brake warning indica...

Page 32: ...ever in the DISENGAGED OFF position 1 PTO lever 2 PTO clutch indicator ENGAGED ON DISENGAGED OFF 4 Place the motion control levers in the NEUTRAL LOCK position 1 Motion control lever LH 2 Motion control lever RH 3 Neutral indicator A NEUTRAL LOCK Position B NEUTRAL Position C FORWARD D REVERSE 5 Set the throttle lever 1 2 way forward 1 Throttle lever FAST SLOW 6 Insert the key into the key switch ...

Page 33: ...ortened A Do not operate the machine under full load until it is sufficiently warmed up A When the ambient temperature is less than 15 5 remove the battery from the machine and store it somewhere warm until next operation 1 OFF The position where the key can be inserted into or removed from the key switch When the key is turned to this position the engine shuts off 2 ON The engine keeps running 3 ...

Page 34: ... Stop the Engine if A The engine suddenly slows down or accelerates A Unusual noises suddenly occur A Exhaust fumes suddenly become discolored While driving make the following checks to see that all the parts are functioning normally BEasy Checker TM If the warning lamps of the Easy Checker TM come on during operation immediately stop the engine and find the cause as shown below Never operate the ...

Page 35: ...LUBRICANTS FUEL AND COOLANT in PERIODIC SERVICE section 3 Engine overheat If the water temperature gauge reads an unusual level and the warning lamp in the Easy Checker TM comes on the engine may be overheated Check the machine by referring to TROUBLESHOOTING section 4 Electrical charge If the alternator is not charging the battery the warning lamp in the Easy Checker TM will come on If this shoul...

Page 36: ...for hot 2 If the indicator reaches the H position engine coolant is overheated Check the machine by referring to TROUBLESHOOTING section BHourmeter This meter gives readings for the hours the machine has been operated The hourmeter indicates in 5 digits the hours the machine has been used the last digit indicates 1 10 of an hour BBattery Voltage Meter This meter gives readings for the battery volt...

Page 37: ... is below 7 L A Fill the fuel tank only to bottom of the filler neck A Be careful not to empty the fuel tank Otherwise air may enter the fuel system Should this happen you must bleed the system See Bleeding Fuel System in SERVICE AS REQUIRED in PERIODIC SERVICE section A When refueling basically fill both fuel tanks full A In the case you have a small amount of fuel if fuel is still in the fuel ta...

Page 38: ...sion oil In cold weather the oil may be cold with increased viscosity This can cause delayed oil circulation or abnormally low hydraulic pressure for some time after engine start up This in turn can result in trouble in the hydraulic system or damage to the hydraulic clutch To prevent the above observe the following instructions Warm up the engine at about 50 of rated rpm according to the table be...

Page 39: ... or pos terminal of the dead battery and clamp the other end of the same cable to the positive red or pos terminal of the helper battery 6 Clamp the other cable to the negative black or neg terminal of the helper battery 7 Clamp the other end to the engine block or the frame of the disabled machine as far from the dead battery as possible 8 Start the helper vehicle and let its engine run for a few...

Page 40: ...thout the deflector shield in the down position To avoid serious injury or death A The machine relies upon the engine driven transmission for speed direction and steering control If the engine is not running the machine cannot be driven or controlled If the engine stops when operating on a slope apply the parking brake immediately to prevent machine runaway A Do not allow any person other than the...

Page 41: ...1 Loosen the knob bolts 1 to 2 turns 2 Remove both lock pins 3 Fold the ROPS To avoid personal injury A Hold the ROPS tightly with both hands and fold the ROPS slowly and carefully 4 Align lock pin holes and insert both lock pins and secure them with the snap pins To avoid personal injury A Make sure that both lock pins are properly installed and secured with the snap pins 1 Lock pin 2 Snap pin 3 ...

Page 42: ... them with the snap pins 4 Tighten the knob bolts slightly To avoid personal injury A Make sure that both lock pins are properly installed as soon as the ROPS is in the upright position and secured with the snap pins BAdjustment of Foldable ROPS A Adjust free fall of the ROPS upper frame regularly A If you feel less friction when folding the ROPS tighten the nut 1 until you feel the right friction...

Page 43: ...spension setting C Lumbar support adjustment Turn the lumbar support adjust lever to the desired position C Arm rest Arm rest may be set at upright position if desired C Arm rest angle adjustment Turn the arm rest angle adjuster to the desired angle C Backrest tilt adjustment Turn the backrest tilt adjust knob to the desired angle A After adjusting the operator s seat be sure to check to see that ...

Page 44: ...en the engine is still cold the hydraulic system may be damaged A Do not operate at slow Engine rpm Move the throttle lever above 1 2 A If noises are heard when implement is lifting after the hydraulic lift control pedal has been activated the hydraulic mechanism is not adjusted properly Contact your local KUBOTA Dealer for adjustment A Do not depress the hydraulic lift control pedal When the engi...

Page 45: ...ward position rapidly Sudden direction changes could cause loss of control or damage to the machine or property A Do not make sharp turns at high speeds Fast and sharp turns could cause loss of control A Motion control levers must be in NEUTRAL LOCK position to safely enter and exit the operator s seat or to carry out maintenance and safety checks C Neutral lock position A Forward and reverse move...

Page 46: ...position until the machine comes to a stop To avoid serious injury or death A The motion control lever adjustment is important to ensure the machine operates properly A The motion control linkages are adjustable If adjustment is required see ADJUSTMENT section We recommend you to contact your local KUBOTA Dealer C Re start on slopes To avoid serious injury or death A Do not stop or change directio...

Page 47: ...th motion control levers forward equally at the same time For travel forward in a straight line REVERSE A Pull both motion control levers past center rearward equally at the same time For rearward travel in a straight line GENERAL LEFT TURN A Push right motion control lever further forward than the left motion control lever For forward travel to the left GENERAL RIGHT TURN A Push left motion contr...

Page 48: ...ers to the NEUTRAL position to stop the machine 2 Apply parking brake 3 Move both motion control levers to NEUTRAL LOCK position 4 Throttle lever in slow position and shift PTO lever to the DISENGAGE OFF position 5 Lower all implements to the ground 6 Turn off the engine and remove the key FIXING FRONT AXLE To avoid serious injury or death A Park the machine on a firm and level surface A Stop the ...

Page 49: ...ncline be sure to chock the wheels on the downhill side to prevent accidental rolling of the machine TRANSPORTING 1 Transport the machine on a suitable trailer A Shut off the fuel valves below the fuel tanks while transporting A To prevent the hood from opening by wind while in transit it is necessary to either load the machine backward or use a suitable tie down for the hood A Apply the parking b...

Page 50: ...OPERATING THE MACHINE 30 ENGLISH OPTION A For the operation and precautions of option kit obey the instructions of the manuals attached in the option kit ...

Page 51: ...be cut in the afternoon or evening when it is free of moisture To avoid serious injury or death A Clear the work area of objects which might be picked up and thrown by blades A Keep bystanders and animals away from the mowing area A Be sure to disengage the PTO and sit on the operator s seat before starting the engine ADJUSTING CUTTING HEIGHT To avoid serious injury or death A Do not engage the mo...

Page 52: ...incorrectly A Anti scalp rollers must maintain a minimum clearance of 6 mm 0 24 in to the ground 1 Anti scalp roller Front swivel type 2 Anti scalp roller Rear bolt shift type 1 Anti scalp roller Front swivel type 2 Anti scalp roller Rear bolt shift type 1 Anti scalp roller Front swivel type 2 Anti scalp roller Rear bolt shift type ...

Page 53: ... 50 38 0 19 19 1 75 44 1 13 25 2 00 50 1 2 19 19 2 25 58 2 13 25 2 50 64 2 3 19 19 2 75 70 3 13 25 3 00 76 3 19 31 2 3 25 83 4 13 38 3 3 50 89 4 19 1 44 3 3 75 95 4 13 3 51 3 4 00 102 4 19 3 57 3 4 25 108 4 13 3 63 3 4 50 114 4 19 3 70 3 4 75 121 4 25 3 76 3 5 00 127 4 31 3 83 3 1 For cutting heights above 3 5 The anti scalp rollers will still be effective against scalping 2 For cutting heights ab...

Page 54: ...tarting To avoid serious injury or death A Engine components can get extremely hot from operation To prevent severe burns do not touch these areas while the engine is running or immediately after it is turned off Never operate the engine without heat shields or guards 1 Sit on the operator s seat 2 Start the engine 3 Engage the PTO lever 4 Disengage the parking brake 5 Speed up the engine by movin...

Page 55: ...ng Continuous mowing under these conditions may result in overheating This machine is equipped with an overheat warning buzzer as standard Even when the rubber plates are installed clean the areas around the hood and the transmission at a minimum once every five hours See Checking and Cleaning Radiator Screen and Hood Screen in LUBRICANTS FUEL AND COOLANT in PERIODIC SERVICE section A Be aware tha...

Page 56: ...ISH 1 Rubber plate 1 Both sides 2 Rubber plate 2 Center 3 Upper plate 1 Both sides 4 Upper plate 2 Center 5 Short square neck bolt 6 Flange nut A Mower deck B Hole for installing upper plate 1 C Hole for installing upper plate 2 ...

Page 57: ...d retighten to specified torque A Check all bolts frequently and keep them tightened BInflation Pressure Though the inflation pressure is factory set to the prescribed level it naturally drops slowly in the course of time Thus check it and inflate as necessary WHEELS A When re fitting a wheel tighten the wheel bolt to the following torques then recheck after traveling 200 m 200 yards changing dire...

Page 58: ...hen remove the nylon sleeve 5 Remove the wheel from assembly yoke C Installing 1 Install the replacement wheel 2 Install the nylon sleeve with the wheel bolt and the lock nut 3 Tighten the nut A Insert the wheel bolt from the outside of the yoke A Tighten the nut gradually until wheel bearing play is eliminated and wheel turns freely by hand Reference 4 Lower machine Tightening torque 20 to 25 N m...

Page 59: ... A Never open the step while the engine is running A Do not touch muffler or exhaust pipes while they are hot Severe burns could result BHood To open the hood pull the latch lever frontward Lift the grip BFront Cover To open the front cover pull the bottom edge of the front cover BStep To open the step pull the grip 1 Latch lever 2 Hood 3 Grip A RELEASE 1 Hood 1 Front cover 1 Step 2 Grip A PULL ...

Page 60: ...raising 2 Pull the latch lever on the seat panel frontward 3 Raise the operator s seat to the LOCK position C Lower To avoid serious injury or death A Do not drop the seat to close it A Watch your hands Do not place your hands under the seat when closing 1 Pull up the seat support rod and release the LOCK 2 Lower the seat slowly to lock 3 Slide the seat to proper position 1 Latch lever A PULL 1 Op...

Page 61: ...ore working under the machine 1 Lower the forward right anti scalp roller to the lowest position 2 Fully open the front cover 3 Unfold the tilt lever 4 Keep the front cover opened 5 Remove 2 L pins 6 Insert L pins to both sides of the front axle to position the front wheels As shown below 7 Turn the tilt lever clockwise to raise the axle to the stop 8 Remove the L pin of the raised wheel and inser...

Page 62: ...E LEVER GUIDE To avoid serious injury or death A Park the machine on a firm and level surface A Stop the engine remove the key and apply the parking brake 1 Remove the screw of the lever guide 2 Pull up the lever guide How to install the lever guide 1 Install the lever guide 2 Tighten the screw A If the lever guide is out of alignment with the motion control lever move the lever guide to align it ...

Page 63: ...ide Lift the front axle with nylon slings Or jack up the front axle Never lift up the mower deck A When you use nylon slings or a jack make sure to block rear wheels with chocks BRear side Lift the rear frame with a nylon sling Or jack up the bottom plate Never lift up the engine oil pan or battery support A When you use a nylon sling or a jack make sure to block front wheels with chocks 1 Bypass ...

Page 64: ...9 Radiator screen 51 10 Hood screen 51 11 Brake play 62 12 Oiling 59 13 Air cleaner primary element 60 Mower 1 Oil leak 57 2 Make sure blade bolts are tight 75 3 Belt and blades wear or damage 75 4 Check all hardware 5 Make sure all pins are in place 6 Mower deck cleaning 7 Greasing A Universal joint A 3 spindle shafts A Belt tension pulley A Belt tension pivot A Front anti scalp roller pivot boss...

Page 65: ... SUPER UDT 2 fluid 2 Mower gear box 0 5 L 0 53 U S qts 0 4 L 0 42 U S qts 0 5 L 0 53 U S qts 0 4 L 0 42 U S qts ZD1211 ZD1211L Engine oil API service Classification SH SJ or higher SAE10W 30 ZD1211R ZD1211RL SAE90 gear oil API service classification more than GL 3 Greasing No of greasing points Capacity Type of grease King Pin 2 Until grease overflows Multipurpose EP2 Grease NLGI Grade No 2 Center...

Page 66: ...res as shown above C Transmission Oil KUBOTA Super UDT 2 For an enhanced ownership experience we highly recommend Super UDT 2 to be used instead of standard hydraulic transmission fluid Super UDT 2 is a proprietary KUBOTA formulation that deliveries superior performance and protection in all operating conditions Regular UDT is also permitted for use in this machine A Indicated capacities of water ...

Page 67: ...ons based on the use of non BDF When using BDF the owner is advised to check applicable local and federal emission regulations and comply with all of them 2 BDF may cause restricted or clogged fuel filters during cold weather conditions resulting in the engine not operating properly 3 BDF encourages the growth of microorganisms which may cause degradation of the fuel This in turn may cause fuel li...

Page 68: ... tanks and replace with light mineral oil diesel fuel Subsequently run the engine at least 30 minutes to remove all of the Biodiesel from the fuel lines 3 When using B5 fuel and storing machine longer than 3 months drain the fuel from the tanks and replace with light mineral oil diesel fuel Subsequently run the engine at least 30 minutes to remove all of the Biodiesel from the fuel lines Items Int...

Page 69: ... the fuel system Fill fuel tank only to bottom of filler neck Check the fuel level Take care that the fuel tank does not become empty A Use Diesel Fuel Only 1 Use No 2 diesel fuel 2 Use No 1 diesel fuel if the temperature is below 10 14 3 Always use a strainer when refueling to prevent fuel injection pump contamination A Do not permit dirt or trash or water to get into the fuel system A Be careful...

Page 70: ...completely Check the coolant level daily for both the radiator and the recovery tank before starting engine 1 Remove the radiator cap and check to see that the coolant level is just below the fill port 2 Check to see that the coolant level is between the FULL and LOW marks of recovery tank 3 When the coolant level drops due to evaporation add water only up to just below the fill port of the radiat...

Page 71: ...very 5 hours of operation check to be sure the radiator screen and the hood screen are clean Dirt or chaff on the radiator screen hood screen or radiator decrease cooling performance 1 Remove the radiator screen and the hood screen and remove all foreign material 2 Remove the dust from between the fins and the tube 3 Tighten the fan drive belt as necessary For this refer to EVERY 100 HOURS in MAIN...

Page 72: ...nflation pressure is factory set to the prescribed level it naturally drops slowly in the course of time Thus check it and inflate as necessary BLubricating All Grease Fittings To avoid serious injury or death A Be sure to stop the engine and remove the key before greasing Grease the following location Tire sizes Recommended Inflation Pressure Front 15 x 6 5 8 Smooth semi pneumatic Low profile tir...

Page 73: ...k bushings every 50Hr 58 5 Throttle Cable Oil every 50Hr 59 6 Greasing mower link bushings pivot every 100Hr 63 7 Air cleaner primary element Clean every 100Hr 60 2 Replace every 1000Hr or 1 year 69 3 Secondary element Replace every 1000Hr or 1 year 69 3 8 Fuel filter element Check every 100Hr 60 Replace every 400Hr 69 6 9 Fan belt Adjust every 100Hr 61 10 Parking brake Adjust every 100Hr 62 9 11 ...

Page 74: ...1 year 72 4 9 Replace every 4 years 74 6 24 Radiator hose and clamp Check every 1 year 72 4 9 Replace every 4 years 74 9 25 Hydraulic hose Check every 1 year 73 4 9 Replace every 4 years 74 6 26 Intake air line Check every 1 year 73 4 9 Replace every 4 years 74 9 27 Engine breather hose Check every 1 year 73 4 6 Replace every 4 years 74 6 28 Mower gear box oil seal Check every 1 year 73 4 6 Replac...

Page 75: ...battery is used for less than 100 hours per year check the battery condition by reading the indicator annually 8 The initial 100 hours should not be an adjustment cycle 9 If you feel you are unable to make the following service correctly and safely contact your local KUBOTA Dealer A The items listed above marked are registered as emission related critical parts by KUBOTA in the U S EPA non road em...

Page 76: ...sition 5 The engine must not crank Test 3 OPERATOR ON THE SEAT 1 Securely set the parking brake 2 Shift the PTO lever to DISENGAGE OFF position 3 Hold the motion control levers and move then inward from NEUTRAL LOCK position to NEUTRAL position and then release the levers 4 Turn the key switch to START position 5 The engine must not crank Test 4 OPERATOR ON THE SEAT 1 Securely set the parking brak...

Page 77: ...arking brake 3 Shift the PTO lever to ENGAGE ON position 4 Stand up Do not get off the machine 5 The engine must shut off A If the engine remains running in Test 1 or 2 consult your local KUBOTA Dealer to have the unit checked before operation BChecking Gear Box Oil Level To avoid serious injury or death A Always stop the engine and remove the key before checking oil 1 Park the machine on a flat s...

Page 78: ...key before greasing Grease the following locations A Put grease into front wheel until grease overflows from both ends of the front wheel 1 Drain plug 2 Check plug 3 Oil inlet plug 4 Gear case 5 Check plug port A Oil level is acceptable within this range B Oil level 1 King pin LH RH 2 Center pin 3 Front wheel LH RH 1 Tilt lever ...

Page 79: ...59 MAINTENANCE ENGLISH BOiling 1 Machine universal joint 2 Engine 3 Radiator 1 Parking brake lock pedal 1 Seat adjuster 1 Throttle cable Oil ...

Page 80: ...alve Open the evacuator valve once a week under ordinary conditions or daily when used in a dusty place to get rid of large particles of dust and dirt BChecking Fuel Filter To avoid serious injury or death A Be sure to stop the engine and remove the key when attempting to make the following checks and changes A Never fail to check the fuel lines periodically The fuel lines are subject to wear and ...

Page 81: ...overheat To adjust loosen bolts and move the alternator outward to tighten the belt After adjustment securely tighten the bolts Moderate belt tension The belt must deflect approx 10 mm 0 4 in when the center of the belt is depressed with finger pressure of 98N 10kgf 22 lbs 1 Pipe clamps 2 Fuel line 3 Fuel filter 4 Seat 1 Pipe clamps 2 Fuel line 3 Fuel filter 1 Tension bolt 2 Alternator 3 Adjusting...

Page 82: ...rking brake to the lock position 3 Loosen the lock nuts 4 Adjust the spring length to the recommendation 5 Lock the nuts 6 Check the brake spring play to the recommendation If there is no play adjust the brake spring play again See Adjustment of brake spring play below 7 Adjust the other side spring to the same dimension C Adjustment of brake spring play 1 Place the motion control lever to the NEU...

Page 83: ...om the battery at all times especially when charging the battery To avoid serious injury or death A Batteries battery posts terminals and related accessories contain lead and lead compounds and other chemicals known to the State of California to cause cancer and birth defects or other reproductive harm WASH HANDS AFTER HANDLING A Never remove the battery cap while the engine is running A Keep elec...

Page 84: ...to the negative then charge for at least 1 hour at 4 5 amperes 2 A boost charge is only for emergencies It will partially charge the battery at a high rate and in a short time When using a boost charged battery it is necessary to recharge the battery as early as possible Failure to do this will shorten the battery s service life 3 When the specific gravity of electrolyte is between 1 27 and 1 29 t...

Page 85: ...stall the drain plug 3 Remove the oil level check plug Only R models 4 Fill with the new oil up to the check plug port See LUBRICANTS FUEL AND COOLANT in PERIODIC SERVICE section 5 After filling reinstall the check plug and oil inlet plug with gauge securely A RCK60R Similar 1 Drain plug 2 Oil inlet plug with gauge 3 Seal washer 4 Gear case A Oil level is acceptable within this range B Oil level 1...

Page 86: ...arks BReplacing Engine Oil Filter To avoid serious injury or death A Be sure to stop the engine and remove the key before changing the oil and the oil filter A Allow engine to cool down sufficiently oil can be hot and may cause burns 1 The oil filter must be changed every 200 service hours 2 Apply a slight coat of oil onto the rubber gasket of new filter 3 Tighten the filter quickly until it conta...

Page 87: ...ttle Add fluid to proper level Check for oil leaks around filter gasket A To prevent serious damage or premature failure to the hydraulic system use only a KUBOTA genuine filter BAdjusting Front Axle Pivot If the front axle pivot pin adjustment is not correct vibration in the front wheel can occur C Check and Adjustment of the Front Axle End Play 1 Lift up and securely block the front of the machi...

Page 88: ... case RH LH 2 After draining reinstall the drain plugs 3 Fill with UDT or SUPER UDT hydrostatic transmission fluid or its equivalent up to the upper line of the gauge A It takes time to send the oil from the transmission case to the rear axle case RH LH Pour the regulated amount of oil slowly 4 After running the engine for a few minutes stop it and check the oil level again add oil to the prescrib...

Page 89: ...luid level normally lowers a little Add fluid to proper level Check for oil leaks around filter gasket A To prevent serious damage or premature failure to the hydraulic system use only a KUBOTA genuine filter BReplacing Fuel Filter Consult your local KUBOTA Dealer for this service EVERY 800 HOURS BAdjusting Engine Valve Clearance Consult your local KUBOTA Dealer for this service EVERY 1000 HOURS o...

Page 90: ...er all coolant is drained close the drain valve and install the drain plug 4 Fill with clean water and cooling system cleaner 5 Follow directions of the cleaner instruction 6 After flushing fill with clean water and anti freeze until the coolant level is just below the fill port on the radiator Install the radiator cap securely 7 Fill with coolant up to the FULL mark on the recovery tank Set the d...

Page 91: ...mber for further assistance A When anti freeze comes in contact with the skin or clothing wash it off immediately A Do not mix different types of Anti freeze The mixture can produce chemical reaction causing harmful substances A Anti freeze is extremely flammable and explosive under certain conditions Keep fire and children away from anti freeze A When draining fluids from the engine place some co...

Page 92: ...fe of 2 years Be sure to change the coolant every 2000 hours or every 2 years whichever comes faster A The above data represent industry standards that necessitate a minimum glycol content in the concentrated anti freeze EVERY 3000 HOURS BChecking Injection Pump Consult your local KUBOTA Dealer for this service EVERY 1 YEAR BChecking Fuel Lines If you feel you are unable to make the following serv...

Page 93: ...ore applying pressure to the system make sure all connections are tight and that lines pipes and hoses are not damaged 1 Check to see that all lines and hose clamps are tight and not damaged 2 If hoses and clamps are found worn or damaged replace or repair them at once BChecking Intake Air Line If you feel you are unable to make the following service correctly and safely contact your local KUBOTA ...

Page 94: ...AS REQUIRED BReplacing Fuses 1 Raise the operator s seat 2 Remove the blown fuse 3 Place a new fuse of the same capacity in position A If the new fuse happens to blow out within a short time contact your dealer for inspection and repair Never jump the fuse with wire or foil or install a larger capacity fuse than is recommended C Protected circuit BBleeding Fuel System Air must be removed 1 When th...

Page 95: ...o prevent the spindle from rotating while removing the blade bolts loosen the blade bolt as illustrated RCK60R RCK72R Set the pipe between the blade and the next blade or use a box wrench over the pulley nut to prevent the spindle from rotating while removing the blade bolts loosen the blade bolt as illustrated A Use the proper metric size box or socket wrench to tighten or loosen the blade mounti...

Page 96: ...e procedure DISMOUNTING THE MOWER DECK 2 Remove the left and right hand shield from the mower deck 3 Clean around the gear box 4 Remove the belt from the tension pulley 5 Remove the right hand bracket which mounts the gear box to the mower deck and slip the belt over the top of the gear box 6 To install a new belt reverse the above procedure A Tighten bracket bolts securely 77 5 to 90 2 N m 8 0 to...

Page 97: ... can be adjusted independently BHST NEUTRAL 1 Lift up and secure with jack stands or blocking the rear of the machine frame 2 Remove both rear wheels 3 Set the engine speed maximum 4 Place the motion control lever in the NEUTRAL LOCK position 5 After forward and backward operation tighten the guide control at the position when wheel axis stops 6 Adjust the rod length L of the damper 28 to 32 mm 1 ...

Page 98: ...ition High or Low 1 Remove the nut and select the motion control lever position high or low 2 Tighten the nut Lever alignment Right and Left 3 Loosen the nut 4 Slide both levers forward or rearward to desired position within tab slots until levers are aligned 5 Tighten the nut A If the ends of the levers strike against each other while in the NEUTRAL position move the levers outward to the NEUTRAL...

Page 99: ...o the correct pressure See TIRES AND WHEELS section 2 Start the engine 3 Raise up the mower deck to the transport position Also the top end of the lift 4 Turn the cutting height control dial to adjust height 5 Lower the mower deck Front side anti scalp roller 6 Adjust height of the front side anti scalp roller by replacing the collar collar is raised and lowered or shifting the pin to approximatel...

Page 100: ...ht mower blade in the Side to Side position 5 Measure from outside blade tip to the level surface with a short ruler or leveling gauge Reference A There is a difference of the blade height between on the concrete and ground 6 Check that the left side blade is same height The difference between both measurements must be less than 3 mm 0 12 in 7 If the Side to Side adjustment is not within the given...

Page 101: ... on a firm and level surface A Engage the parking brake A Disengage PTO A Stop the engine remove the key and remove the mower universal joint while checking or adjusting the level of the mower deck A Check the machine tire pressure Inflate tires to the correct pressure See TIRES AND WHEELS section C Checking level Front to Rear A Mower deck anti scalp rollers must not contact the ground 1 Raise th...

Page 102: ...the wood block 4 Lower the mower deck 5 Loosen the lock nuts of the front side of the machine 6 Adjust the cutting height fine tuning bolts to set 76 mm 3 in height Both front side bolts must be adjusted 7 Lock the nuts 8 Adjust the other side equally A The difference between both measurements must be less than 6 mm 0 24 in Front side must be lower than rear side 9 Check the front to rear level an...

Page 103: ...4 34 3 3 0 3 5 3 8 lbf ft N m kgf m 35 42 47 5 57 0 4 84 5 82 45 54 61 0 73 2 6 22 7 47 M10 lbf ft N m kgf m 35 5 41 2 48 1 55 8 4 9 5 7 44 9 52 1 60 8 70 5 6 2 7 2 1 2 lbf ft N m kgf m 80 96 108 5 130 2 11 07 13 29 110 132 149 2 179 0 15 22 18 27 M12 lbf ft N m kgf m 57 2 66 5 77 5 90 1 7 9 9 2 76 0 86 8 103 117 10 5 12 0 9 16 lbf ft N m kgf m 110 132 149 2 179 0 15 22 18 27 160 192 217 0 260 4 2...

Page 104: ... 2 39 3 45 1 42 2 2 9 4 0 4 6 4 3 0 3 35 4 41 2 38 3 2 9 48 1 55 9 52 0 3 9 4 9 5 7 5 3 0 4 M12 17 or 19 46 3 53 5 49 9 3 6 62 8 72 6 67 7 4 9 6 4 7 4 6 9 0 5 57 1 66 5 61 8 4 7 77 5 90 2 83 9 6 3 8 0 9 2 8 6 0 6 M14 19 or 22 79 6 92 6 86 1 6 5 107 9 125 5 116 7 8 8 11 0 12 8 11 9 0 9 91 1 108 5 99 8 8 7 123 6 147 0 135 3 11 7 12 6 15 0 13 8 1 2 A Figure 7 on the top of the bolt indicates that the...

Page 105: ... rain Cover the machine 9 Store the machine indoors in a dry area that is protected from sunlight and excessive heat If the machine must be stored outdoors cover it with a waterproof tarpaulin 10 Jack the machine up and place blocks under the front and rear axles so that all 4 tires are off the ground Keep the tires out of direct sunlight and extreme heat A When washing the machine be sure to stop...

Page 106: ...e only when the machine is going to be used Insufficient engine power A Insufficient or dirty fuel A The air cleaner is clogged A Check the fuel valve position A Check the fuel system A Clean the element Engine stops suddenly A Insufficient fuel A Check the fuel valve position A Refuel A Bleed the fuel system if necessary Exhaust fumes are colored Black A Fuel quality is poor A Too much oil A Engi...

Page 107: ...s displayed on the LCD monitor indicating the location of the trouble If an error code appears immediately contact your local KUBOTA Dealer for repairs 1 Master system warning indicator 2 Error code Displayed error code Trouble Operator s action Err 1 Water temperature sensor trouble Contact your local KUBOTA Dealer Err 2 Fuel sensor trouble Err 3 Meter panel memory reading trouble ...

Page 108: ...ge battery sufficiently A Battery must be serviced properly before initial use When viewed from top the top of plates look whitish A Battery was used with an insufficient amount of electrolyte A Add distilled water and charge the battery A Regularly check the electrolyte level A Battery was used too much without recharging A Charge battery sufficiently A Charge the battery properly Recharging is i...

Page 109: ...correctly adjusted A Consult your dealer for hydrostatic lever linkage adjustment or pressure adjustment A Control linkage pivots are sticking A Full up and lubricate linkage Fuel decreases uneven in LH and RH tanks A Fuel filter is clogged A Replace fuel filter A Fuel valve is closed A Open the fuel valve A Check valve is clogged A Replace check valve A Bypass hose kink in the pipe between LH and...

Page 110: ...d air to correct pressure A Anti scalp rollers not adjusted correctly A Adjust anti scalp rollers A Wheels pressure not adjusted correctly A Set both tire pressures to the correct pressure See TIRES in TIRES AND WHEELS section Blades scalping grass A Cutting height too low A Raise cutting height A Turning speed too fast A Reduce speed on turns A Ridges in terrain A Change mowing pattern A Rough or...

Page 111: ...er loads down machine A Engine rpm too low A Mow at full throttle check and reset engine rpm A Ground speed too fast A Slow down A Debris wrapped around mower spindles A Clean mower A Front of deck lower than rear A Adjust deck See MOWER DECK LEVEL in ADJUSTMENT section Trouble Cause Remedy ...

Page 112: ...ose 73 Hydraulic Hose 74 Hydraulic Lift Control Pedal 24 Hydraulic Oil Filter 69 Immediately Stop the Engine if 14 Inflation Pressure 37 Inflation Pressure 52 Injection Pump 72 Installation of Bolt Adjuster 10 Installation of Gauge Wheel 9 Installation of Skid 9 Intake Air Line 73 Intake Air Line 74 Key Switch 13 LEVEL MOWER DECK Front to Rear 81 LEVEL MOWER DECK Side to Side 80 Lubricating All Gr...

Page 113: ...93 INDEX ENGLISH Transmission Fluid Level 50 Transmission Oil Filter HST 67 Warm up and Transmission Oil in the Low Temperature Range 18 ...

Reviews: