background image

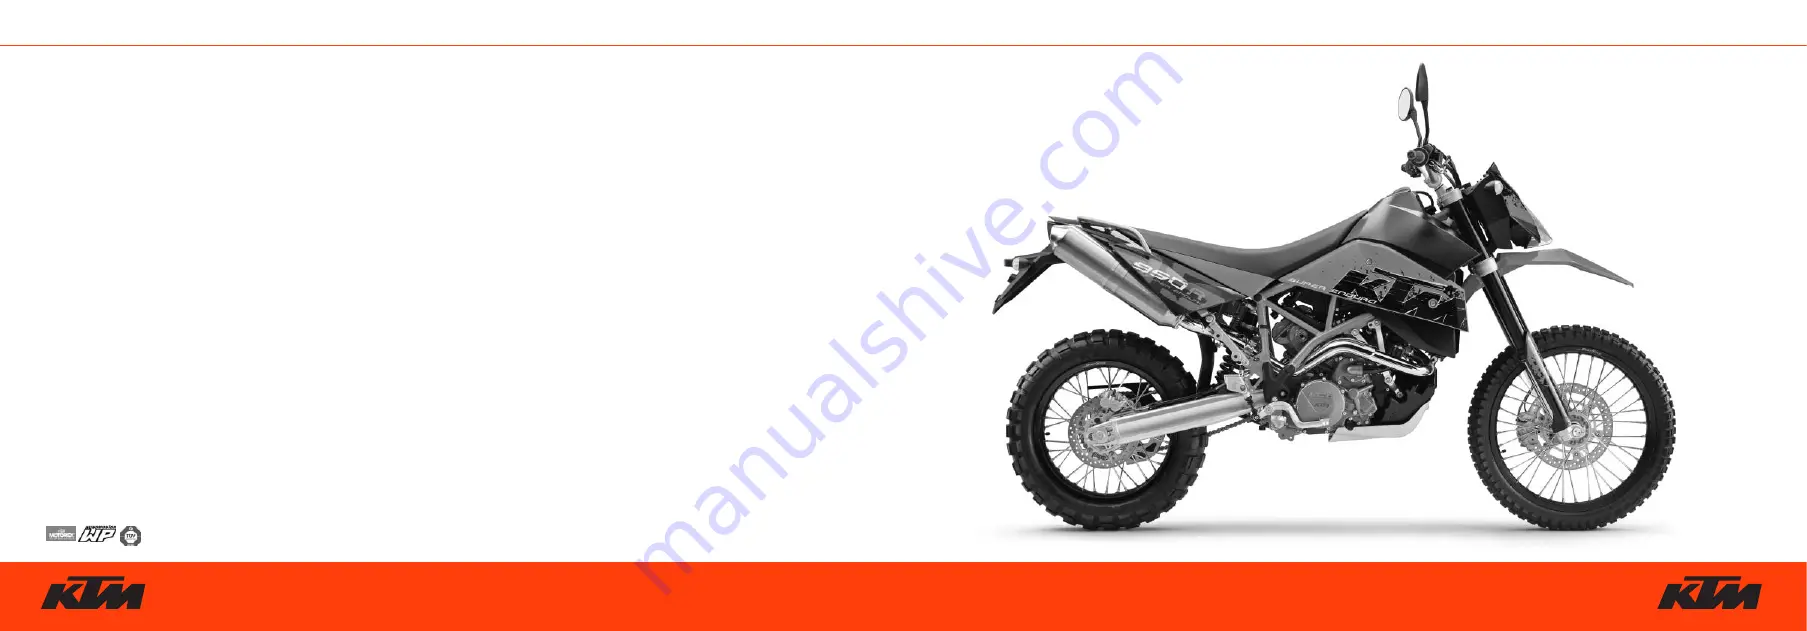
950 SUPER ENDURO R

KTM Sportmotorcycle AG 

A–5230 Mattighofen

www.ktm.at

04/2006        FOTO: MITTERBAUER

KTM Group Partner

ART. NR. 3.211.172 EN

OWNER’S MANUAL 

2006

Summary of Contents for 950 R

Page 1: ...950 SUPER ENDURO R KTM Sportmotorcycle AG A 5230 Mattighofen www ktm at 04 2006 FOTO MITTERBAUER KTM Group Partner ART NR 3 211 172 EN OWNER S MANUAL 2006...

Page 2: ...ER INFORMATION FOR AUSTRALIA ONLY Tampering with noise control system prohibited Owners are warned that the law may prohibit a The removal or rendering inoperative by any person other than for purpose...

Page 3: ...uded The Owner s Manual is an integral part of the motorcycle and must be handed over to the new owner when the motorcycle is sold SERVICE Observance of the service maintenance and operating instructi...

Page 4: ...tions must be used in accordance with the maintenance schedule SPARE PARTS ACCESSORIES For your own safety only use spare parts and accessories approved by KTM KTM shall not assume any liability for o...

Page 5: ...sorber 19 GENERAL TIPS AND WARNINGS FOR STARTING THE MOTORCYCLE 20 Instructions for initial operation 20 Running in the LC8 engine 20 Accessories and payload 21 DRIVING INSTRUCTIONS 22 Check the follo...

Page 6: ...tane fuel 57 Cooling system 58 Checking the cooling liquid level in the compensating tank 59 Checking the cooling liquid level in the radiator 60 Bleeding the cooling system 61 Changing the original p...

Page 7: ...d tube Enter this num ber in the field on page no 1 The type label is located next to the chassis number Engine number engine type The engine number and the engine type are stamped into the left side...

Page 8: ...additional fuel This produces a rich fuel air mixture necessary for cold start The fuel quantity and thus the engine speed are determined by the choke lever position At temperatures over 5 C 41 F it...

Page 9: ...the MODE button The indicator lamps 3 provide additional information on the motorcycle s running condition Display TEST When you switch on the ignition all of the display elements will light up for 1...

Page 10: ...1 The TRIP 1 mode shows the speed the temperature of the cooling liquid and the trip odometer 1 To switch to the next display mode press the MODE button TRIP 2 The TRIP 2 mode shows the speed the tem...

Page 11: ...to the CLOCK mode Simultaneously press MODE 1 and SET 2 The numbers on the clock will start to blink Use the MODE button to set the hours and the SET button to set the minutes The press the MODE and S...

Page 12: ...el reaches the reserve mark the display will automatically switch to TRIP F and begin to count no matter which display mode was active before At the same time the fuel warning lamp will light up You w...

Page 13: ...en indicator lamp will blink in the blinker rhythm when the blinker is switched on NOTE The indicator lamp will blink faster when a blinker is broken The green indicator lamp will light up when the ge...

Page 14: ...r to the left then turn the ignition key to the left The ignition key can be withdrawn in position and OPERATION INSTRUMENTS 13 3 Combination switch The light switch has 2 switch positions A Low beam...

Page 15: ...0 clockwise and take out the key OPERATION INSTRUMENTS 14 Fuel taps 2 fuel taps 4 are mounted on the fuel tank that must be open when the motorcycle is run ning The level in the fuel tanks is equalize...

Page 16: ...oval head screw 4 lower the seat in the back while sliding it towards the front Both noses 5 should fit into the frame Insert the catch bolts 6 in the lock housing and push the seat down in the back...

Page 17: ...nd is linked to the safety start system follow the driving instructions 2 Tool set The tool set 1 is located in the storage compartment under the seat Shift lever The shift lever is mounted on the lef...

Page 18: ...footrest system is available from your authorized KTM workshop as an acces sory The motorcycle is already approved for two seats OPERATION INSTRUMENTS 17 1 For off road riding you can use the rubber b...

Page 19: ...orber Rebound damping of fork The fork s damping action during rebound travel rebound damping can also be adjusted This allows you adjust the damping behavior to match your driving style and the paylo...

Page 20: ...g speed The adjusting screw 1 for the low speed range can be adjusted with a screwdriver The adjusting screw 2 for the high speed range can be adjusted with a 17 mm socket wrench More information is p...

Page 21: ...or cycle carefully at moderate speed during the first 200 kilometers 125 miles with new tires tilting the vehicle at different angles so that all sections are properly roughened Tires will not display...

Page 22: ...optimum vision in any sit uation When light shines directly on scratched visor the operator will be blinded A passenger may only ride on the motor cycle if passenger footrests are mounted A passenger...

Page 23: ...res showing cuts or dents must be replaced The tread depth must comply with the legal regulations Also check the air pressure Insufficient tread and incorrect air pressure deteriorate the driving perf...

Page 24: ...amage 9 BAGGAGE PAYLOAD Never exceed the maximum total weight 400 kg 883 lbs and the motorcycle s wheel loads The maximum total weight is comprised of the motorcycle in a running condition and refuele...

Page 25: ...adequate ventila tion while the engine is running Never operate the motorcycle with a run down battery or without the battery This can damage the electronic components or safety equipment in either c...

Page 26: ...g off Pull the clutch lever and engage 1st gear Slowly release the clutch lever while you open the throttle Shifting Riding You are now in first gear refered to as the drive or uphill gear Depending o...

Page 27: ...wear Stop immediately if a perceptible power loss occurs while driving due to a defec tive ignition caused by a cylinder misfir ing or breaking down If the unburned fuel air mixture reaches the catal...

Page 28: ...the ignition Fold the side stand forward to the stop with your foot put the weight of the motor cycle on the stand and park the bike on a firm surface Lock the motorcycle Always park your motorbike o...

Page 29: ...you use leaded fuel Always use unleaded fuel Fuel expands when its temperature rises Therefore do not fill the tank to the top see fig When you close the filler cap make sure it is correctly positione...

Page 30: ...ess arrangement z z z Renew spark plugs z Check and adjust valve clearance z z Check engine fastening bolts for tight fit z z z Check all engine bolts accessible from the outside for tight fit z z z C...

Page 31: ...ent z z z Check headlamp adjustment z z z Check electrical system for function low high beams stop light turn indicators headlamp flasher tell tale lamps speedometer illumination horn side stand switc...

Page 32: ...ck tire condition and inflation pressure z z z Check chain sprockets and chain guides for wear force fit and tension z z z Check bolts on pinion and chain sprocket for locking devices and a tight fit...

Page 33: ...z z z Check the chain tension grease the chain if necessary z Check tire pressure and wear z Check coolant level z Check fuel lines for leaks z Check all control elements for smooth running z Check br...

Page 34: ...cket connectors with self locking nuts replace them before remounting If no new self locking nuts are available apply Loctite 243 to the thread of the old nuts If the thread is damaged replace the scr...

Page 35: ...ing determines the reaction when the fork is compressed The degree of compression can be adjusted with adjusting screws at the bottom of the fork legs Carefully pry out the protection cover 1 with a s...

Page 36: ...on the fork The fork spring preload can be adjusted by turning the adjusting screws 2 wrench size 24 mm 5 mm 0 2 in Turning in a clockwise direction will increase the preload turning in a countercloc...

Page 37: ...Turning in a clockwise direction will increase the damping turning counterclockwise will decrease the damping STANDARD ADJUSTMENT LOW SPEED Turn adjusting screw 1 clockwise as far as it will go Turn 2...

Page 38: ...rber is filled with high compression nitrogen Never try to take the shock absorber apart or to do any maintenance work yourself Severe injuries could be the result MAINTENANCE WORK ON CHASSIS AND ENGI...

Page 39: ...andling performance to become instable and cause it to crash MAINTENANCE WORK ON CHASSIS AND ENGINE 38 Checking the chain tension Place the motorcycle on the side stand Switch the transmission to neut...

Page 40: ...N CHASSIS AND ENGINE 39 Chain maintenance For long chain life good maintenance is very important X ring chains require only modest maintenance The best way is to use lots of water but never use brushe...

Page 41: ...ith the original equipment it cannot be warranted that they are authorized for use in road traffic Your motorcycle will not longer comply with the regulations authorizing the use of vehicles for road...

Page 42: ...ot have any DOT 5 1 for refilling you may use DOT 4 brake fluid However you should replace it as soon as pos sible by DOT 5 1 Never use DOT 5 braking fluid It is based on silicone oil and has a purple...

Page 43: ...below middle of the glass If the brake fluid level drops below the minimum either the brake system has a leak or the brake pads are completely worn down In this case consult an authorized KTM dealer...

Page 44: ...brake pad will rub against the brake disc imparing the braking effect and destroying the brake disc Checking rear brake fluid level The brake fluid reservoir for the rear disk brake is combined with t...

Page 45: ...ld the front wheel pull out the wheel spindle 3 Carefully remove the front wheel from the fork Do not operate the hand brake when the front wheel has been dismounted Make sure the brake disc is always...

Page 46: ...wn on the fork a few times vigorously so that the fork legs come into alignment Only after this has been accomplished tighten the clamp screws on both fork legs with 15 Nm If you do not have a torque...

Page 47: ...as far to the front as possible take the chain off of the rear sprocket and lay it on the rear sprocket guard Carefully lift the rear wheel out of the swing arm Do not operate the rear brake when the...

Page 48: ...r wheel forwards so that the chain tensioners lie on the tension screws If you don t happen to have a torque wrench at hand make sure you have the tighten ing torque corrected by a KTM dealer as soon...

Page 49: ...extends the life of your tires Do not mount tires which have not been approved by KTM Other tires could have adverse effects on the way your motorcycle rides Use tires of the same brand and type for t...

Page 50: ...r checking tap on each spoke with the blade of a screw driver see illus tration A clear tone must be the result Dull tones indicate loose spokes If necessary have the spokes retightened and the wheel...

Page 51: ...ront see illustration Connect the minus pole to the battery last If electrolyte sulphuric acid leaks from the battery proceed with great care The elec trolyte can cause severe burns In the case of ski...

Page 52: ...time the battery will run down and sulfa tize destroying the battery Recharge the battery every 3 months if it is being stored for a longer period of time Never remove the closure since it will be da...

Page 53: ...spare fuse is always at hand Replace a blown fuse only with an equivalent one If a new fuse that has just been set in gets blown again you are strongly advised to have it inspected by a KTM dealer The...

Page 54: ...ch Fuse ACC 2 also protects the carburetor heaters from short circuits Sockets to connect the accessories are located under the headlight mask For more infor mation contact an authorized KTM workshop...

Page 55: ...s B in the headlight Mount the bulb socket rubber cap and connector Attach the headlight mask at the bottom mount the screw and tighten to 10 Nm MAINTENANCE WORK ON CHASSIS AND ENGINE 54 Replacing the...

Page 56: ...r of the headlight Position your motorcycle loaded ready for the trip 5 meters 16 4 ft away from the wall and switch on the low beam The light dark cut off line should be 5 cm 2 in under the mark see...

Page 57: ...30 in a counterclockwise direc tion and remove it from the socket Proceed in the reverse order to mount a new bulb BULBS FOR THE TAILLIGHT Remove the bulb socket 4 from the housing and pull the bulb...

Page 58: ...ed to each other the ignition curve for fuel having at least 95 octane RON is activated If you disconnect the plug and socket connection the ignition curve for fuel having 80 94 octane RON is activate...

Page 59: ...ible causes Slow riding with large loads at a higher air temperature If possible increase your running speed so that more air can blow through the radiators Should the warning light still be on off af...

Page 60: ...ve in the radiator cap 4 a water temperature rising up to 125 C 257 F is admissi ble without fear of problems Any excess cooling liquid caused by thermal expansion is conducted to the compensating tan...

Page 61: ...cooling liquid level when the engine is cold If you need to remove the radiator cap when the engine is hot hold the cap with a cloth and open slowly allow ing any excess pressure to escape danger of s...

Page 62: ...ling liquid Mount the radiator cap and move the motor cycle into a horizontal position again Fill the compensating tank with cooling liquid until it reaches a level between the MIN and MAX mark Close...

Page 63: ...apply excessive force Checking the oil level of the hydraulic clutch To check the oil level in the master cylinder of the clutch remove the cover For this pur pose remove screws and cover 2 together...

Page 64: ...es To check the play push back the protection cover 4 It should be possible to lift the cable approx 3 mm away from the adjusting screw 5 If necessary loosen the counter nut 6 turn the adjusting screw...

Page 65: ...the same oil to lubricate the trans mission and the clutch The JASO MA standard responds to these special requirements Only use fully synthetic engine oils that meet the JASO MA quality requirements...

Page 66: ...the oil change must be performed by an authorized KTM mechanic Otherwise the guarantee will become void The engine oil change is to be carried out when the engine is still warm An engine having been...

Page 67: ...plugs the cover and both oil screens Clean all rubber seal rings and check for damage Replace if necessary Mount the oil drain plug on the engine with a new seal ring and tighten to 20 Nm Slide the oi...

Page 68: ...e oil tank Position the con nector 2 mount the screws and tighten to 10 Nm Unscrew the plug 3 Add 2 5 liters 0 7 USgal of fully synthetic engine oil according to the JASO MA Norm e g Motorex Power Syn...

Page 69: ...fuse Defect ignition lock Defect safe starting system Turn on the ignition switch the gear to neutral Recharge the battery and investigate the causes for discharg ing contact an authorized KTM worksho...

Page 70: ...aps run the fuel lines without kinks Check vacuum hoses and venting hoses of carburetors for correct position no kinks Have the air filter replaced at an authorized KTM workshop Activate the ignition...

Page 71: ...e ACC2 High oil consumption Engine oil level too high Engine oil too thin viscosity Check engine oil level when the engine is warm correct if necessary Use thicker engine oil see chapter Engine oil He...

Page 72: ...instructions Voltage regulator and generator should be checked by an authorized KTM workshop No values are visible in the multi functional digital speedometer display Blown fuse Replace fuse HORN BRA...

Page 73: ...nd cleaned with a brush After the motorcycle has been rinsed with a soft water jet it should be dried by air pressure and a cloth Then take a short drive until the engine has reached the working tempe...

Page 74: ...road salt clean motorcycle thoroughly and let it dry treat engine carburetor swing arm and all other bare parts except for brake discs with a wax based anti corrosion agent Keep anti corrosion agent f...

Page 75: ...eated tarpaulin or blanket Do not use non air permeable materials as a possible humidity might not be able to escape and could cause corrosion It would be very bad to let the engine run for a short ti...

Page 76: ...0 90 21 M C 54Q M S up to a max of 160 kph 100 mph Air pressure front Offroad 1 7 bar 24 psi Road driver only 2 4 bar 34 psi Road with passenger 2 4 bar 34 psi Authorized rear tires METZELER MCE KAROO...

Page 77: ...kg 883 lbs FORK 950 SUPER ENDURO R Type 14187B32 WP Suspension Spring 5 9 450 Spring preload turns 5 Air chamber lenght 100 mm 4 in Fork oil SAE 5 WP 4860 0401 SHOCK ABSORBER 950 SUPER ENDURO R Type 1...

Page 78: ...HH clamp bolts on fork leg axle passages M8 15 Nm Collar bolts for handlebar clamps M8 20 Nm AH bolt for handlebar mount M10 20 Nm HH clamp bolts for steering stem M8 20 Nm Collar bolt front rear brak...

Page 79: ...clamp M8 12 Nm Senkschraube Hitzeschutzblech M6 8 Nm HH bolt on fuel level indicator M5 3 Nm HH bolts fuel taps M6 6 Nm Collar screw for underride protection M8 25 Nm Spoke nipple M5 5 Nm 1 Nm Jerk da...

Page 80: ...tion bearings 2 main bearings 1 supporting bearing Conrod bearing friction bearing Piston pin bearing dual fuel bearing Piston light alloy forged Piston rings 1 compression ring 1 taper face ring 1 si...

Page 81: ...TEMPERATUR 0 C 32 F Engine oil Only use fully synthetic engine oils that meet the JASO MA quality requirements see infor mation on the can KTM recommends Motorex Power Synt 4T in the 10W 50 viscosity...

Page 82: ...Checking spoke tension 49 Checking the chain for wear 39 Checking the chain tension 38 Checking the cooling liquid level in the compensating tank 59 Checking the cooling liquid level in the radiator 6...

Page 83: ...e oil 64 Re initiation after time of storage 74 Removal of seat 15 Replacing the brake light and taillight bulbs 56 Replacing the flasher bulbs 55 Replacing the headlight lamp 54 Running in the LC8 en...

Page 84: ...83...

Page 85: ...84...

Page 86: ...950 SUPER ENDURO R KTM Sportmotorcycle AG A 5230 Mattighofen www ktm at 04 2006 FOTO MITTERBAUER KTM Group Partner ART NR 3 211 172 DE BEDIENUNGSANLEITUNG 2006...

Reviews: